PROJECT
Bow Box – Part 2: ribbons and bows

Rick Campbell

Find more Gifts / Crafts projects
Now for the most creative part of the project – crafting realistic-looking ribbons and bows to decorate the beautiful box you just completed.
Last week Rick Campbell took you through the process of building the box, with a neat trick to leave you with continuous grain around its perimeter.
This week Rick covers how to make the ribbons and bow. Next week he’ll share how you can fix the ribbons and bow to the box to complete this great gift project.
Bow Box – Part 2: ribbons and bows
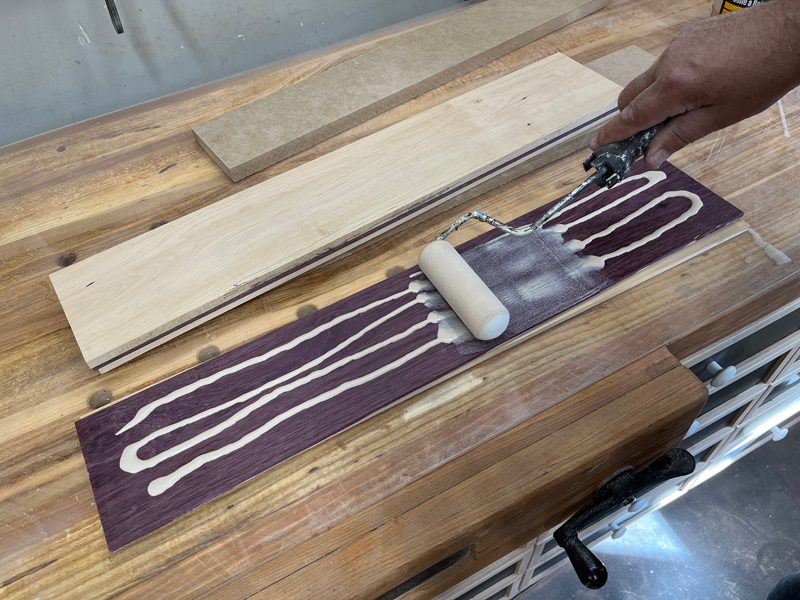
Start by resawing thin layers of contrasting wood to create a laminated blank for all these parts. I used maple for the outside layers and centre core, with two thin layers of purpleheart sandwiched in between. I made all my outer layers about 3/16” thick and the centre core roughly 3/8” thick, resulting in an overall thickness of 1-1/8”. This is just a general guideline, so feel free to choose materials and a layering configuration that works best for your design. My laminated blank ended up being 5” wide and 24” long, more than enough for all the parts I would need, with a little extra for second attempts.
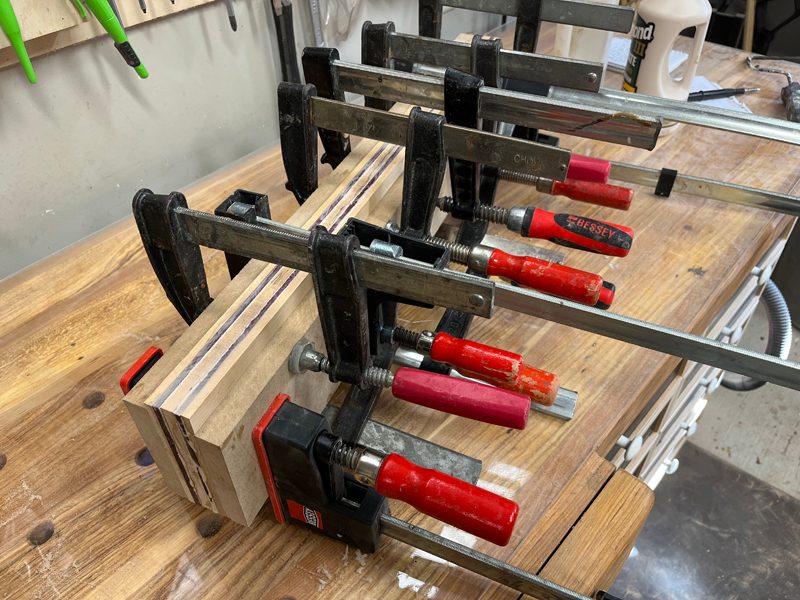
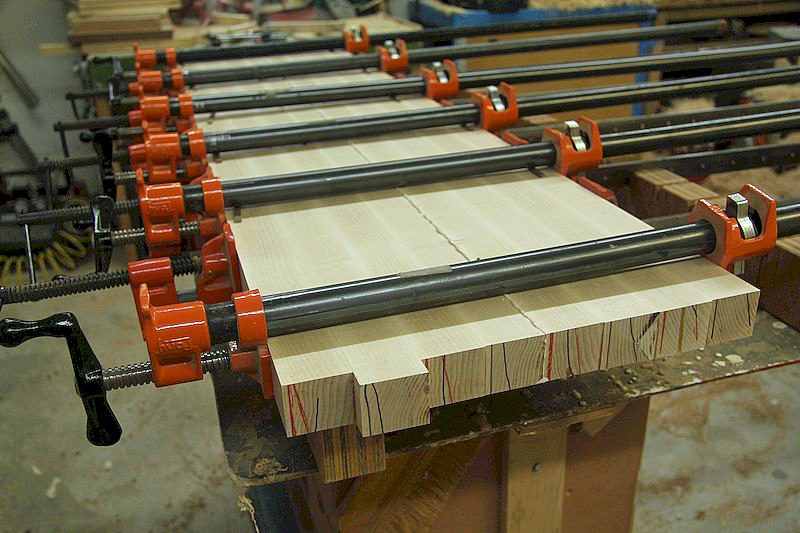
To assemble the lamination, I applied an even coat of glue to the mating faces with a foam roller before clamping the layers together with just about every clamp I own. To achieve even pressure in the centre, I used wood culls between the clamps and lamination to distribute the load. Your objective is a good bond with all the surfaces and no visible gaps between the layers.
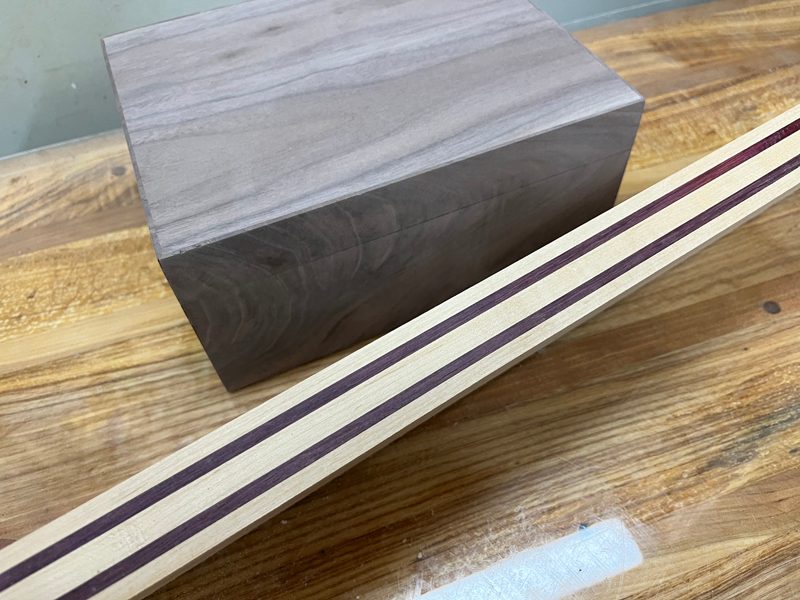
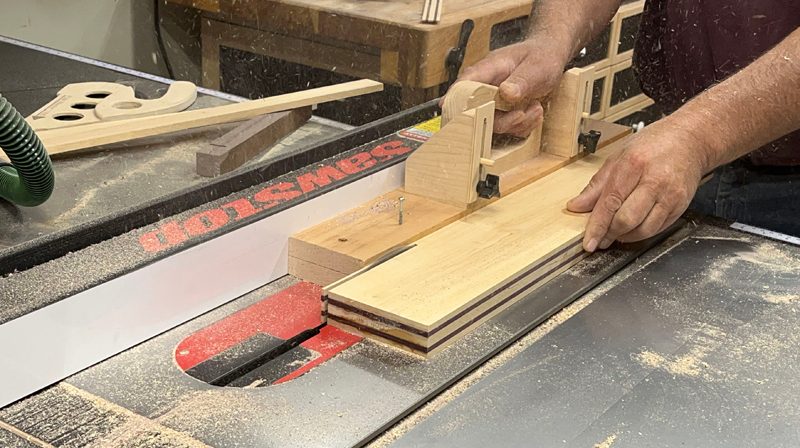
After letting the glue cure overnight, remove the clamps and clean up the edges at the jointer. Next, rip two or three 1/8” thick strips from the edge of the blank to create a supply of flat ribbon that will be applied to the top and sides of the box. I cut my strips at the table saw using a thin-strip ripping jig. Another alternative is to position the fence so the thin material drops to the outside of the blade, though this technique requires that you accurately reposition the fence after each cut. What you should not attempt is to rip the strips on the fence side, with the fence positioned 1/8” from the blade. This is a recipe for dangerous kickback, which could cause the strip to fire back at you like a missile.
Duplicate the patterns to create the number of parts you’ll require, then apply a spray adhesive to the back of the paper templates before adhering them to the surface of the laminated blank.
When I made the curved ribbon tails, I used the bandsaw to cut out the profile on the top face first. After that, I sanded the surface smooth with a spindle sander to remove any saw marks. Then I returned to the bandsaw to cut the bottom profile, followed by more sanding to refine the shape. Use a sander with a flat platen to create a flat face on the tails, where they will mate with the box, so they can be secured to the box lid properly.
Next, we need to cut a 90° point on the end of the tail blanks where they will meet the junction of the flat ribbon on top of the box. We also need to prepare a decorative V-groove on the other end to simulate the cut that would be made with scissors when cutting ribbon for a real gift.
I laid out these details using a flat square, then completed the cuts with the bandsaw. Don’t worry too much about precision here because the mounting ends will be hidden under the bow and the outer ends are intended to look hand cut anyway.
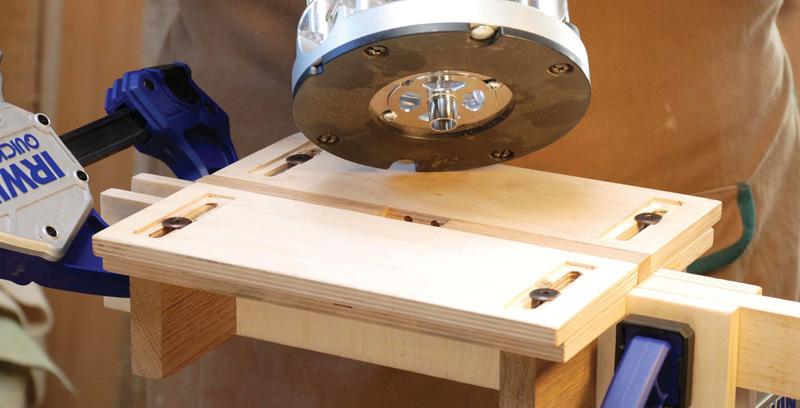
For the loops of the bows, I started by cutting out the centres using a scroll saw. Drill a small pilot hole inside each loop to provide access for the blade, then carefully follow the outline of the pattern as you make your cuts. Using a sharp fine-tooth blade for this step will significantly reduce the amount of sanding needed inside the loops.
The bandsaw was my tool of choice to cut out the profile on the outside. I stayed just shy of the layout lines while completing the cuts, then I moved to a sander to refine the shape and remove the saw marks.
Finish-sand all the surfaces and edges of the curled ribbon ends and bow loops to prepare for installation.
Lamination Layers
Once the contrasting bow layers are machined, apply glue to their surfaces and clamp them up.
Cauls to the Rescue
Using cauls while gluing up the lamination layers will not only spread out the clamping pressure, but also help keep the assembly flat.
Get Creative
Layers of slightly differing thicknesses may provide a more dynamic, natural look.
Thin Strips
Campbell uses a special jig to help him rip thin strips from the lamination. Another safe approach is to keep the main portion of the workpiece between the fence and blade and adjust the fence to leave you with an offcut the thickness you need.
[illustrations_gallery]


I would love to see how you did the loops and ribbons can you please send me photos or if you have videos?that box is something else but the ribbons,that’s being creative and thinking outside the box ?
Would love to have seen photos of the process involved in making the loops
Hi Roly. If you send me your email address, I would be pleased to send you photos of the loop and ribbon process.