FROM ROB'S BENCH
A stool of surprises

Rob Brown

Blog for February 12, 2026
As you know, I've been working on a step stool for the past few weeks.
I haven’t been working on it full time, as I had a few other projects to get out the shop door, but I’ve been picking it up regularly to move it along. I wrote about the design challenges I faced four weeks ago and about the colourful flowers I added to the surface of the step stool two weeks ago.
The main reason I didn’t apply a finish to the stool earlier was because a pair of vanities I was going to make were also maple and they would need the same spray-on finish. Rather than set my spray equipment up twice and clean it up twice, I’d just spray both projects at once. Both the vanities and step stool got a finish applied to them earlier this week.
It's all about expectations
I had hoped the step stool would move forward in a simple and quick way, but that wasn’t the case. From design to execution, there were a wide range of challenges. To be clear, none of those challenges were overly difficult, but they seemed to add up, leaving me with a less than wonderful memory of the build. I certainly don’t hate the finished project, but I was just anticipating a smoother, quicker build that left me with a wonderful little step stool we could use. I guess my expectations were a bit off.
All wrapped up
Well, that’s actually a bit of a stretch. I applied a few coats of finish to it earlier this week, assembled it yesterday and brought it home. That’s when I started to realize it had turned out a bit less wonderful than I thought it would.
First off, it wobbles. One leg needs to be shortened, which isn’t a big deal. I’ll bring it back to the shop, trim about 3/16″ off one leg, add small rubber bumpers to the underside of all four feet and that problem will be gone.
How to hang it?
Another shortcoming is the way the step stool attaches to the vertical gable beside our fridge. I wasn’t thinking, and made just one simple cleat to screw to the gable and support the stool when it’s not in use. The “not thinking” part is that the cleat needs a second piece of maple underneath it to bring it out another 1″ from the gable. This is because the lower fold-out section of the stool sits between the main section of stool and the gable, keeping it an extra 1″ away from the gable. Just a silly oversight on my part. That will be another fairly simple fix. Machine a piece of maple as long as the stool and as wide as the upper rail, plus the width of the cleat I made. Then the challenge is applying a finish to this piece. I’ll have to get out the spray equipment and apply a few coats. Again, not the end of the world, but not a step I anticipated.
Really, I should also carve a few vines and flowers into this additional piece, as I’ve done a good job keeping the vines flowing around the entire piece, especially when it’s stored on the gable, as that’s where it’s going to be for at least 99% of its life. That means getting out the carving tools, mixing up some more paint, applying the paint in any vines or flowers I carve, then sanding the excess off the surface. This will be a game-day decision, once the piece has been machined.
Form follows function
As you can imagine, this stool needs to function smoothly to be of any use to us. On paper, all the pivoting parts line up nicely with the mating parts, and it provides the user with a surface that’s 18″ above the floor to stand on, an intermediate step between it and the floor and a rail to help stabilize the user when they’re on the top step. Once it’s set up, the stool performs well. The shortcoming in this area is not only getting it set up, but folding the stool back up, so it can be hung on the gable.
The hinges and pivot points work, just not as smoothly as I anticipated. The stool takes a bit of elbow grease to set up, not to mention fold up after use. I think the pivot points that allow the steps to rotate aren’t drilled perfectly at 90°, which causes the movement to be a bit less smooth that it could be. Also, the hinges that keep the two lower half-steps together might not be set exactly 90° to the hanging edge of both pieces, meaning the hinges don’t work perfectly. Both of these things mean it’s a bit harder to operate, though it still does operate, thankfully.
Three-handed operation
Not only does this step stool not open overly smoothly, but it almost requires three hands to quickly and easily fold it up to put it away. One hand lifts the upper step and keeps it up until the stool is mostly folded together. A second hand lifts the centre of the hinged lower step so the two main support sections can come together. A third hand could hold the upper rail of the step stool so it doesn’t all come crashing to the floor when the two main support sections are hinged closed.
I’ll admit, I pictured this stool being operated by only one person. Maybe that’s my fault, though. Maybe, once again, I set my expectations too high.
Build those biceps
I’m not sure if I mentioned this in a previous post or not, but one of the main problems my wife had with the mock-up from a few weeks ago was that it was too narrow. I made it about 16″ wide, overall, but she wanted it at least 5″ wider. No problem, I assured her, which was indeed the case. The downside to that was that the step stool is that much heavier. I knew it was going to be somewhat heavy, as it’s made of hard maple that’s machined to a full 1″ in thickness, the safest approach for a project that will support a person’s weight 18″ above the floor. She even wanted it a bit higher than I first thought. Again, I can do it, but it will add weight to the stool.
The original stool we were using weighs just over 12 pounds. This new step stool weighs just over 21 pounds. My wife is in good shape, and can toss the dumbbells in the basement around with ease, but the first time she picked up the new stool she commented on how it wasn’t light, as she hoisted it up to the location on the gable where it would eventually live.
Onward
Life goes on. I’m sure I’ll have this project completely wrapped up in another few days. Or, at least, I hope that’s the case. In the meantime, I’m glad we have a simple, stable, lightweight stool that doesn’t need three hands to operate in our kitchen at this very moment.
I might not throw that old stool out anytime soon.
Finished Stool
All done. Or at least it looks that way.
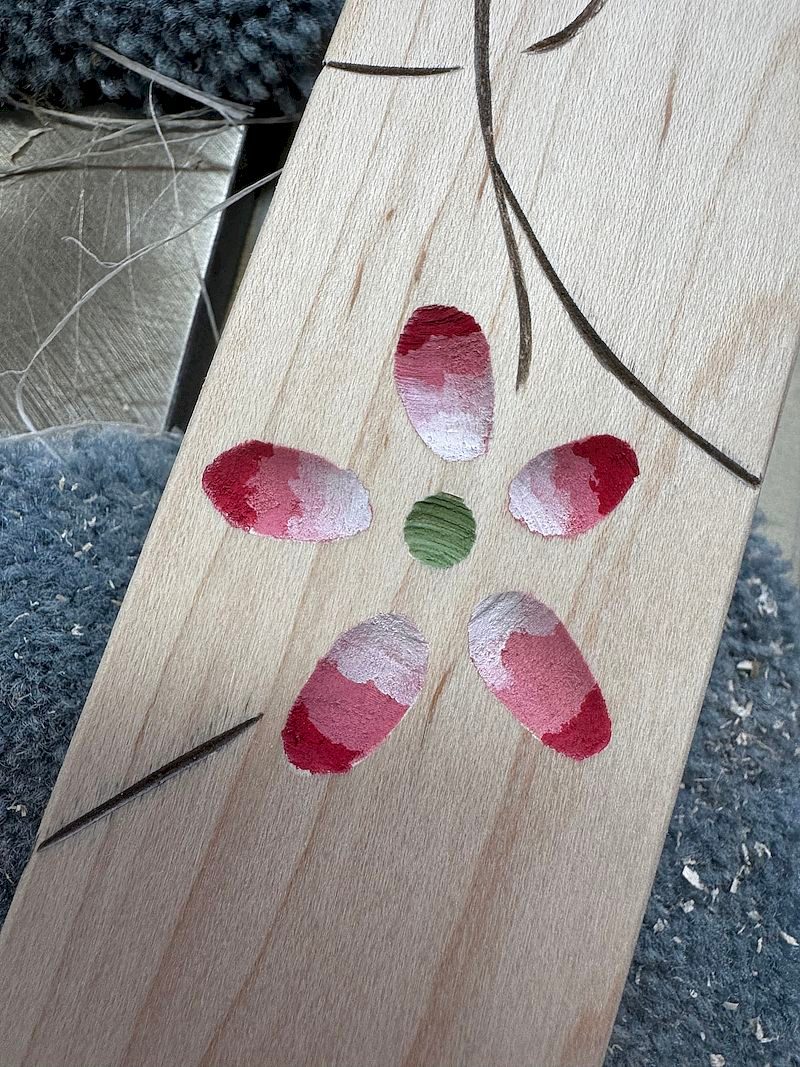
Flower Detail
This is one of the flowers I carved, then painted. The last step before applying a durable topcoat was to sand the surface of the stool. Not only does this smooth the surface, but it also removes any errant milk paint that was ended up on the surface. If you look closely at the lower, left corner of this photo, you'll see a bit of brown milk paint still on the surface, on either side of a vine, even after a sanding. A bit more sanding removed it entirely.
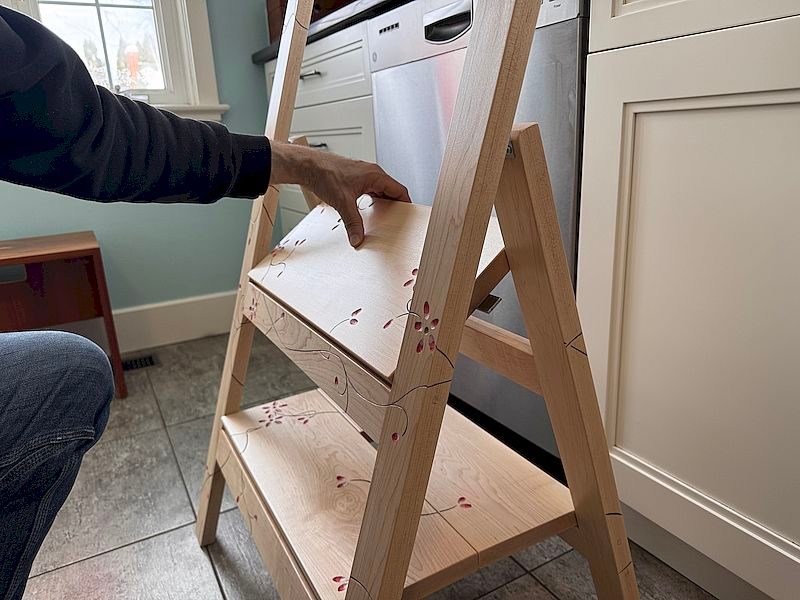
Step One
The first step in folding up the stool is to lift the top step with one hand.
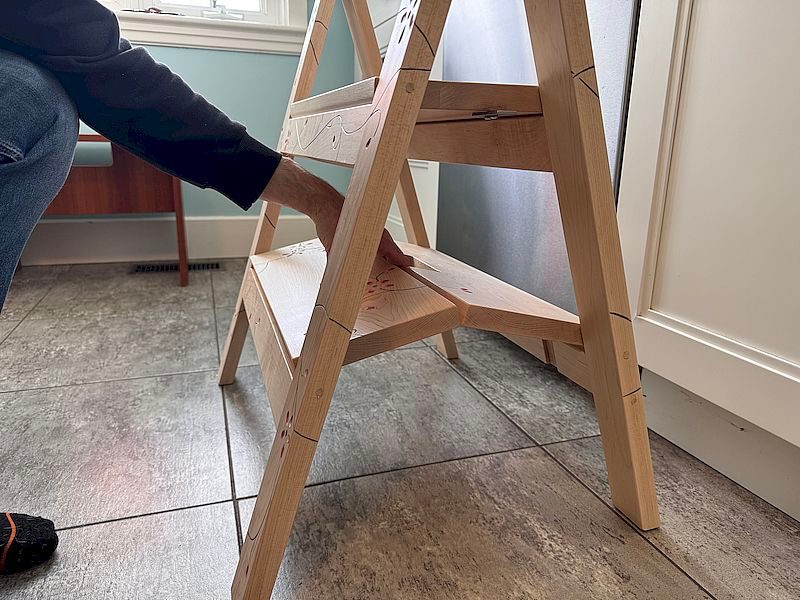
Step Two
The second step in folding up the stool is to grasp the middle of the lower steps and lift them upwards, allowing the two parts to fold together while automatically moving the two main support leg sections closer to each other. A third hand, if one were nearby, would grasp the upper rail and ensure the entire step stool doesn't fall forward or backward to the ground.


Could you alleviate some of the need for a third hand by embedding strong rare earth magnets in the verticals and corresponding steel discs on the ends of the steps (or vice-versa) so that when the steps are raised they’re held in place so all you’ve have to focus on is holding the top cross-member? If not rare earth magnets, ball and socket catches? Just a thought.
Hi Mark,
That was an option we were discussing. There’s already a steel plate that overhangs the edge of the top step. It’s there so the step will stop rotating once it’s in the same plain as the long, front upright / leg. A rare earth magnet in the rear face of that front upright, directly where the steel plate touches that inner face, would lend a helping hand while setting the step stool up.
The other thing I (still!) need to add are a few rubber bumpers on the horizontal surface the hinged, upper step rests on, when the stool is in the open position. Currently, it makes a loud noise when the top step knocks down into place.
One of these days I’ll be done with this project!