PROJECT
Make a chess board

Annabelle Brown

Find more Featured projects , Gifts / Crafts projects
Every woodworker loves a project that looks more difficult to make than it actually is. Impress your friends with this chess board before challenging them to a match.
Have you ever tried to find a gift for someone who doesn’t want anything? That was the dilemma I found myself in when deciding on a gift for my boyfriend, who is good at chess. Then, my dad suggested making a chessboard.
This is one of those wonderful woodworking projects that looks more difficult to complete than it really is. With a clear plan and a simple table saw jig, cutting the chess board squares from veneer is easy and accurate.
Make a chess board
Checkered pattern
Some chess board designs are made with solid wood squares, but we opted for veneer. Solid wood moves a lot more than veneer, and it’s not usually available in as wide a range of species and figures as veneer, though it can be more forgiving to work with.
The first step in making our chess board was to decide on two different types of veneer. There are lots of different species of veneer, but we were looking for some specific attributes. I wanted two shades that would contrast with each other nicely in terms of colour and also had relatively straight grains. We went with mahogany and maple. If you choose figured wood, be aware that it can chip out very easily, so more care will have to be taken when machining it. Using veneer tape across the cuts helps prevent chipping out. On the upside, figured wood does look amazing once it’s been machined and finished.
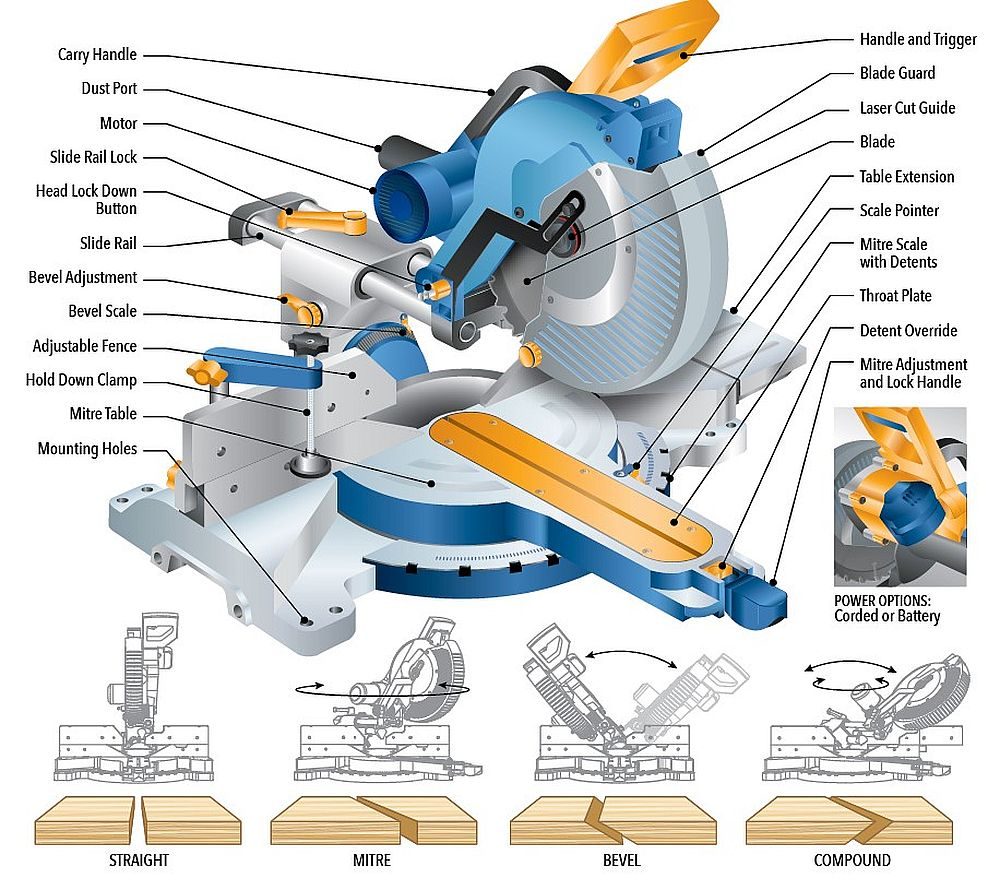
Make a simple jig
The jig we used to make the 2″ wide veneer strips was easy to make. A runner that fit the mitre slot in the table saw was attached to the underside of the flat melamine base, positioned so the blade would be vaguely near the centre of the base. Next, attach a cleat on the leading edge of the jig that will span the kerf the blade will leave after the jig has been used. This cleat keeps the two halves together after the blade cuts into the base. We didn’t cut through the rear edge of the jig, so we didn’t attach a second block to the trailing end of the jig. If you think you may cut through the entire length of the base, attach another cleat at the trailing end. We also added a very simple handle to the trailing edge of the jig to allow us to easily move the jig forward and backward.
The next jig part was a straightedge. It can be made from a similar material as the base. Just about any sheet good will do. It should be slightly shorter than the jig. This piece will act as a fence, which you can butt the workpiece up to during use. It will simply get screwed onto the base at the correct distance from the edge of the blade. The final piece of the puzzle is another piece of sheet good to act as a hold-down. This part will apply pressure when the workpiece is being machined.
First, make strips
Rather than cut squares, we first cut strips, then used veneer tape to secure the strips together. Then, we rotated the veneer sheet 90° and crosscut the veneer, giving us the squares we needed.
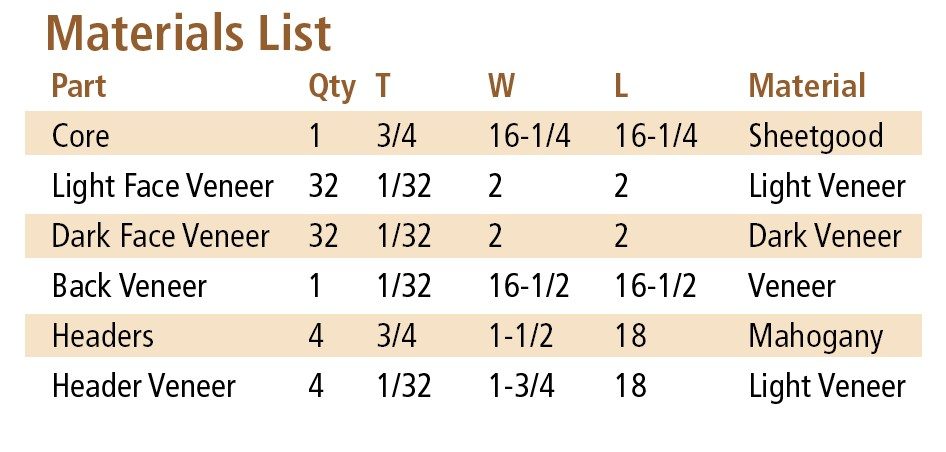
We calculated how much of each veneer species we would need for this chess board. The board needed to be eight squares by eight squares, meaning we needed 32 squares of each type of veneer. We decided each square would be roughly 2″ by 2″, giving us a playing surface about 16″ square.
To give us a bit of extra material to work with, we cut a piece of veneer in each species to about 18″ long. Thankfully, the two pieces were both over 10″ wide, which meant each piece of veneer would give us the four 2″ wide strips we needed, plus enough for an extra strip, just in case.
First, make sure one side of each species of veneer is straight. To do this, position the piece of veneer so it slightly overlaps the kerf in the jig, then apply the hold-down jig piece on top of the veneer. This hold-down will sandwich the workpiece between itself and the base, keeping constant pressure on the workpiece while it’s being machined. This drastically reduces tear-out.
It’s important to note that the blade height should also be adjusted so it’s only slightly higher than the veneer. It will only cut into the hold-down piece by about 1/16″ or so. In fact, depending on how fragile your veneer is and how sharp your crosscut table saw blade is, you might have to play around with the best height to further reduce tear-out.
Here’s the process we used to cut the first edge straight: adjust the blade height; position the veneer in place on the jig; apply the hold-down piece on top of the veneer; slowly make the cut; turn the saw off and wait until the blade stops rotating; remove the hold-down piece; remove the veneer; and then return the jig to its starting position.
At this point, attach the jig straightedge to the jig base with a few screws. This is where accuracy is important. In our case, the distance from the straightedge to the kerf wasn’t critical, but the gap between the two needs to be as close to parallel as possible.
After cutting one edge, we set up the table saw to cut five strips, each roughly 2″ by 18″. We only needed four strips of each shade, but we made an extra one just to be safe. We then slowly cut each strip, making sure the sides didn’t chip out. Applying pressure directly over where the cut is being made helps reduce tear-out. Repeat this process until you have your strips of veneer. Leave the straightedge in place for cutting the squares.
Next, make squares
After we had our strips, we positioned them edge-to-edge, alternating species. Veneer tape was then applied along the length of each joint to bring eight strips together, forming a large sheet of alternating strips of veneer.
Making the squares was essentially the same process as making the strips, except for one initial operation. When we were making the strips, we cut one straight edge to begin the process, but it didn’t need to be perfectly perpendicular to the longer edge of the veneer. This time, the first cut across the grain of the strips needs to be perpendicular to the side edges of the strips. Not following this step will leave you with squares that are slightly askew or angled.
You could simply position the sheet of veneer strips carefully, so its edges are perpendicular to the kerf, though another approach is to attach a straightedge to the base of the jig and butt the veneer sheet against it before making the cut.
Once you have your first straight cut, proceed to cut strips like you did previously. In fact, the straightedge you used to cut the strips to width shouldn’t have been moved; this will ensure the width is the same. Once we cut each strip from the veneer sheet, we then turned every second strip around to create the checkered pattern. Repeat until all the strips (each with eight squares) are created. If any of the squares are chipped, you could replace them with one of the extras. This would mean removing the veneer tape and the damaged square, and taping in another square in its place.
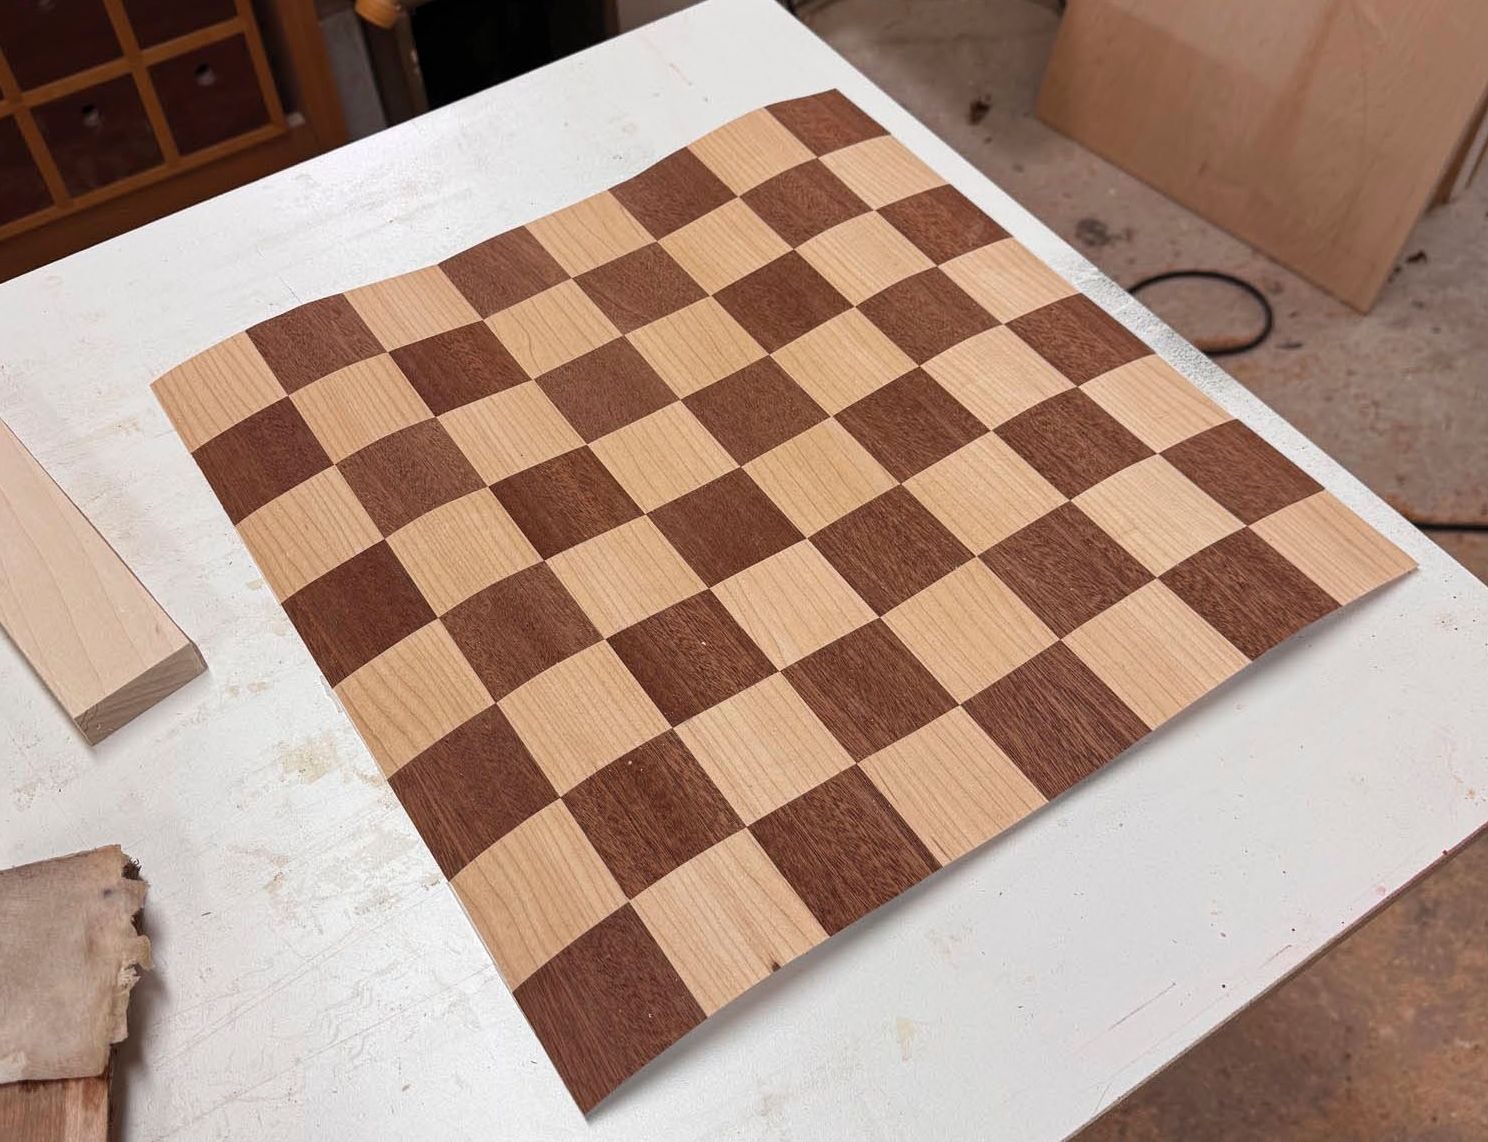
Finally, we lined each square up with the one next to it, then applied tape across all the joints to join everything together. At this stage you’re ready to press the checkered pattern onto the core.
The core
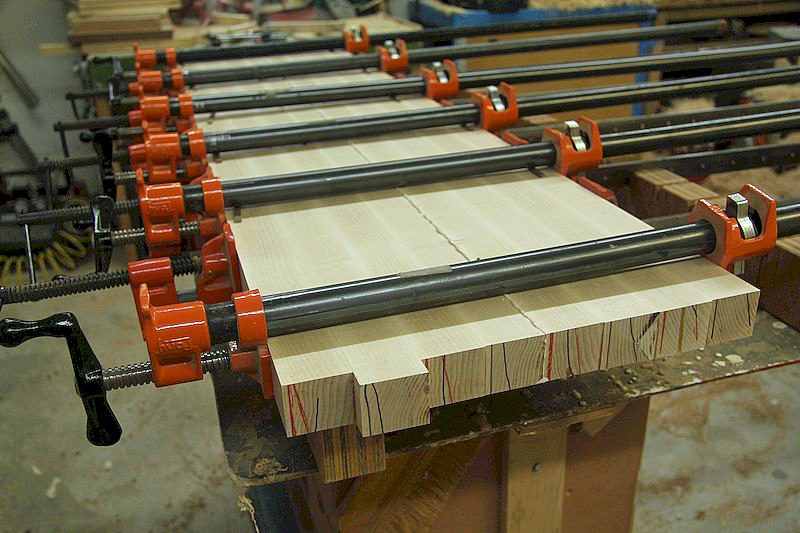
Once the checkered pattern was complete and taped up, we glued the veneer to the core of our chessboard. We did this with a vacuum bag, though clamps, some long cauls and a flat platen would also work well for a small project like this.
Our core was about 1/4″ longer and wider than the checkered pattern, so we could trim it to size after it was glued up. This also meant we didn’t need to worry if the edges of the veneer sheet weren’t perfectly parallel and even with the edges of the core. You can use any kind of sheet good for the core, as it won’t be visible when the chess board is finished. It’s also good practice to apply a layer of back veneer on the underside of the core to balance the construction. Having said that, a smaller panel like this won’t move too much if it isn’t veneered on both faces.
A track saw can be used to straighten the first edge once the veneer sheets have been glued to the core, though a shim or spacer taped to the edge of the core can be used to adjust the position of the assembly while making a rip cut with a table saw. In either case, the rest of the edges can be referenced off the first edge.
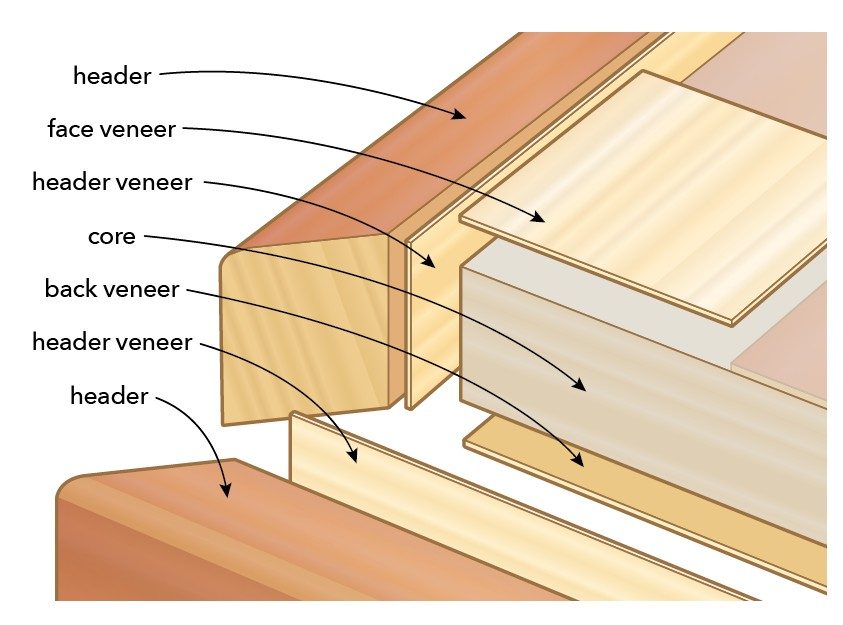
Add the headers
At this point, my dad and I were trying to think of an extra nice touch to add to the board. We decided to put a thin outline of maple veneer between the checkered pattern and the mahogany header. This highlights the squares of mahogany. If you wanted to add even more pizzazz to this design, you could add three layers of contrasting maple / mahogany / maple veneer between the header and main play field.
Next, we cut four oversized strips of the same maple veneer we used previously. We glued the veneer to the inner face of the header, and when it was dry, trimmed it vaguely flush to the header. We ripped the headers to final width, which flushed up the veneer edges.
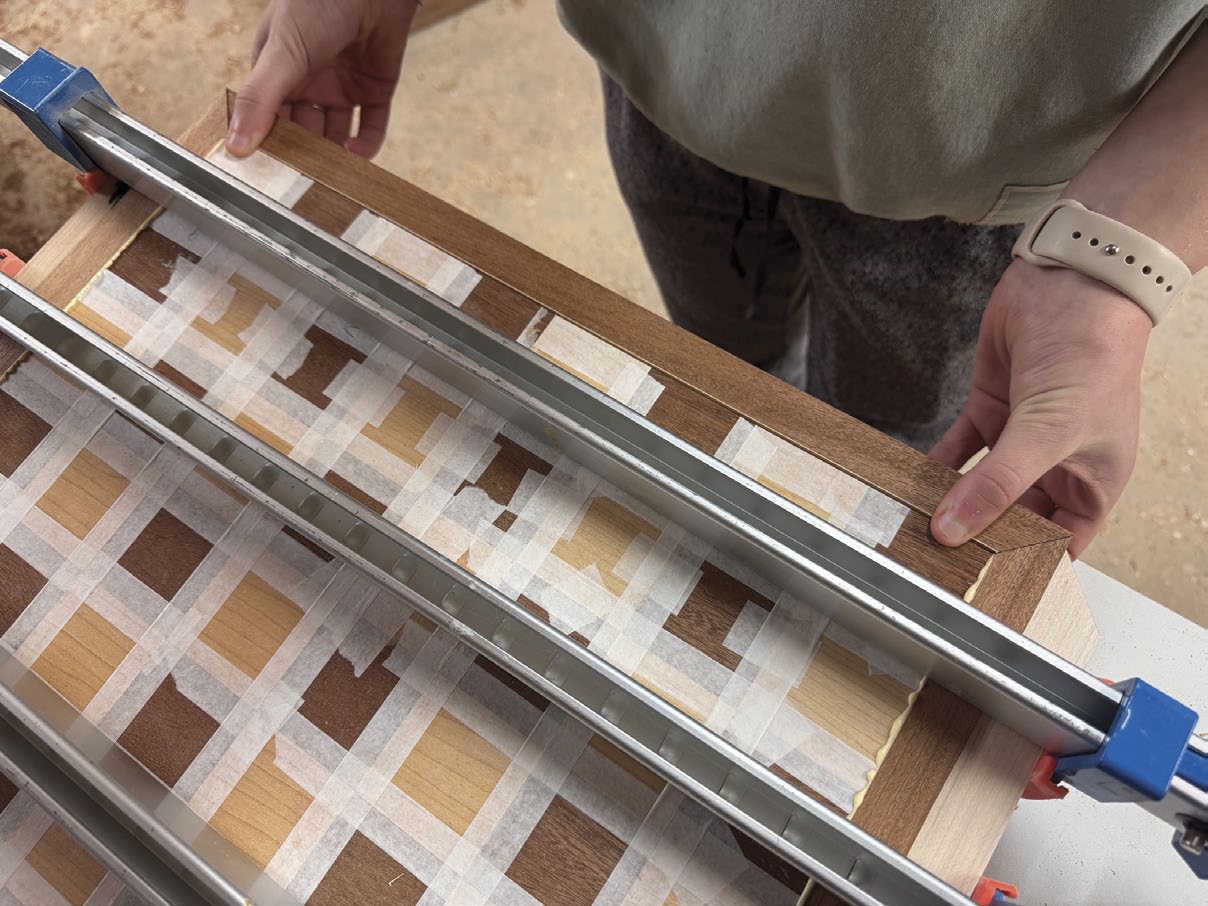
We bevelled the ends of the headers to create a clean look, then glued all four pieces to the core of the board. You may find it easier to glue two headers onto the core at a time. While gluing the headers to the core, ensure their upper edges are at least slightly above the surface of the play field.
Flush the headers, sand the board
Once the glue had dried, we took off the clamps and removed the tape from the veneer. We did this by putting a light coat of water over the tape, waiting a minute or two, then peeling it off by hand.
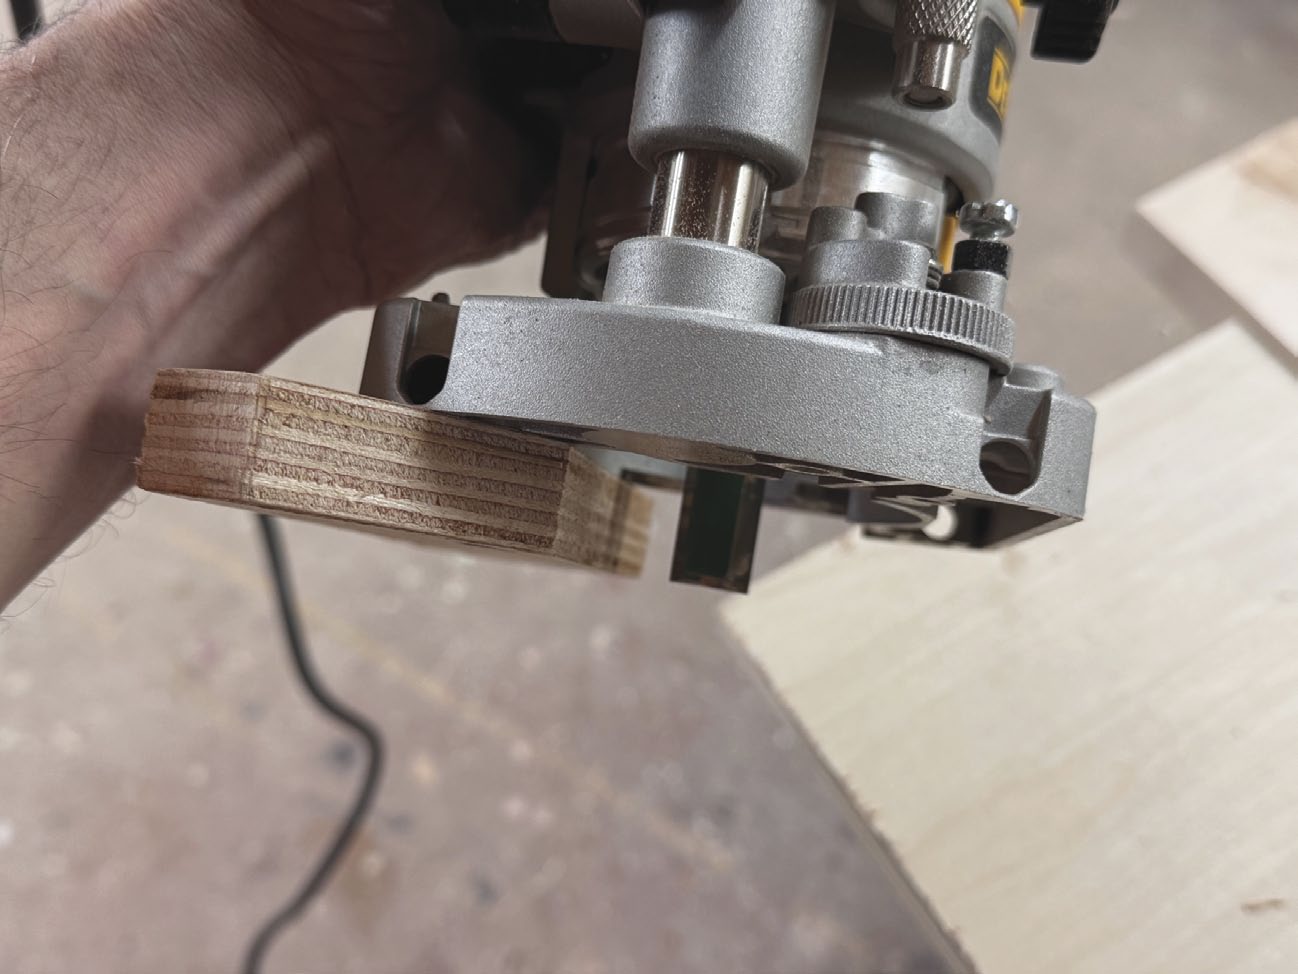
My dad then used a router, equipped with a very simple base, to cut the upper edge of the headers flush with the top surface of the veneer pattern. We rounded over the headers with a router, then sanded them with a hand sanding block.
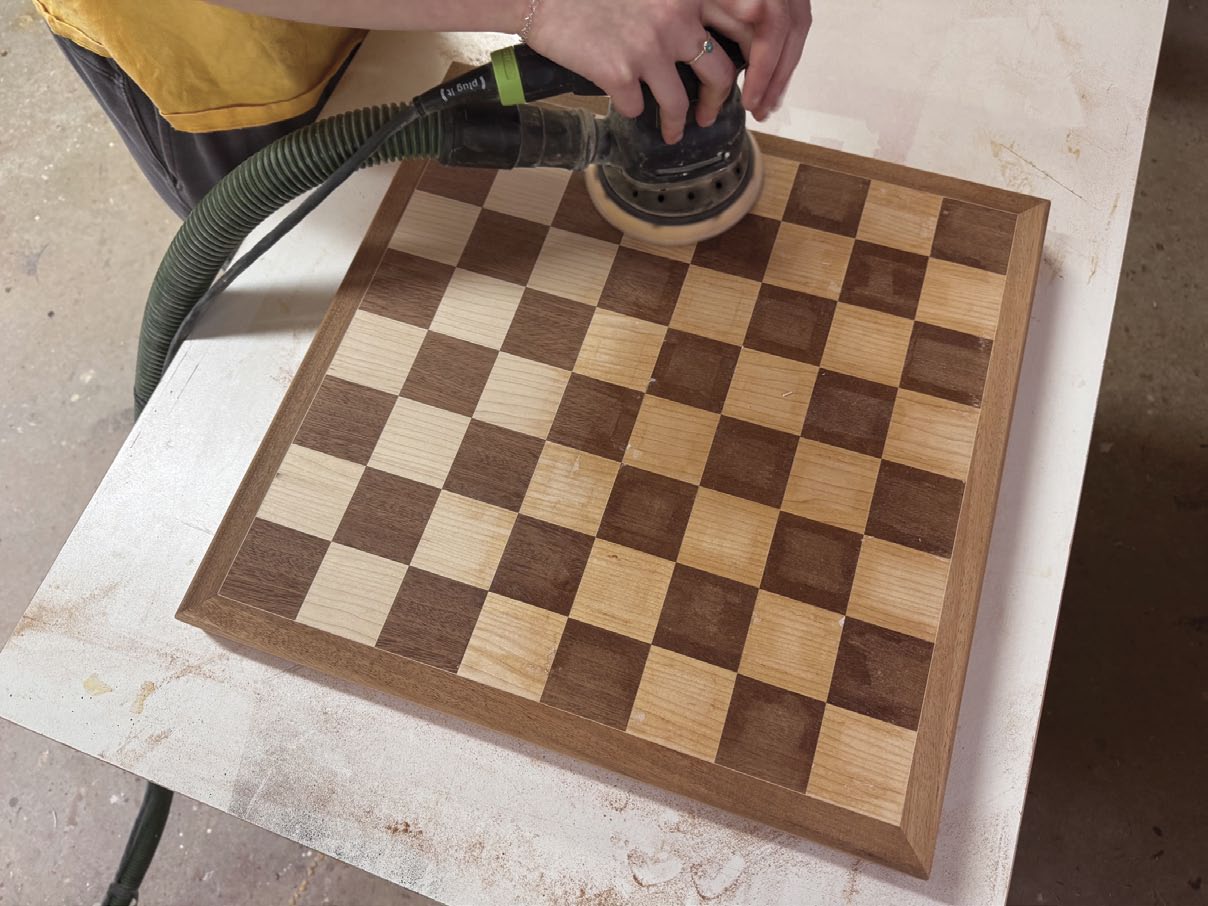
Next, we then used a random orbital sander to smooth the top of the board and prepare the board for a finish.
Finishing it up
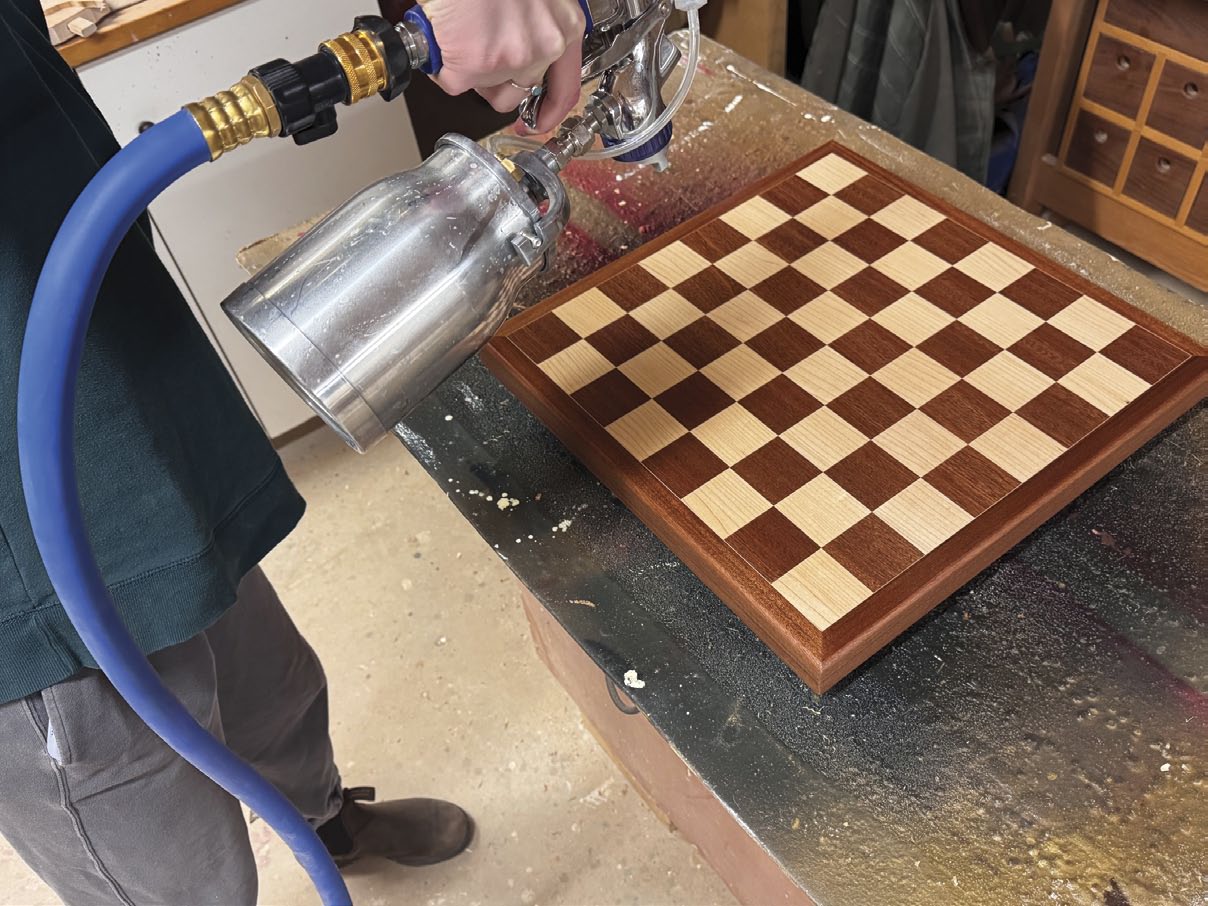
Some finishes can be wiped on, but we chose a durable water-based polyurethane for this project. Its clarity allows the natural wood tones to come through. My dad has a Fuji spray turbine, which was a lot of fun to use. With a little bit of practice, I could evenly apply coats of finish onto this project.
A finish not only protects the board, it also enhances the colour and grain of the wood. Select a finish you like by testing it out on a similar piece of scrap. We applied the first layer of finish and waited for it to dry before lightly sanding the surface and adding a second coat. When that coat was dried, we repeated the process for the third and final coat. Different finishes may require a different number of coats.
My boyfriend loved his present and we played three games of chess on it right away. Sadly, he beat me all three times, so I’ll have to brush up on my strategy. Even with three losses, it was a lot of fun to play chess on a board I made.
Photos by Rob Brown
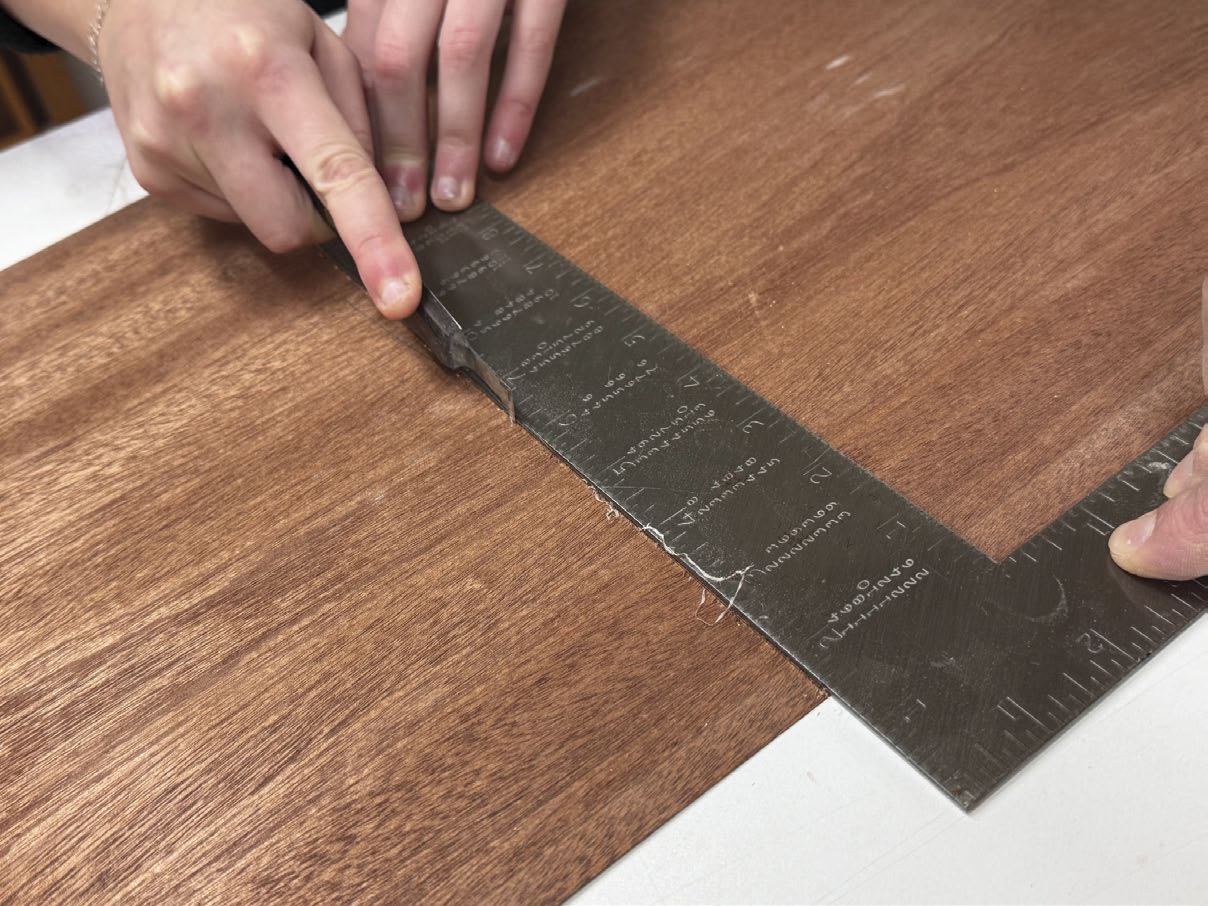
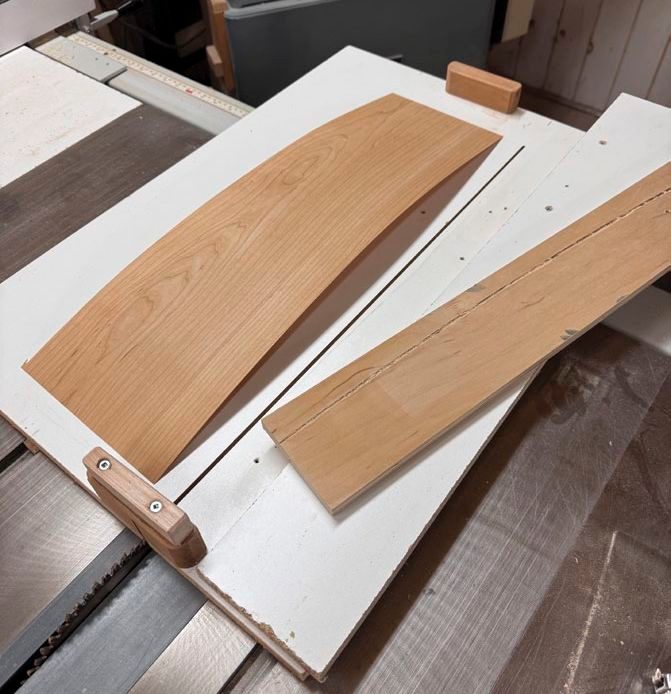
Trim to Length
Large sections of veneer are hard to work with, so start off by trimming enough pieces to rough length. A sharp knife and straightedge work nicely, especially if you make multiple, light passes with the knife, rather than fewer, deeper passes.
Simple Jig
This jig has already trimmed one end of the veneer straight. Now it’s time to butt the veneer workpiece up against the stop to rip a 2" wide strip of maple veneer. Notice the saw kerf doesn’t extend out the trailing edge of the jig. The remaining material will help keep the jig base intact for future use.
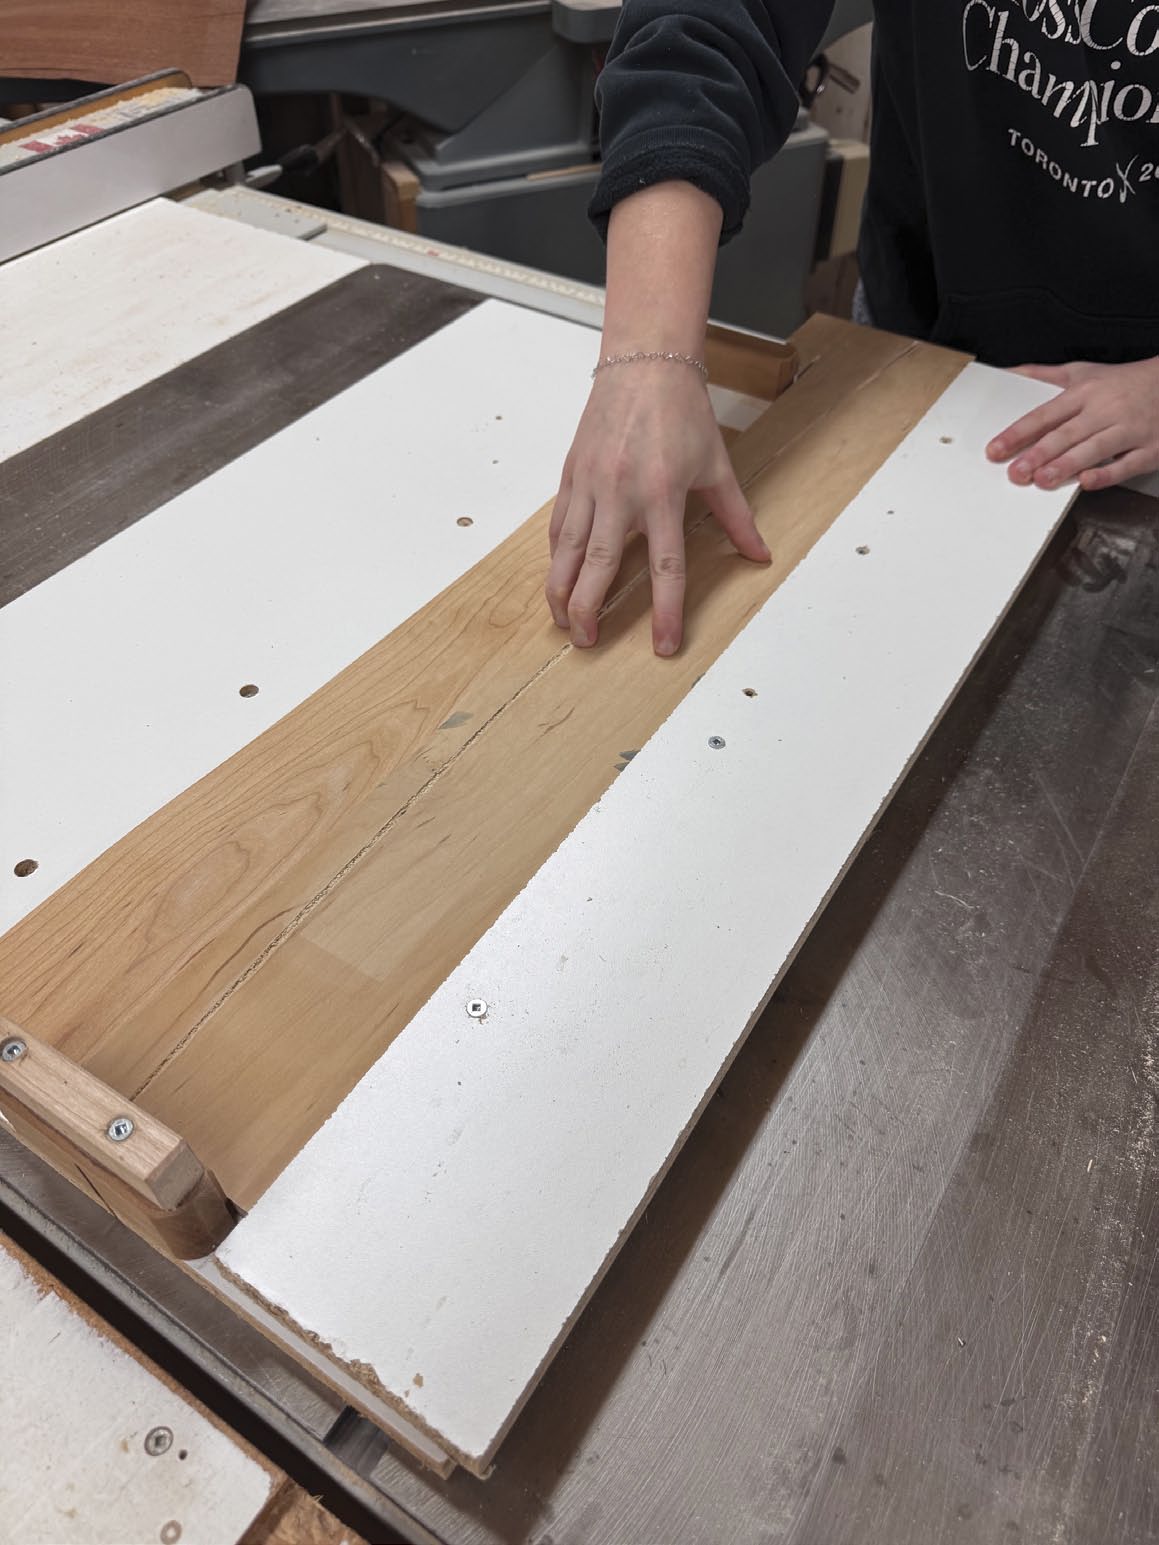
Make a Slow Pass
With the sheet of veneer butting up against the stop, Brown makes a slow pass to cut another 2” wide strip of maple veneer. She does this while pressing downward on the hold-down in order to sandwich the veneer between the jig base and the hold-down to minimize, or even eliminate, tear-out.
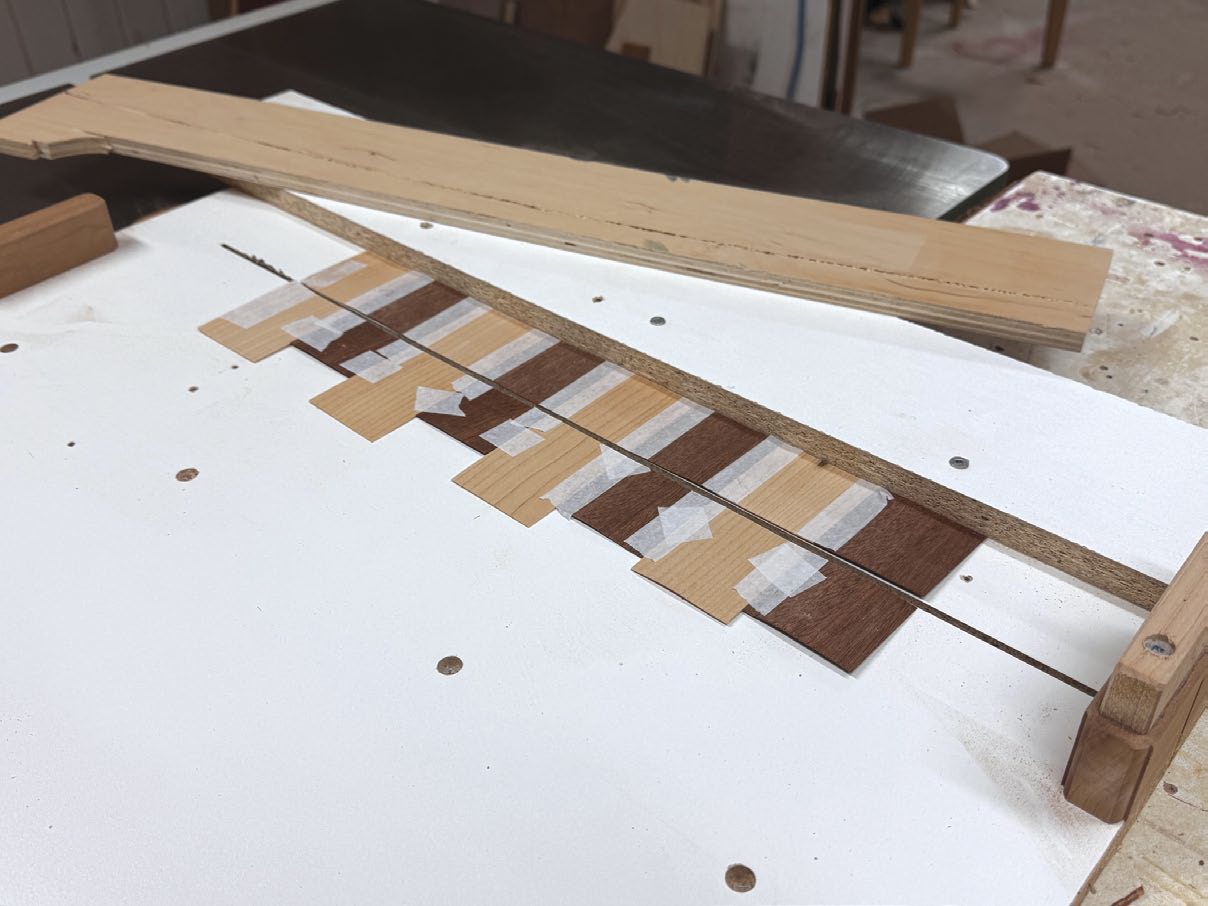
Final Cut
Here, Brown has just made the final slow pass to crosscut the last strip. Every other strip can be turned end-for-end, while keeping the tape face up, then taped back together to form the checkered pattern that can be adhered to the core in the next step.
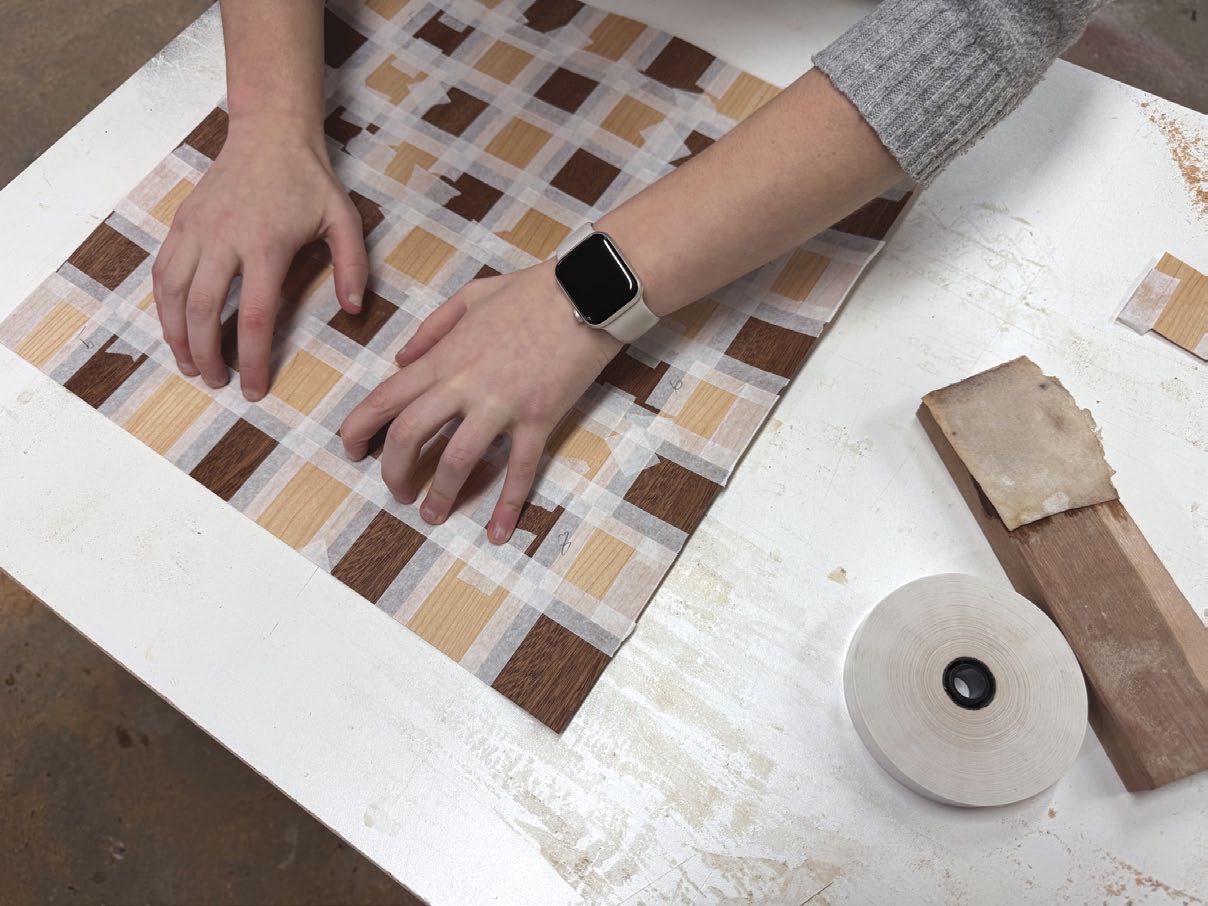
Tape the Strips
Use veneer tape to secure the strips to each other, forming a larger sheet of veneer to press onto the core. Break strips of tape off, wet them, apply them to the joints and press them in place. Brown used a wet paper towel on a piece of scrap wood to wet the strips of tape. Regular masking tape is too thick to use, as when the sheet is being pressed onto the core, no pressure will be applied over the tape-free areas of veneer. It also leaves a lot of adhesive film on the workpiece that could cause problems down the road.
Tape-Free Underside
The underside of the taped-up sheet of veneer should be free of tape. This allows the adhesive to bond with the square pieces of veneer and create a strong bond with the core.
Add the Headers
It’s very important to align the headers so their upper edges are at least slightly above the upper surface of the checkered top. This allows you to trim the headers flush with the surface once the glue is dry. You may find it easier to glue only one or two headers to the core at a time.
Flush the Headers
A router, equipped with a straight bit and simple base, allows you to accurately and easily flush up the upper edge of the headers to the veneer surface. Set the bottom end of the router bit ever so slightly higher than the added base, so the bit doesn’t damage the veneer. In use, the base rides on the veneered surface while the bit trims the upper edge of the header slightly proud of the veneered surface. Make sure the router doesn’t tilt in use or the bit will dive into the veneered surface, ruining your project.
Smooth the Surfaces
Once all the tape has been removed, the headers have been flushed with the veneered surface and a small round over has been routed into the four sides of the board, Brown uses a random orbital sander to smooth and refine the visible upper surface.
Beauty and Protection
A quality finish not only protects against scratches and stains, but also enhances the beauty of the wood. Here, Brown sprays one of three coats she applied.
[illustrations_gallery]