FROM ROB'S BENCH
Finessing the fish

Rob Brown

Blog for November 20, 2025
A few months ago, I wrote about a set of shoji screens I'm making for a Toronto client.
This job has been in the pipes for a while, as I first met with the client in February. Between the client’s travel plans, and the projects I’ve got going on, I’m only getting close to wrapping up this job now. The screens are almost complete, though I still have to finalize the fish motif, apply a finish and install them next week.
The design process has been a bit of a challenge, but I’d like to think it’s going well. Since I had extra time, I pondered the design for a while before setting it in stone. This isn’t my typical approach, though it’s a nice change from the usual pressure of delivering a piece quickly.
So many options
The client wanted one strong Asian motif in the screens. We considered the profile of Mt. Fuji, a giant wave, a simple circular pattern that’s common in Asian design and koi fish. The fish quickly rose to the top of the list, mainly because I liked the idea of creating a dynamic look with a series of fish that looked like they were naturally moving in water.
But even with the fish motif determined, there were still many details to be worked out. A few months ago, I wrote about the carved, solid wood koi fish, and the challenges they provided. I also mentioned the design of the koi fish in an outline, which is the approach I finally decided to incorporate into the screen.
The main challenge was what type of pattern these fish would look best in. At first, the thought of fish swimming in a circular pattern, almost like they were all caught in a whirlpool, came to my mind. I mocked up the design with some paper fish, but no matter how many ways I organized them, things looked not quite natural. Next, I considered making the fish look like there were swimming upstream, but after a bit of work, I realized this was more of a thing that salmon do, rather than koi.
After going through a lot of images of koi, I realized they’re often swimming in a circular pattern around some sort of a central point. It’s more that they are all going towards this point, rather than around it, sort of like the fish were all heading towards a small morsel of food on the water’s surface. This third approach gave me a much more realistic and dynamic look, so I ran with it.
Now, the hard part
Usually, coming up with the design of a project is the hard part, but this time it was pretty even with executing the design. While the design arguably took me about four months, creating this design in real life was a delicate balance of aesthetics, strength and skill. Not only did it have to look good, but the horizontal and vertical kumiko were not overly strong and I couldn’t sacrifice any more strength by adding these fish to the screens. On top of that, did I have the patience and skill to bring it all together, from a technical standpoint? I was about to find out.
The first thing I did was assemble some of the leftover kumiko and cut a test fish out of 1/2″ plywood. I played around with different methods of creating a half-lap joint in each part so the fish would mate nicely with the kumiko, but it was very difficult to get everything lined up properly. Having said that, I was very close, so I proceeded to the real screens with caution.
Spawn some fish
The first step was to cut out enough fish for the project. I used the paper templates to trace koi outlines onto 3/8″ thick Baltic birch, then cut them on the scroll saw.
Positioning them on the screens wasn’t easy. Because the screens aren’t flat, I laid the screens flat on the table saw’s outfeed surface and moved them around. I sometimes had to support the ends of the fish with something to keep them parallel with the surface of the screen so I could see what the overall look was. After about two dozen tries, I came up with something I liked.
Many small (curved) half-lap joints
My current plan is to machine a half-lap joint in the face of the kumiko to allow the Baltic birch fish to sit in the kumiko by about 1/4″. This will leave the faces of the fish about 1/8″ proud of the kumiko.
The first challenge is how to create these half-lap joints. Half-lap joints are typically cut at, or fairly close to, 90° to the edge of the workpiece. On top of that, the cheeks of a half-lap joint are typically straight. In the case of these screens, neither of these two things are true. Since the edges of the fish are all curved, and they meet the kumiko at pretty much any angle, these are certainly unique half-laps.
Because of this challenge, a handsaw can’t be used to cut these notches. I’m considering a router, equipped with a small diameter straight bit. The small radius (about 1/4″) will allow me to get into some curved nooks and crannies, while the depth of the bit can be set to give me notches of consistent depths. I think I’ll have to add a larger plywood base to the bottom of the router, as the router will otherwise be almost impossible to keep at a right angle to the faces of the kumiko. The thing that makes this extra tricky is that the outer 1-3/4″ wide frame of the screens is set proud 1/8″ from the faces of the kumiko. I will have to cut the notches away from the outer frame first, then adjust the depth of the router bit to give me the same depth, even though the router will be 1/8″ higher.
If the router approach doesn’t work, I might turn to hand tools. Start with a handsaw to set the rough width of the notches, remove some of the waste between the notches, then use some curved carving gouges to shape the cheeks to fit the curved edges of the fish. I feel like this will be a lot more finicky than I’m hoping for though.
At this stage I’m pretty sure all of this is going to work out, but the proof will be in the pudding. I still worry about the rotating router bit chipping out the cheeks of the half-lap notches on the kumiko, but I’ll play around with how that works tomorrow and go from there.
So often in woodworking I’m unsure exactly how a specific joint or technique will be executed before I start it. It’s very common to have to adjust on the fly, depending on how the wood reacts. Try something out, keep your senses open to how it works, adjust as necessary. That’s woodworking in a nutshell. I’ll let you know it goes next week. Although I’m cautiously optimistic, I’m also aware that I may need to pivot once again.
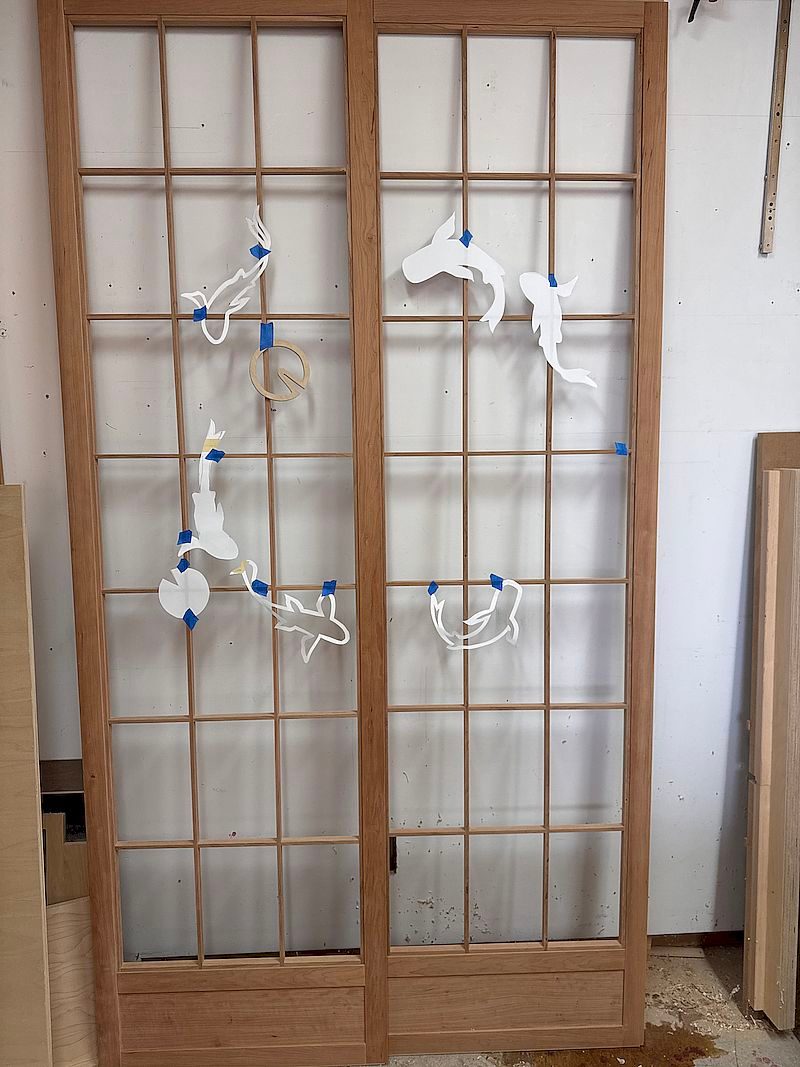
Basic Structure
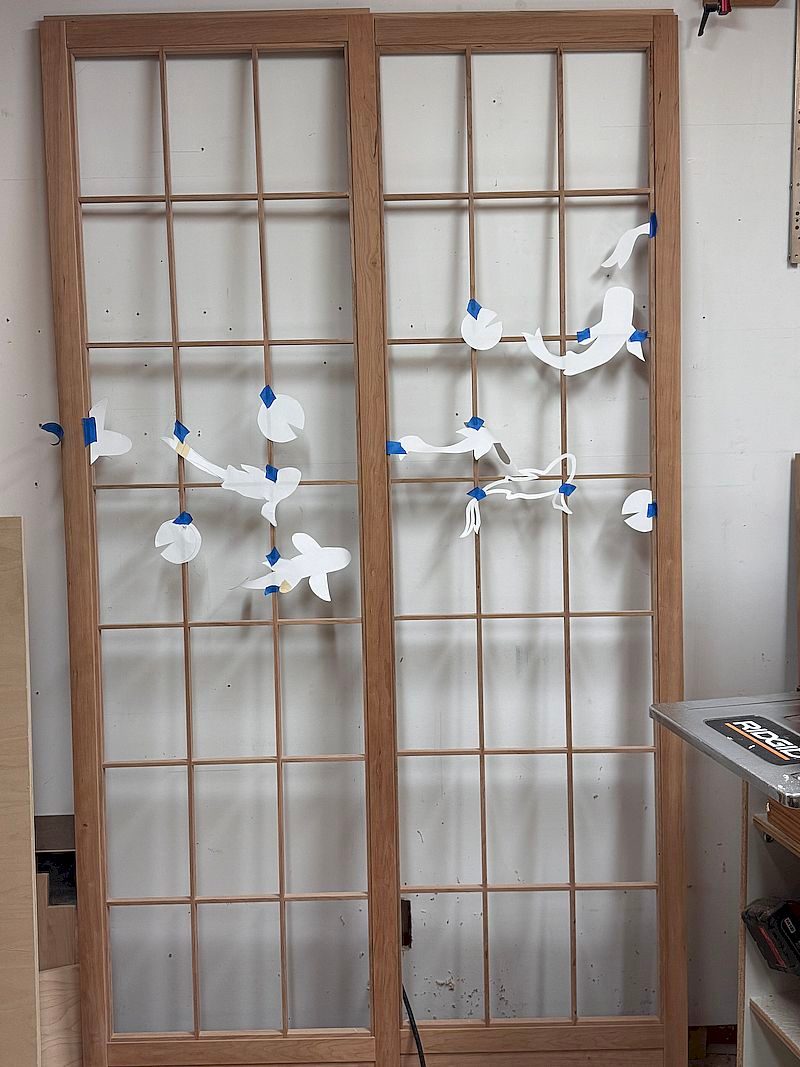
With the basic structure of the two shoji screens complete, the only thing left is to add the koi motif to the kumiko. This fish motif is in a circular pattern.
Another Option
Although it's slightly hard to tell, the pattern of this design is from centre on the left towards the upper right corner.
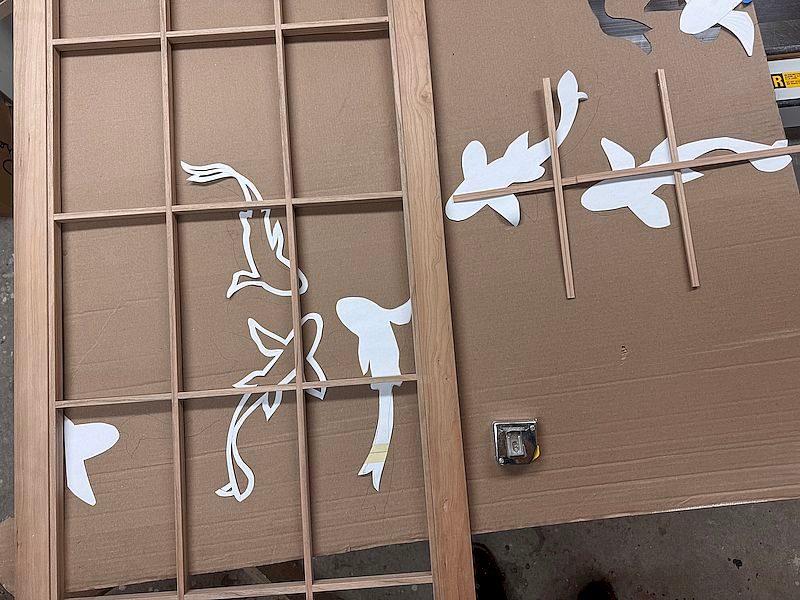
Attaching the Fish
Here, I'm experimenting with how to fix the fish to the kumiko.

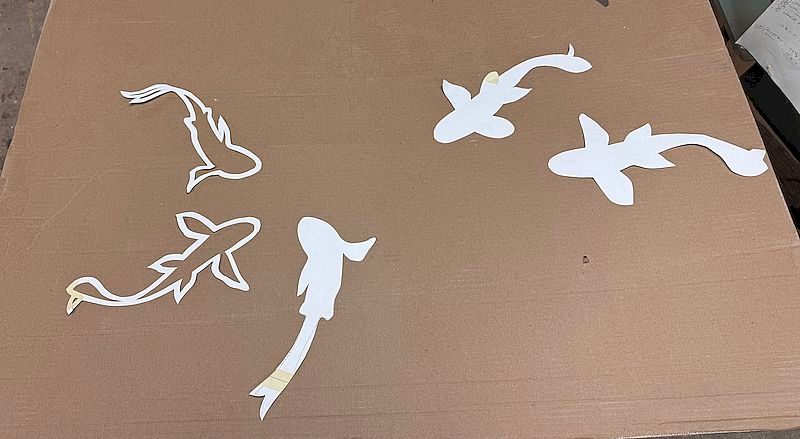
Easy Adjust
Paper designs are quick and easy to make. They're also easy to adjust, in relation to each other, in order to figure out a design that's pleasing to the eye.
The Screen
Not only does the fish design have to look good in relation to the other fish, but the fish also have to fit onto the screen properly. Laying the screen over the paper fish allows me to see how the fish relate to the screen members.
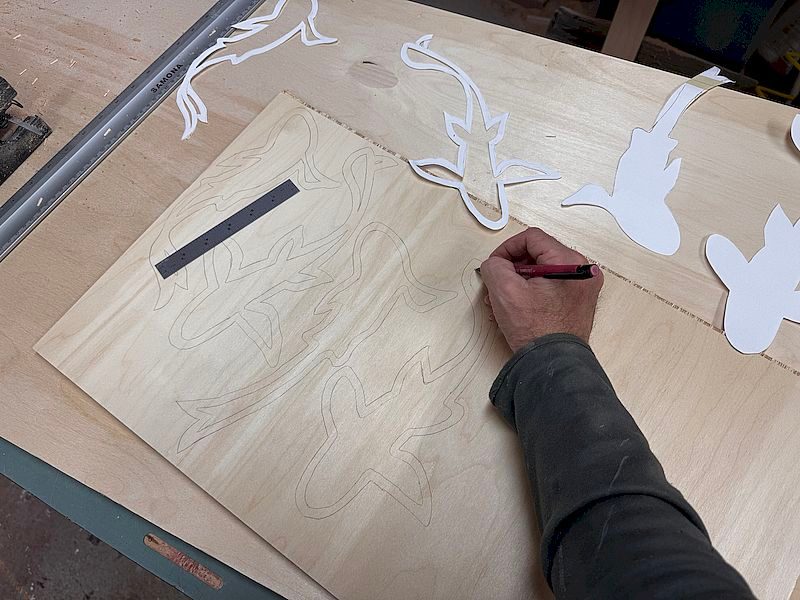
Making Fish
I use the paper templates to draw the fish onto the Baltic birch plywood. A scroll saw will allow me to get into the tight curves of these plywood fish
Placing the Fish
Using these three fish, I'm trying to create a focal point for the pair of shoji screens. The other fish on the screens will also be heading towards this point.