PROJECT
Spinning rainbows: adding colour to your work

Rick Campbell

Find more Turning / Carving / Intarsia projects
The only thing more enjoyable than watching feathery shavings fly off your turning project is when some of them are brightly coloured.
There’s nothing new about incorporating contrasting wood in lathe turnings to create eye-catching accents, but using stacks of coloured card stock to achieve these visual enhancements is an intriguing twist that deserves a closer look. Card stock, rather than solid wood, provides an opportunity for a wider variety of vibrant colour options and the materials are much less costly than expensive exotic wood species.
This idea may sound interesting, but you could be concerned that pulpy card stock will never stand up to the rigors of turning. That’s true, unless you know the secret ingredient that changes the game. Prior to laminating the card stock layers within the blank, the material is saturated with a generous coat of slow-cure, two-part epoxy resin. Once the epoxy fully cures, the card stock becomes extremely resilient and can be milled just like wood.
Spinning rainbows: adding colour to your work
Preparing the blank
For this simple vase design, I selected a big chunk of walnut that I had been hoarding for a rainy day. By the time I was done squaring up the sides and ends of the material, my blank measured 5″ square and 6-1/2″ long, but you can make your turning blank any size you want.
With the completed turning blank in hand, use a pencil or chalk to mark a large triangle on one face of the block. These reference lines will help you reorient the grain pattern after completing the next step.
Head over to the table saw to slice the material in two, where you want the contrasting card stock accents to reside. For my turning, this was about 2″ from the top of the blank. My table saw doesn’t have the capacity to cut through a 5″ thick chunk of wood in one pass, so it was necessary to complete this procedure with two cuts. I started by raising my saw blade to the maximum cutting depth and setting a stop block on my mitre fence to position the workpiece. After completing the first pass, I flipped the block over to make another run that cut the remaining way through the material.
Preparing the card stock
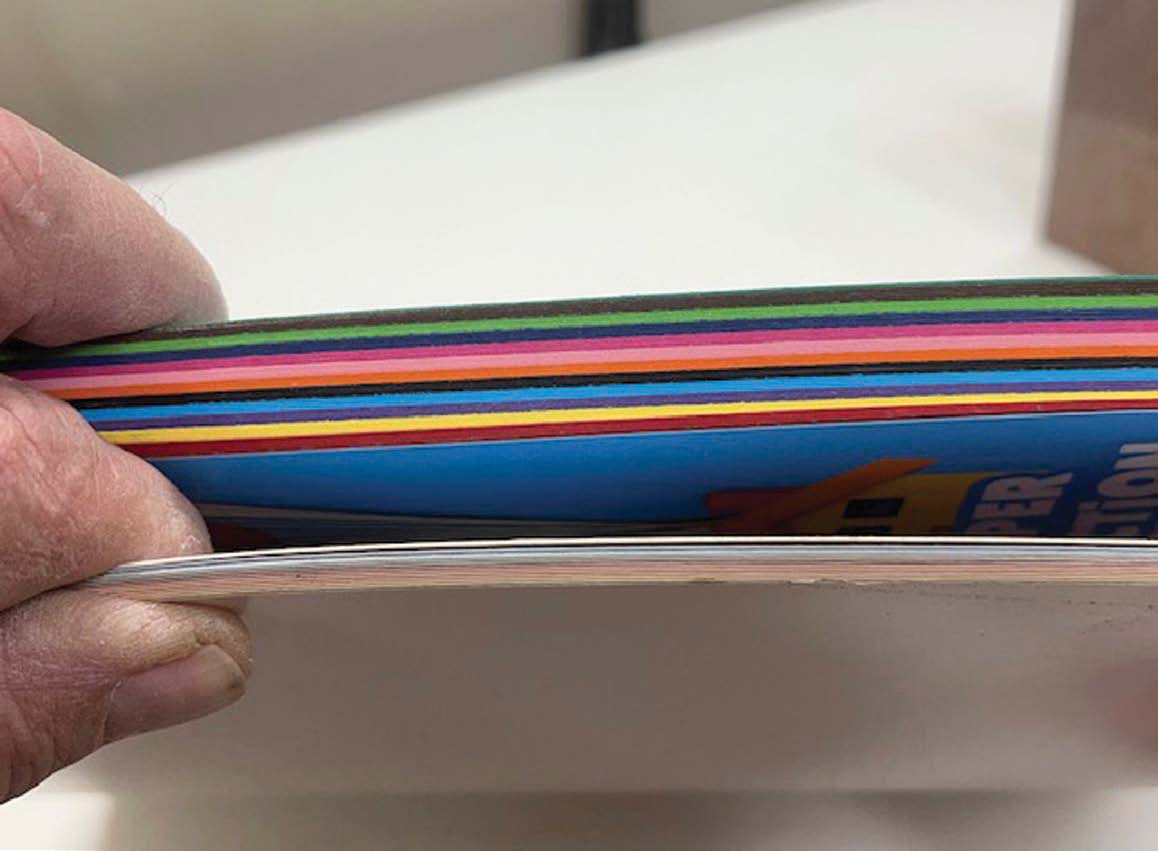
The next step is to prepare the squares of card stock that will create the colourful accents. For this, I purchased a package of multi-coloured card stock for just a couple of bucks from a local dollar store. Just be certain you select a variety that has the colour running all the way through the sheets. Some card stock has a white core with a very thin layer of colour applied to the outside faces. Material with a white core won’t work for this application because all that will be visible after completing the turning is the neutral centre layer.
The card stock is very thin, so you will obviously need quite a few sheets for each colour band. My turning included four sheets for each layer, but you should decide on a configuration that looks best to you. It’s easy to play around with different band thicknesses and colour combinations by stacking up dry layers of card stock squares.
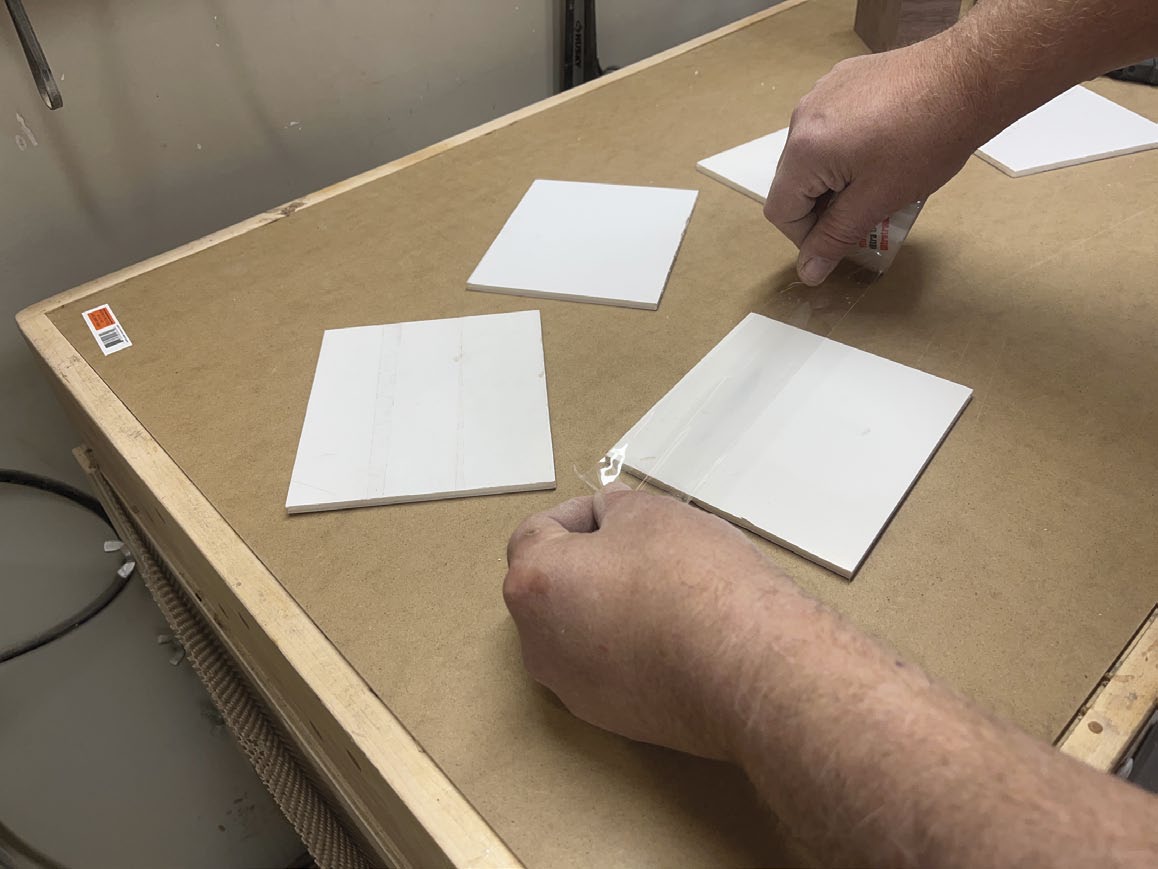
A mechanical paper cutter would make quick work of cutting the card stock to size, but I don’t have access to one, so a straight edge and a utility knife were pressed into service to get the job done. To correspond with the dimensions of my blank, I cut all the card stock into uniform 5″ squares. I avoided the tedious process of measuring and marking each piece by laying out a 5″ square on my cutting surface to serve as a template for the straight edge and utility knife.
Preparing the form
Next, I turned my attention to the form that will contain the turning blank and resin-saturated card stock while it cures. The main purpose of the form is to keep everything aligned while assembling and clamping the two wooden halves and the multiple layers of paper, as well as keep epoxy from squeezing onto your workbench. For this, you’ll need to head back to the dollar store to pick up a sheet of foam core board. These sheets are about 1/4″ thick and have a soft foam core with paper bonded to the outside faces.
Start by using your utility knife and straight edge to cut four sides that will fit snugly around the outside of your blank. Make sure you leave enough room for the thickness of the card stock accent layers when cutting the side panels to length. Now cut out the bottom of your container to fit the end of the blank plus the thickness of the foam core side walls. Before assembling the form, it’s a good idea to completely cover the inside faces of the panels with strips of packing tape. The tape will help prevent the foam core from bonding to the blank when residual epoxy resin inevitably drips down the sides.
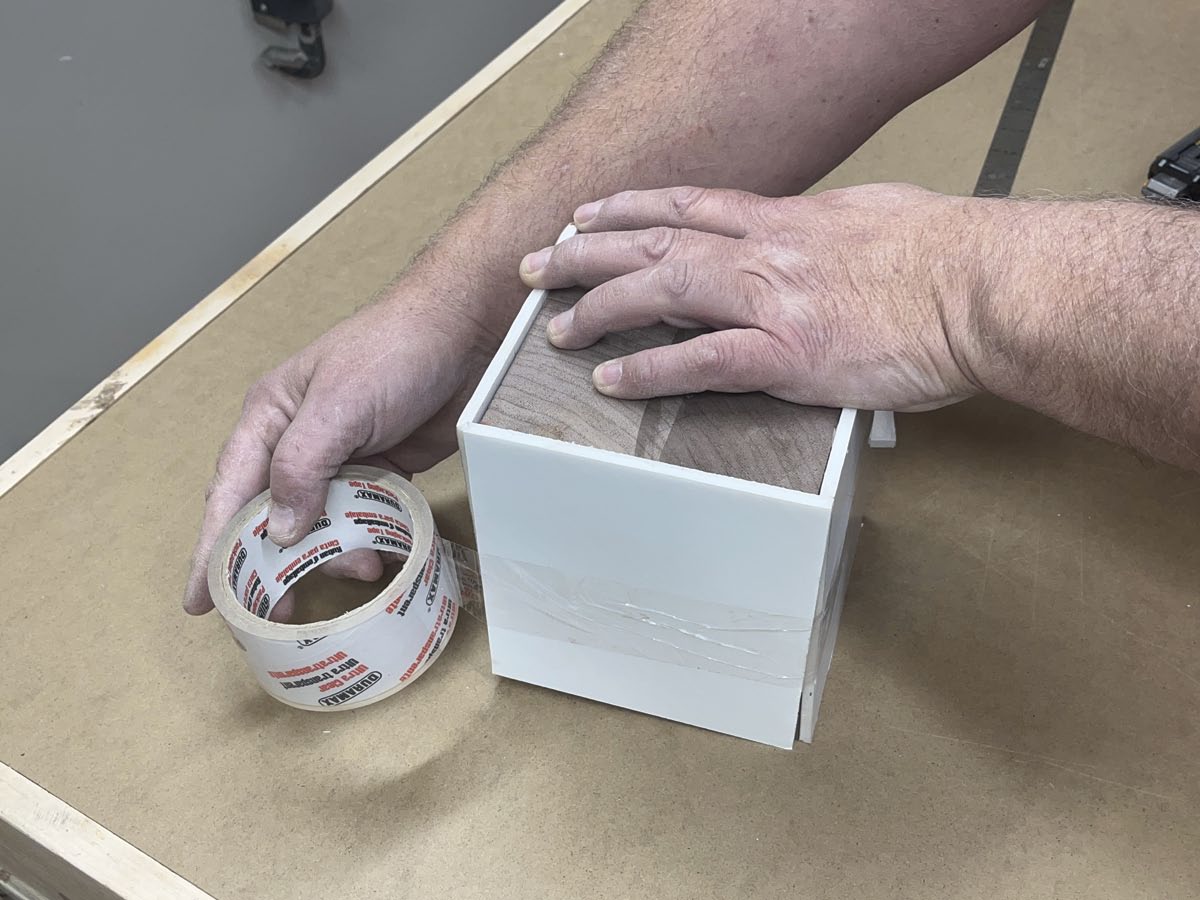
To assemble the form, arrange the side panels around the outside of the blank and secure them in place with more packing tape. Keep wrapping tape around the perimeter of the form until you’re certain the corner seams are fully sealed. Now you can secure the bottom panel in place using the same process.
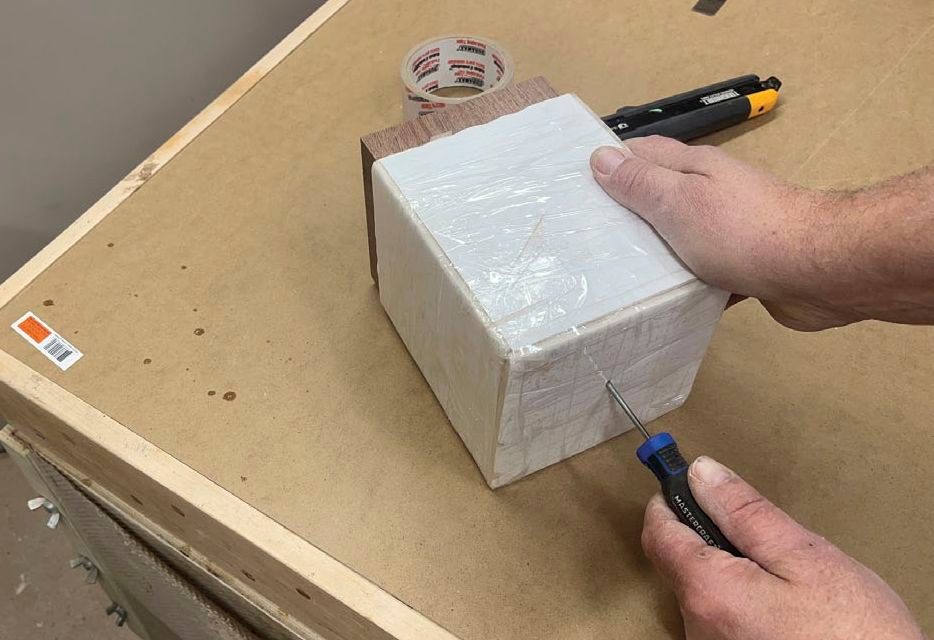
With all this work done, it’s now time to remove the blank from the form to prepare for the application of the epoxy resin, but in my case, I immediately realized I had a small problem. The container’s snug fit made it difficult to remove the blank without damaging the delicate foam core sides. After a bit of thought, my solution was to stick a pointed awl through the bottom panel to push the blank out of the form. This technique worked like a charm, then I simply sealed up the small hole with another strip of packing tape.
Making a mess
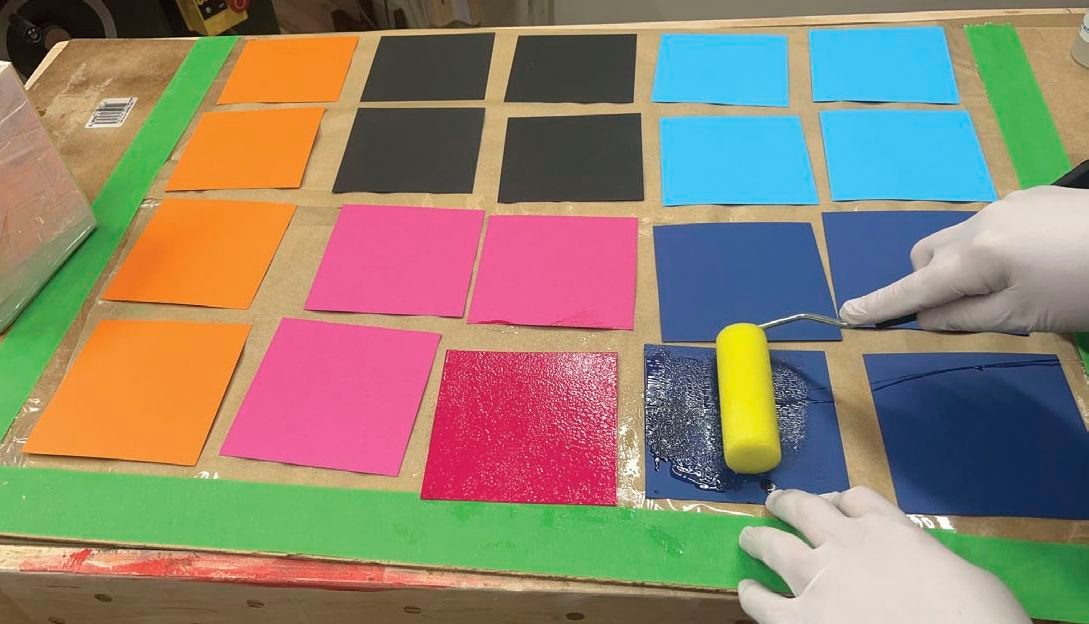
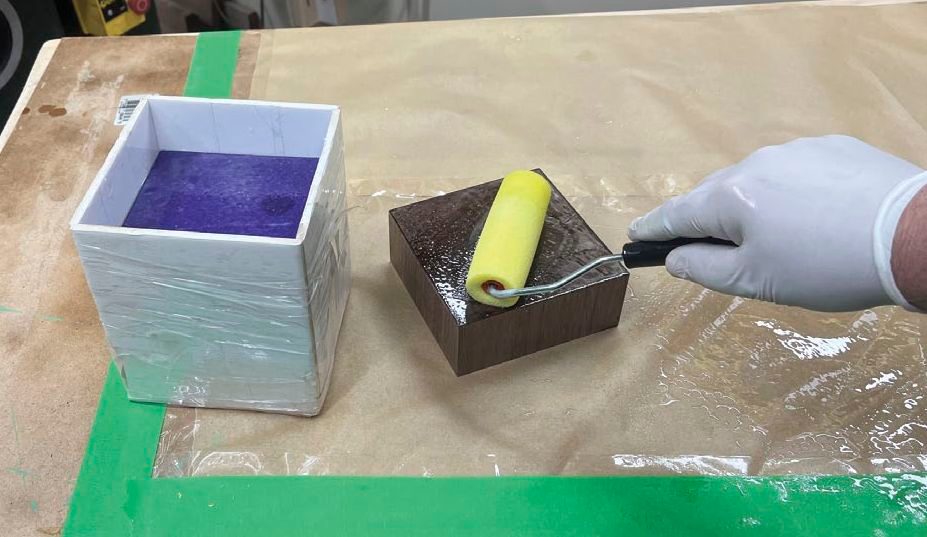
Now for the messy part of this project: saturating the card stock sheets with epoxy resin. I prepared for this process by taping layers of craft paper to my work surface to protect the top. Lay out your card stock squares on the work surface, then follow the product directions to mix up a batch of epoxy resin in a disposable plastic paint tray. The product I used for my turning was a standard two-part casting epoxy with a 30-minute working time. One of those dollar store disposable foam roller brushes does a great job of applying the epoxy to the card stock. (At this stage you must be thinking that I practically live at the dollar store.) Disposable plastic gloves are also a good idea to protect your hands from the sticky goop.
Another option is to use a slower-setting epoxy and after applying a coat to all of the layers of paper, as well as the wood, wait about 30 minutes or so before reapplying a second layer of epoxy to the parts. The first layer will be allowed to soak deeper into the materials, while the second layer will further coat any areas where the epoxy has soaked in. This is especially important when dealing with end grain or thicker paper.
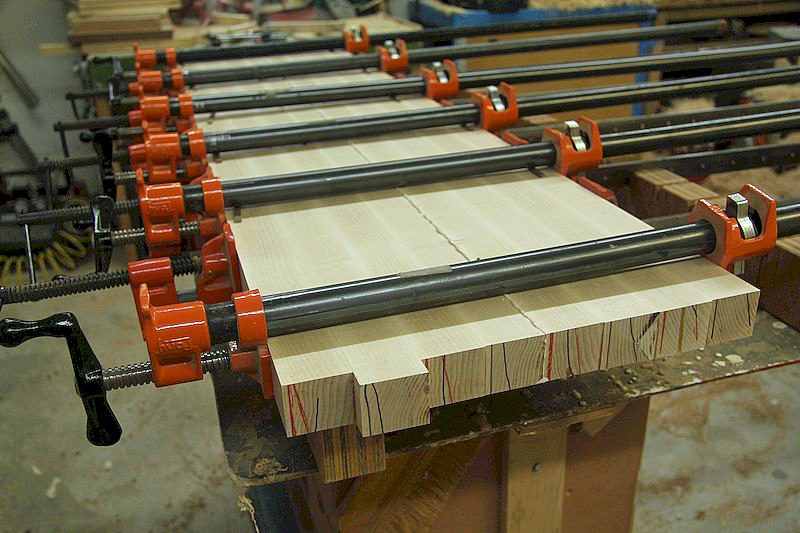
When you’ve prepped your work surface, roll a coat of epoxy onto the top face of the lower section of the wood blank and slide it into the form. When you do this, make sure the chalk reference lines are oriented on the marked side of the container. Next, roll a liberal coat of resin on both sides of the card stock and place the layers into the container in sequence. It is essential that you achieve full coverage, so check carefully for areas you may have missed. Any dry spots will be obvious because the colours will be less brilliant. Now, spread epoxy on the bottom face of the remaining piece of the wood blank and add it to the assembly. When you do this, remember to orient the chalked side of the blank with the marked side of the container to properly align the grain.
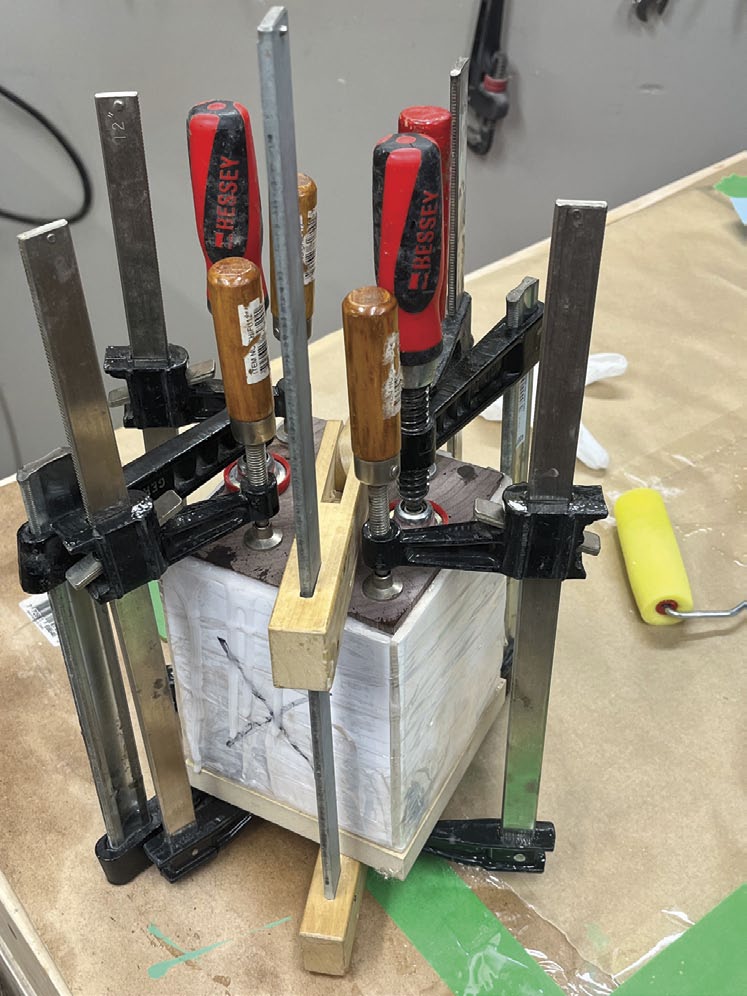
Add a bunch of clamps to uniformly compress all the layers of the lamination while the resin sets. A piece of scrap wood on the bottom of the form is a good idea to prevent the clamp jaws from biting into the soft foam core material. I set my blank aside for four days to let the resin fully cure, but the requirements may be different for the product you’re using, so check the manufacturer’s directions.
Earlier, you’ll recall I marked one side of my turning blank with a chalk triangle to facilitate realigning the grain pattern when the blank is reassembled. You may have already realized that once the lower half of the blank resides in the form you will no longer be able to see these references, making it difficult to correctly orient the grain when inserting the top piece. A simple solution here is to mark the exterior of the form on one side to correspond with the marked side of the blank.
The waiting game
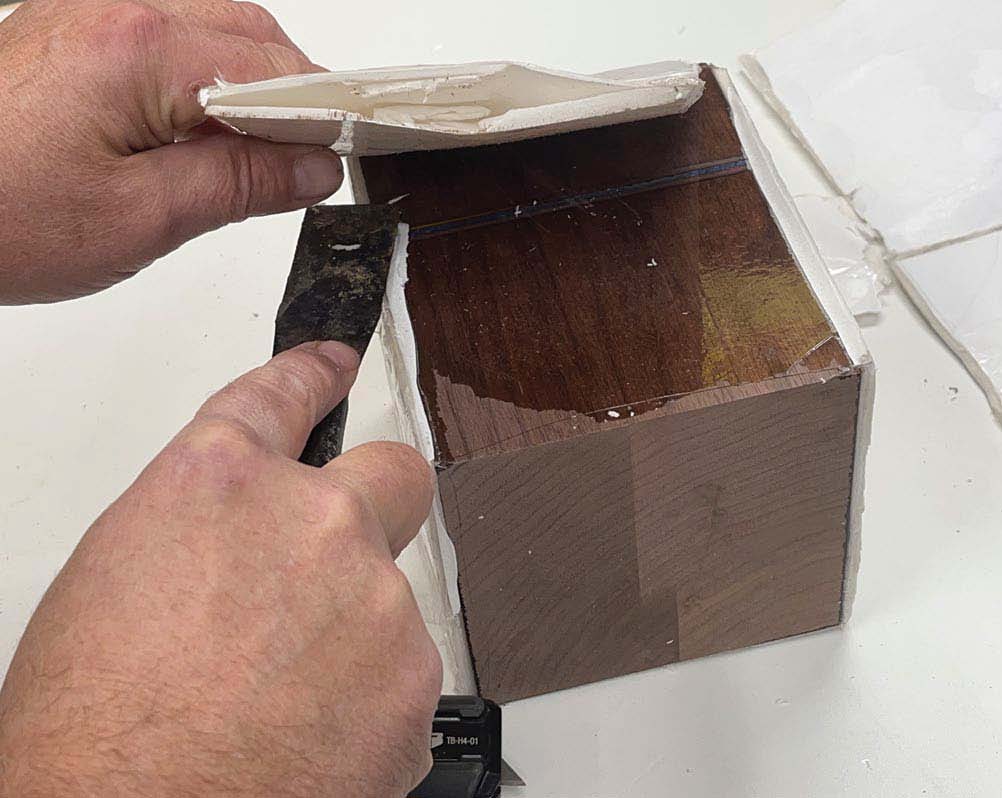
After waiting patiently for the resin to cure, it was time to peel off the form to get my first glimpse of those beautiful coloured bands. To remove the form walls, I sliced the tape along the seams with a utility knife, then slipped a putty knife between the foam core panels and the wood blank to pry away the sides. The packing tape did its job and the foam core board released cleanly with minimal effort.
Time for turning
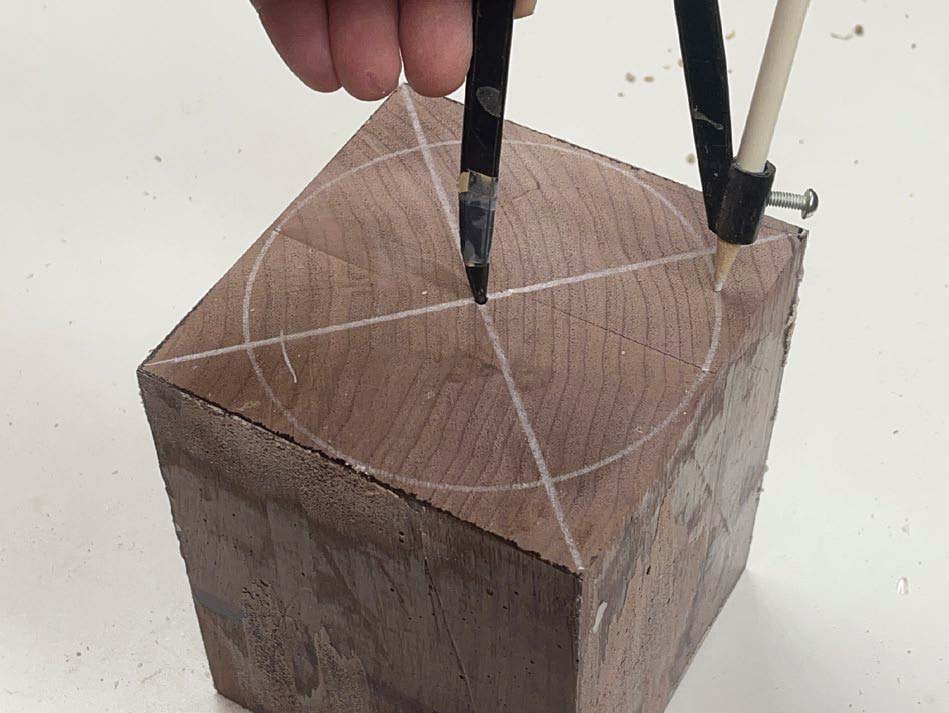
Now it was time to prepare the blank for the lathe. I started by scribing diagonal lines on both ends of the blank, from corner to corner, to locate the centre point on both ends. Next, I used an awl to make a divot where the lines intersect. Using a compass, I scribed a circle on the ends to mark the maximum diameter of the turning.
I always cut the waste off the corners of my turning blanks at the table saw to give me a bit of a head start at the lathe. To do this, I tilted my saw blade to 45° and set the fence to make the cuts. I was careful to position the fence so the blade wouldn’t cut into the circle I scribed on the ends.
With this done, I mounted a small 3″ diameter face plate on the end of the blank that will eventually become the top of my vessel. The screw holes used to mount the face plate won’t be an issue, because this area of the turning will eventually be hollowed out.
First, the exterior
I threaded the face plate onto the lathe and pushed the tail stock into position on the end for added support. After positioning the tool rest, I set the lathe spinning at around 750 rpm to begin rounding the blank with a roughing gouge. Once the blank was consistently round along the entire length, I turned up the speed to about 1200 rpm and used a combination of the roughing gouge and skew to taper the turning toward the bottom. When this process was complete, the diameter of the blank at the top end was 4-3/4″, with a taper towards the bottom reaching 3-1/4″.
For the next stage, I moved the tail stock out of the way and positioned the tool rest on the end of the blank to make a 3/16″ deep by 2 1/4″ diameter recess to receive the jaws of my scroll chuck. I did most of this work with my parting tool.
Then, the interior
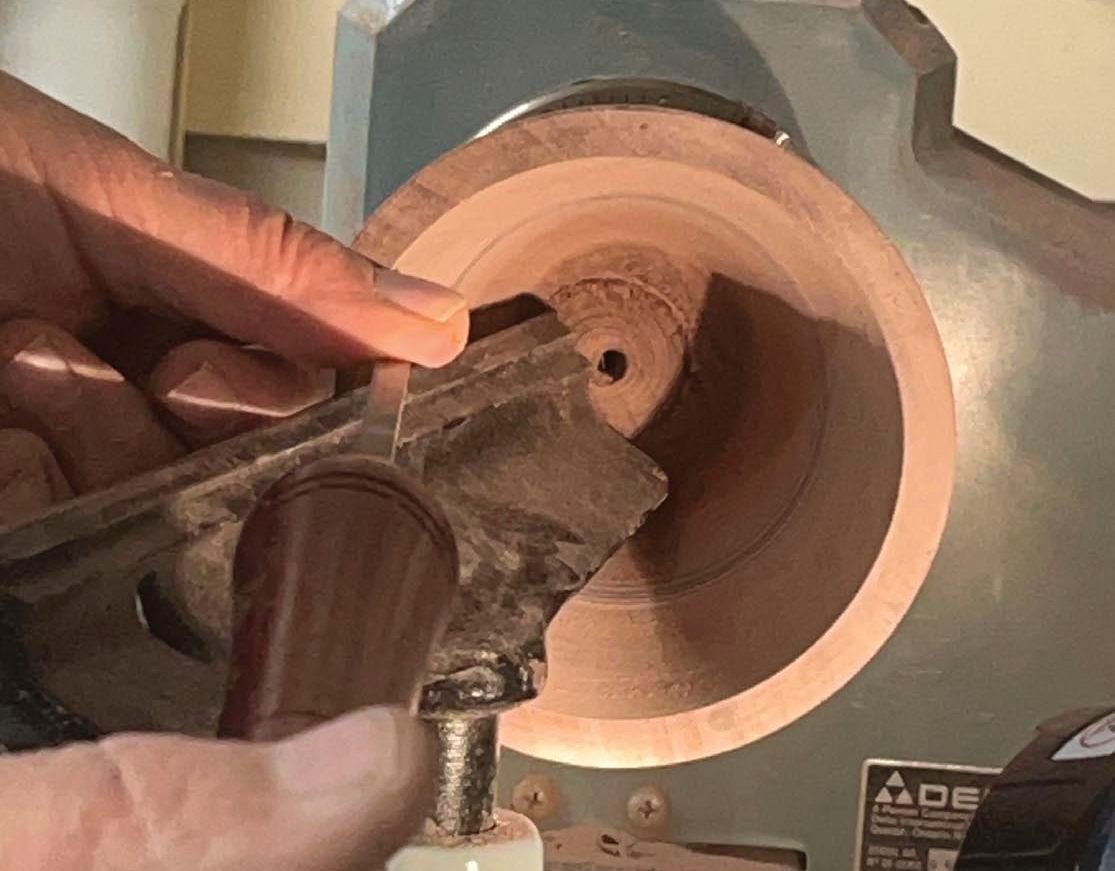
When I was satisfied with the exterior shape of the turning, it was time to remove the material from the inside of the turning. To save some time at the lathe, I started by boring a 1″ diameter hole in the centre of the turning with my drill press. As I was holding the turning with my hand, I had to be a bit more careful. A larger bit, or a plunge rate that was too fast, could easily grab the turning and injure my hand. I was careful to make sure the hole ended about 1″ short of the bottom. You could also do this initial hollowing operation on the lathe.
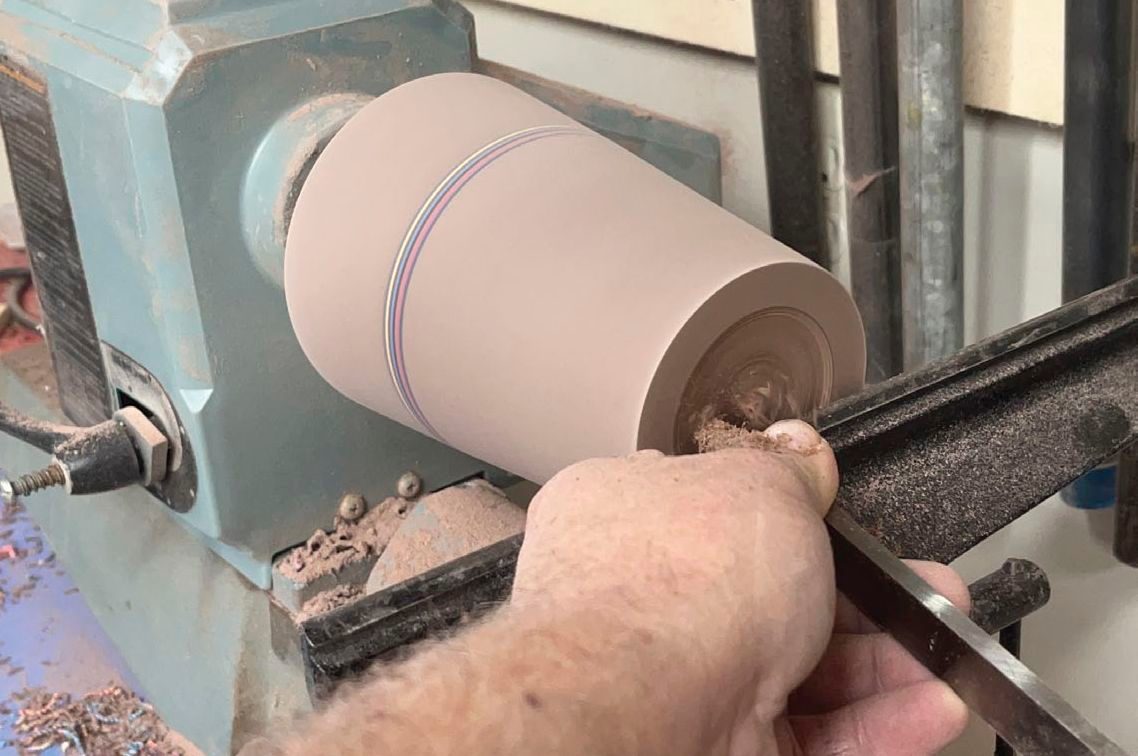
Next, I mounted the bottom of my blank back on the lathe using the scroll chuck. After verifying the jaws were firmly seated, I turned on the lathe to about 1200 rpm and began shaping the interior of the turning using a combination of the finger gouge, parting tool, skew and hooked scraper. As I got deeper into the opening, I turned the end of my tool rest so it was positioned inside the cavity for added support. While I worked, I took the precaution of making very light cuts to prevent the turning from sheering off the chuck.
I continued working away at the inside until the walls were a uniform 1/4″ thick. I finished up the interior by forming a slight cup-shaped profile on the bottom.
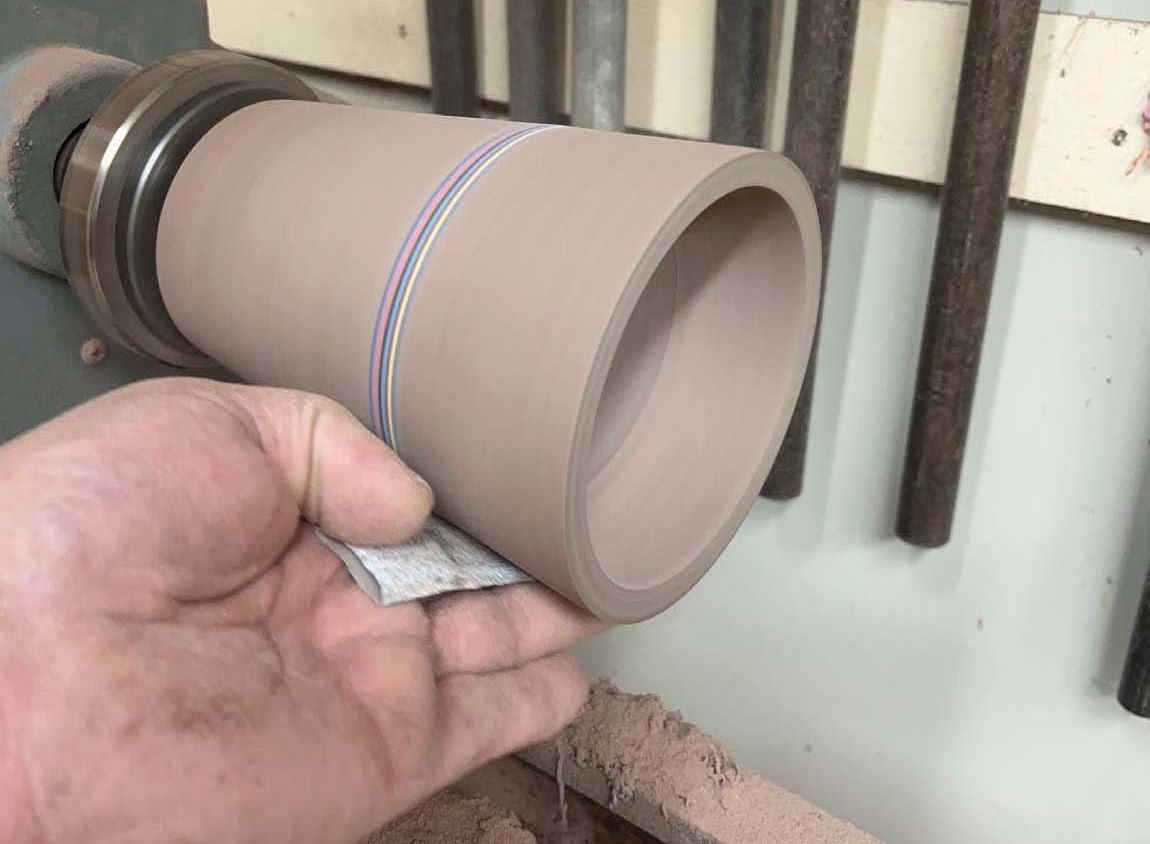
The finish line
Now it was time to move the tool rest aside and break out the sandpaper. I reduced the lathe speed to about 300 rpm and progressively worked my way through all the grits from 100 down to 2000, sanding both the interior and exterior of the turning. My father always taught me to burnish the surfaces with a handful of shavings as the last step of the turning process. I don’t know if it really makes a big difference but I still do it every time.
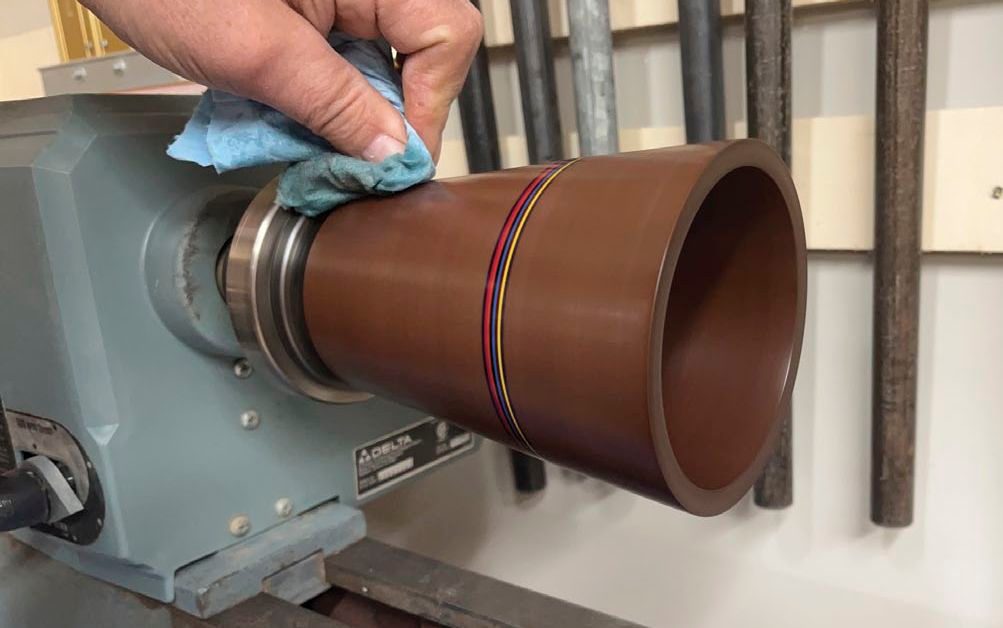
After turning off the lathe, I applied a couple of coats of boiled linseed oil to all the surfaces with a cotton rag. This part of the process was very satisfying because the oil brought out the rich grain of the walnut and brilliant colours of the accent rings.
Final thoughts
After completing my first turning using coloured card stock, I immediately wanted to try the technique again. My next turning involved just black and white card stock. This technique resulted in a midnight black band that resembled the look of ebony, contrasted against pure white ribbons on either side. Totally satisfied with my first experiments using card stock to add accents to turnings, I was excited to explore all the possibilities of this intriguing technique. I guess it’s back to the dollar store to purchase more supplies.
Photos by Rick Campbell
Check the Edges
Some card stock (bottom of stacked paper) may have a white core, which isn’t what you want. Check the edges of the pad for consistent colour throughout the entire thickness of the paper before you make a purchase.
Cut and Tape
Cut pieces of foam core board to the outer size of the blank you’re gluing up. The sizes should fit around the blank, with virtually no gaps between the edges, where lots of epoxy could squeeze out and make a mess.
Wrap It Up
Packing tape does a good job at keeping the pieces of foam core board secure around the blank. Don’t wrap it so tightly that you can’t get the wood blank out of the foam core form.
Remove the Blank
If your blank doesn’t slide out of the form, a small hole in the bottom of the form, along with a small tool to press the blank out, should work.
Roll It On
With some craft paper under the card stock pieces, roll epoxy onto both sides of each piece of card stock. Applying epoxy to both faces might be messy, but it will ensure good coverage of epoxy and solid joints for turning.
Don’t Skimp
End grain sucks in the epoxy, so make sure to coat it with ample epoxy before placing the parts in the form. Waiting a short time between a couple of coats will ensure enough epoxy remains at the joint line.
Just Right
Too much pressure will cause too much of the epoxy to squeeze out of the joint, creating a weak joint. Too little pressure will not bring the parts together properly.
Layout Lines
Find the centre of the blank, then use a compass to lay out a circle on the end grain of the blank to guide you when removing the waste from the blank.
Extract the Workpiece
Once fully cured, cut and scrape the form off the blank.
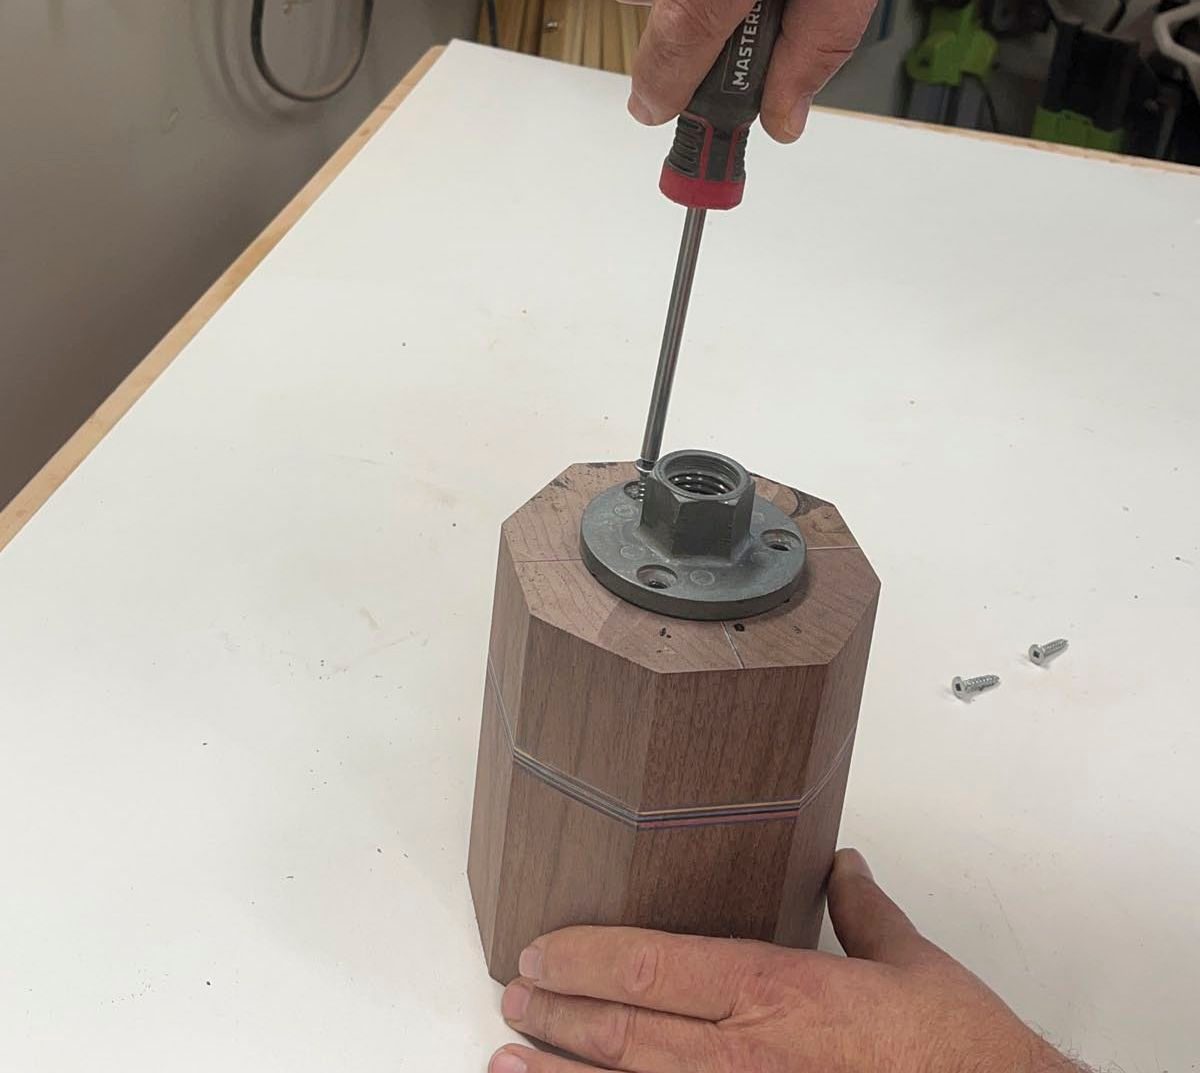
Attach a Face Plate
With much of the waste removed, attach a small face plate to the blank. The screw holes will eventually be removed while hollowing out the interior of the turning.
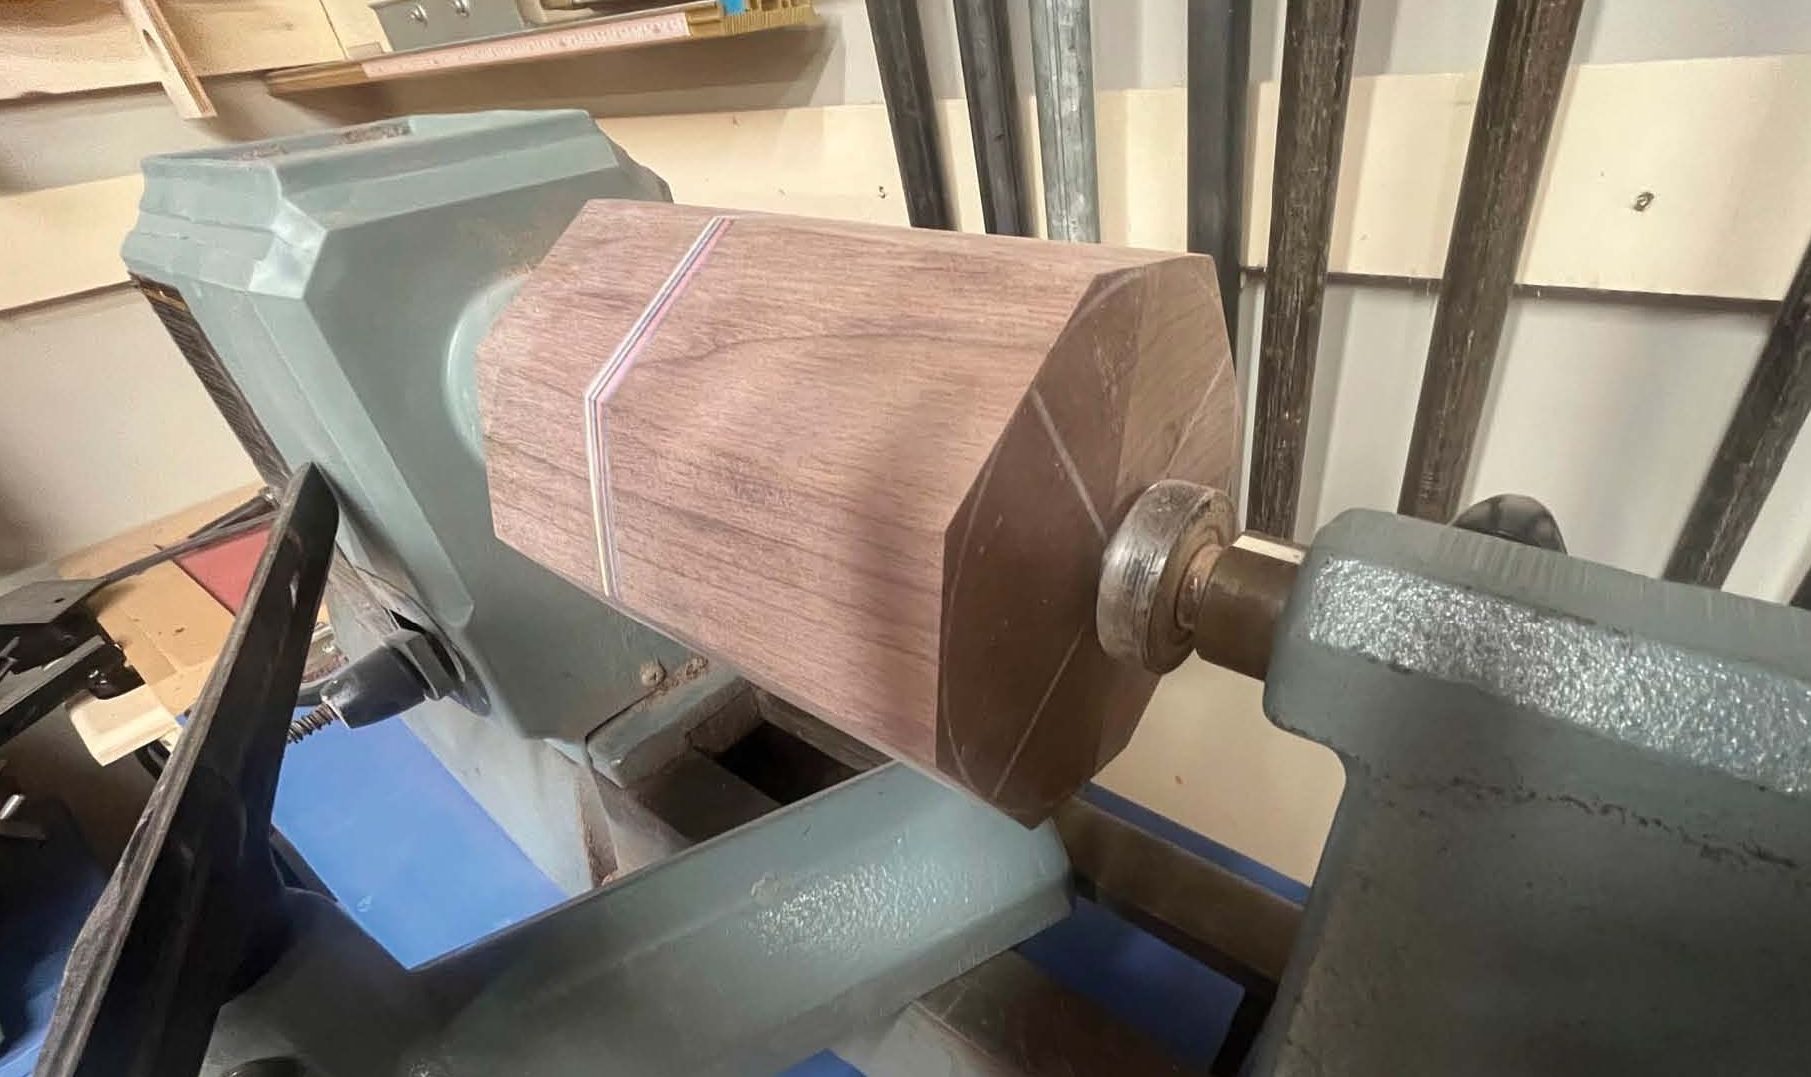
Time to Turn
With the majority of the waste removed, and the blank positioned properly on the lathe, it’s time to turn.
Rough It Out
First, Campbell rough turns the blank with a roughing gouge so it’s round and even. He does this on a slightly slower speed.
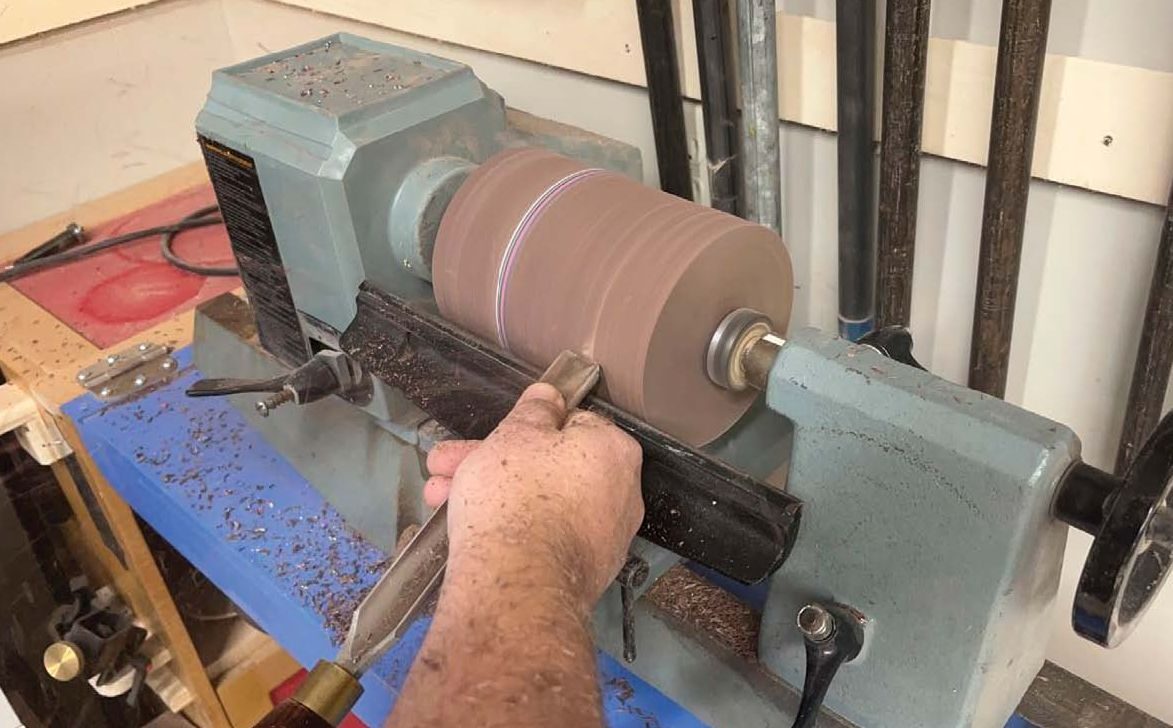
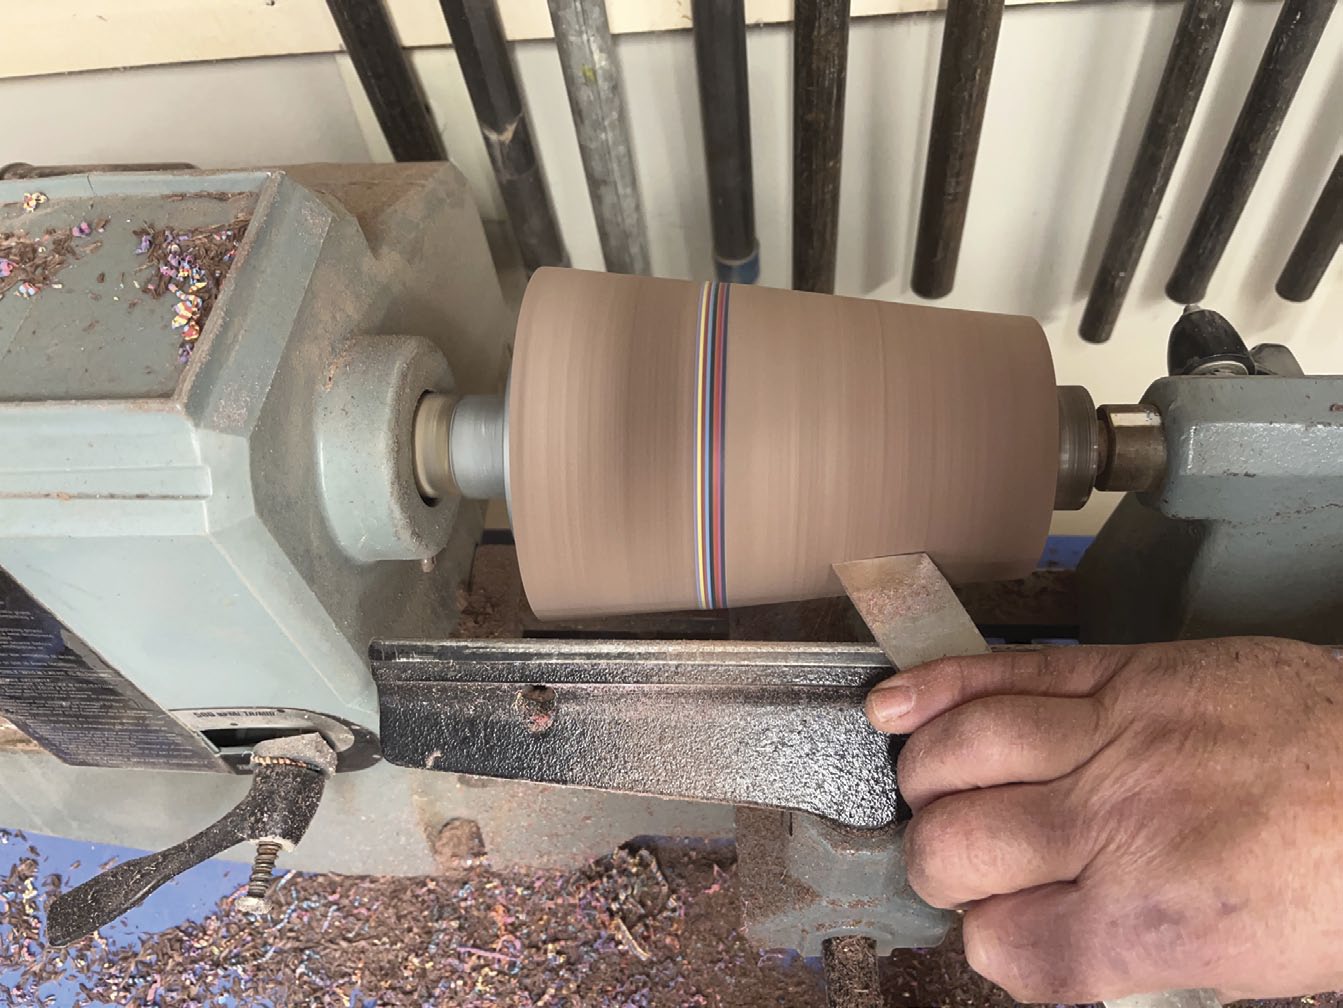
Taper It
Once it’s round, Campbell uses a roughing gouge and skew to taper the turning so it’s narrower at the bottom.
Form a Recess
After moving the tool rest to the end of the blank, Campbell turns a recess in the end of the blank so he can re-attach the blank to the lathe with a scroll chuck.
Get Inside
Extending the tool rest into the cavity of the turning allows Campbell to properly remove material from the interior of the blank.
An Easy Sand
Sanding the turning while it’s on the lathe makes the process easier.
Finish It Up
Once a coat of finish is applied, you can slow the lathe down and buff the surface to your desired sheen.
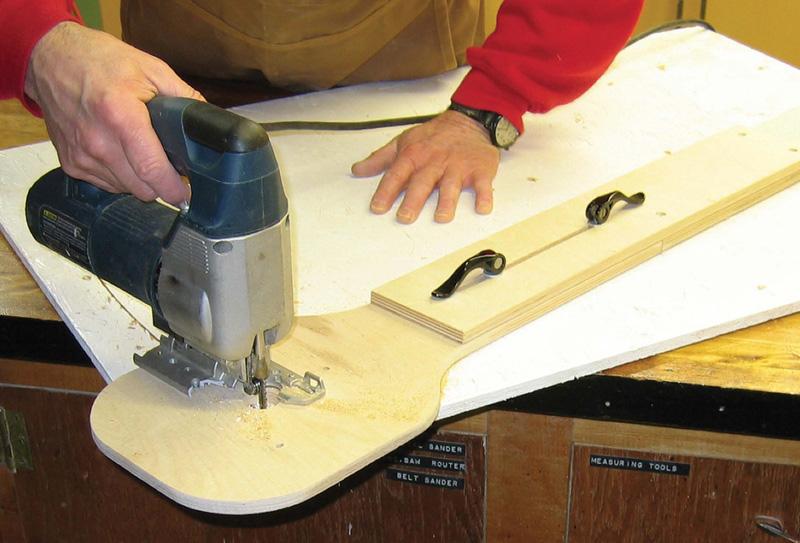
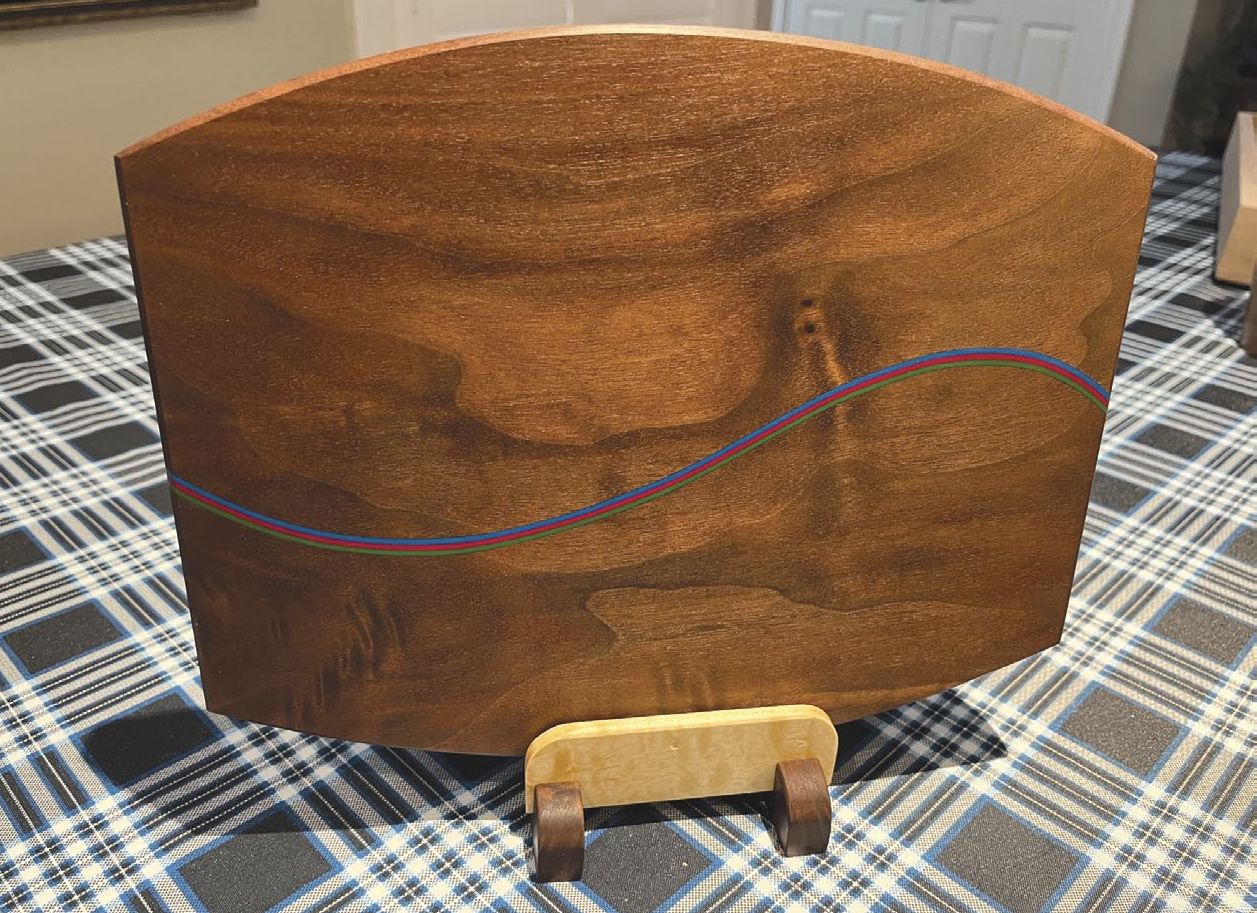
Get Creative
Campbell liked the effect of the coloured bands so much he brought the same technique to a cutting board. There are countless ways this technique can be used in woodworking and furniture making.
[illustrations_gallery]