PROJECT
Make a pill box

Rob Brown

Find more Gifts / Crafts projects
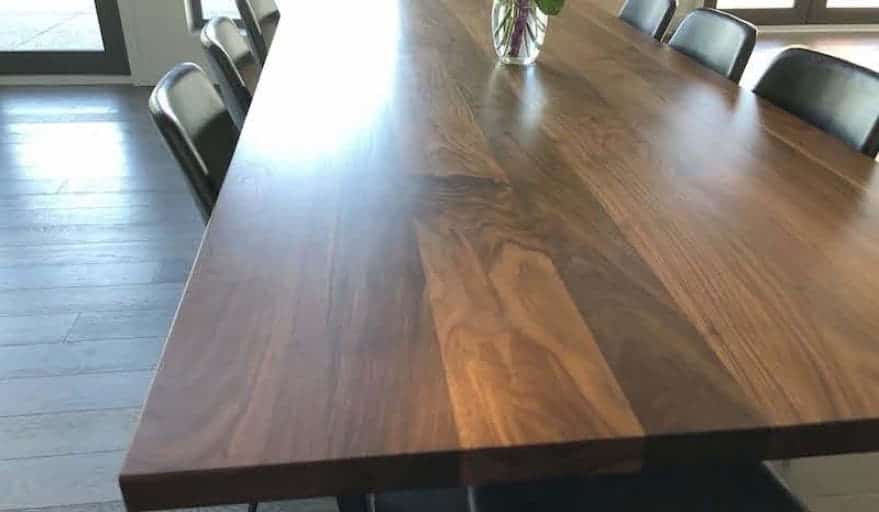
A custom-made pill box is a great way to make taking daily meds more enjoyable.
A friend of mine who now has to take one pill daily is afraid they’re going to forget to take it now and then. I offered to make them a pill box that would allow them to put all their weekly pills in it at the start of the week, allowing them to easily tell whether they missed a day or not by looking at the box. And since they’re more likely to take their daily pill if they enjoy part of the process, I wanted to make the box pleasing to the eye and enjoyable to handle.
Make a pill box
The ground rules
Everyone has different requirements for a project like this. At first, I was going to rout round-bottomed cavities so the user could more easily reach in with one finger and grasp the single pill in each cavity, but routing often leads to scorching the wood. Instead, I opted for a box that can be picked up with one hand and flipped over to allow one pill to spill out for each day.
Because each cavity will hold only one pill, they don’t need to be large. A slightly larger box overall, coupled with a larger cavity for each day, will allow more pills to be added, if that’s necessary. A larger box might be a bit more difficult to manipulate each day, so keep that in mind, too. If you did need to make the box much larger, you might consider routing round-bottomed cavities in a larger box, rather than needing to pick up and turn the box over each day.
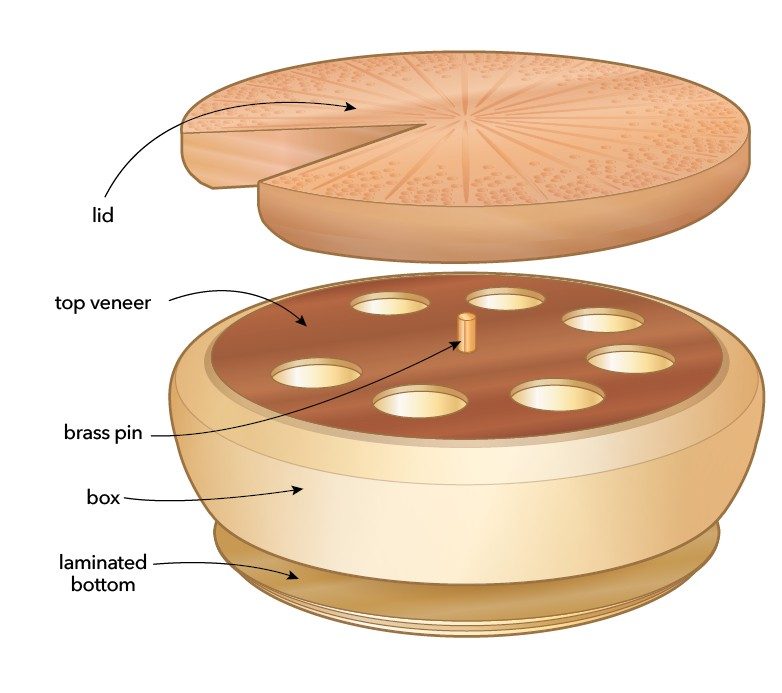
The lid on my box rotates on a brass pin in the base. This allows the user to rotate the slot in the lily pad lid to the correct cavity. It also allows the user to remove the lid and fill up the box at the end of each week. The pills inside will only be visible when the lid is removed; a clear lid would be needed if you want to be able to clearly see if you missed any days.
Because this lid is easy to remove, this box won’t travel well if it’s loaded with pills. The lid would likely come off, spilling the contents. An elastic band might work in a pinch, but if the person using this box travels regularly, a better solution is needed. A latch of some sorts, to hold the lid on, might work.
The prototype
I started by making a very simple prototype. This allowed me to work out some of the design challenges. Unless you want to make some changes to this box, you can likely skip this step, as I’ve worked most of them out already. Having said that, making a prototype only took me about 20 minutes, so it might still be worth it for you.
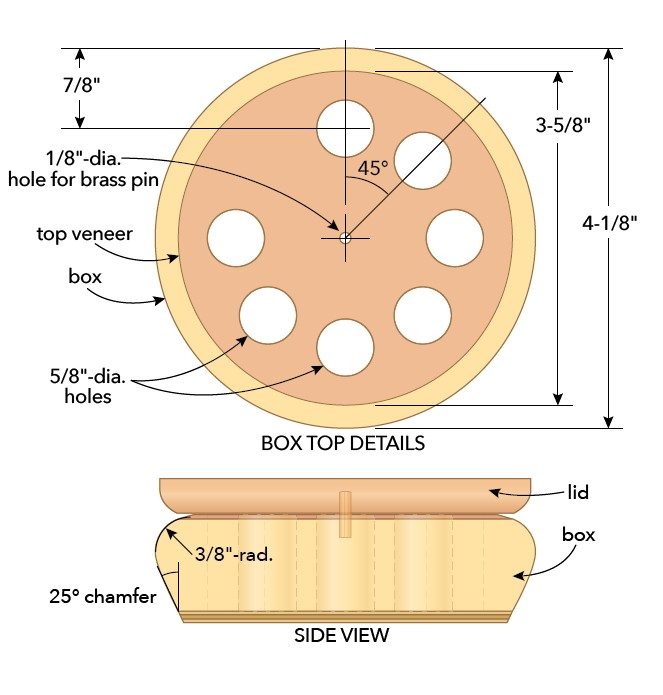
The finished diameter of the base is 4-1/8″. The base is 1″ thick. The top is 4″ diameter and 3/8″ thick.
The base
Working with small parts can sometimes be difficult and dangerous, especially when using machines. It’s a good idea to keep the base of the workpiece attached to more material for as long as possible, so you can more easily secure the workpiece while you’re machining it. And once the base workpiece needs to be cut free from the rest of the material, use proper techniques, safety equipment and common sense when finishing up the rest of the machining operations.
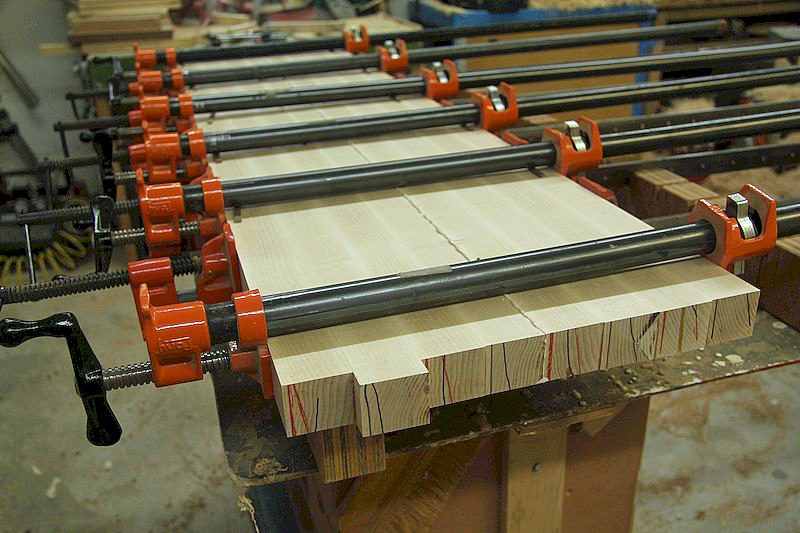
It’s possible to make the base from flat sawn material, but I opted to rip a piece of flat sawn material into narrow strips, rotate them all 90° and re-glue them. This provided me with a more stable blank, as it’s less likely to warp over time. It also has a simpler grain pattern on all surfaces, including the edges, which I liked for this small project.
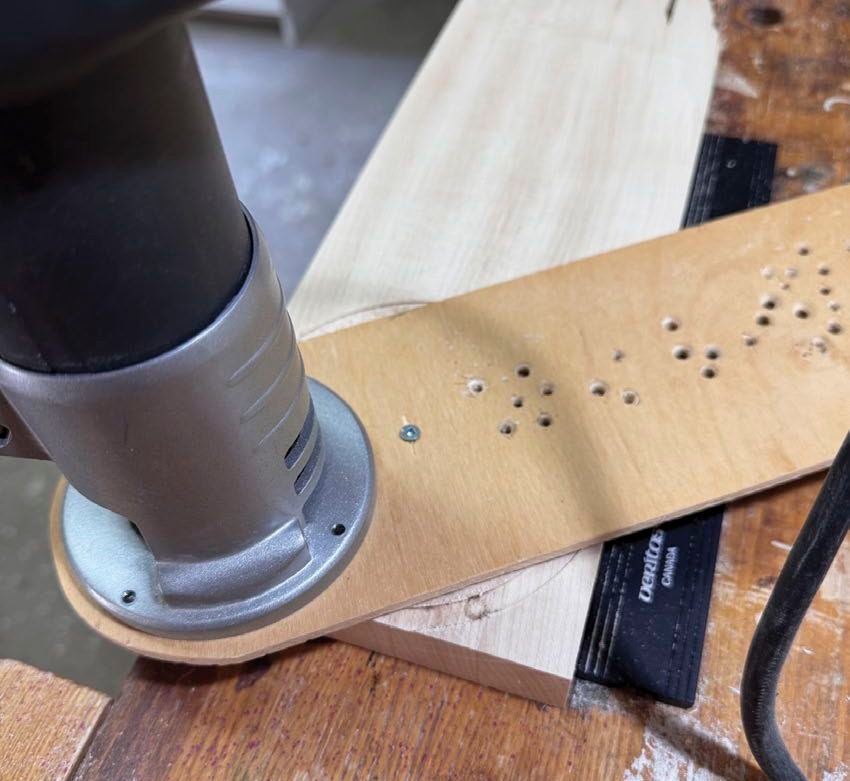
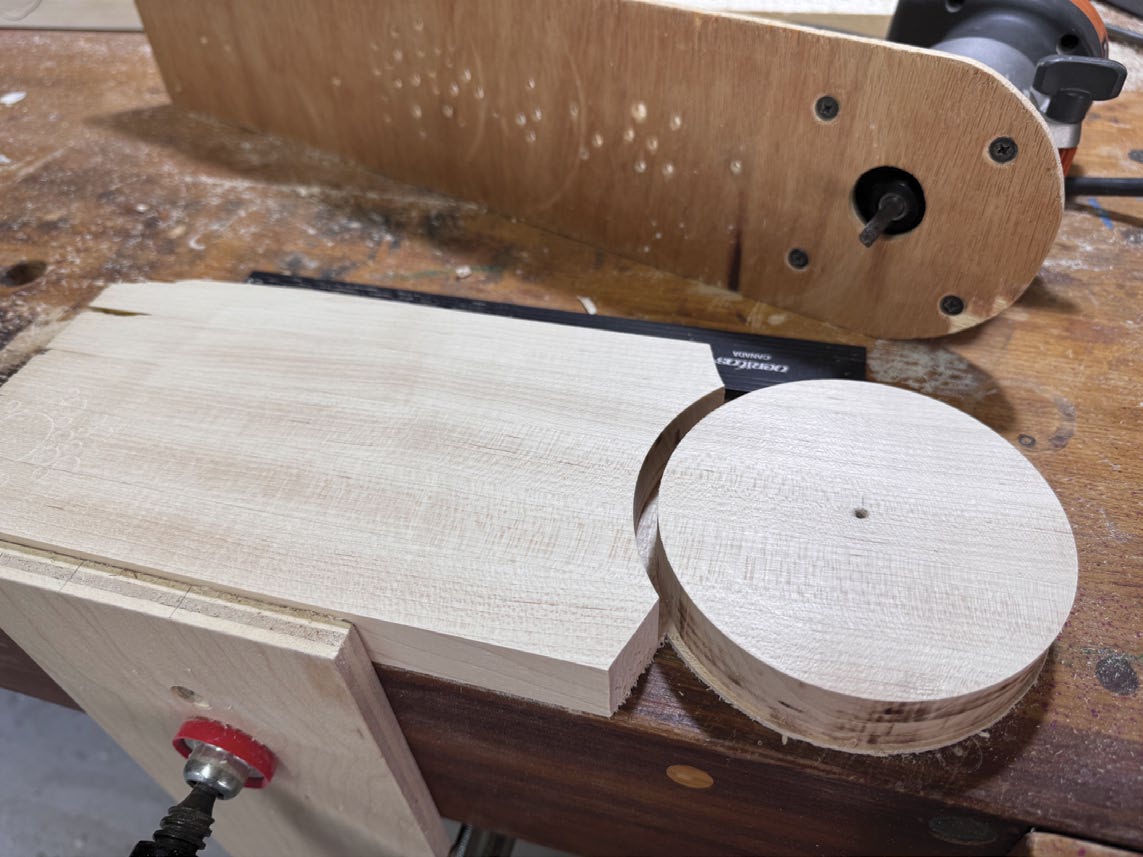
I used a small circle-cutting jig, as well as a 1/4″ diameter straight bit in my trim router to start shaping the circular base. I screwed the jig to the underside of the base, so once the bottom was attached the hole would never be seen.
Rather than expect the small router bit to remove all the waste, and shape the circular base, I opted to do a light pass first, about 1/16″ deep. I then removed the jig, trimmed much of the waste on the bandsaw, and re-installed the jig on the base.
Trimming on the bandsaw allowed me to remove a lot of waste, so the router and bit had an easier time. It was also safer. Slow router passes, sneaking up on the final depth, was critical. Also, with the base stationary, rotating the router in a counter-clockwise direction is also critical, so you’re not climb cutting. I stopped making passes once there was about 1/16″ of material remaining holding the base to the rest of the material. At this point, I cut the base free on the bandsaw.
Add fancy veneer
There’s nothing wrong with skipping this step, but I wanted to add figured veneer to the upper surface of the round base to make the pill box more enjoyable to use.
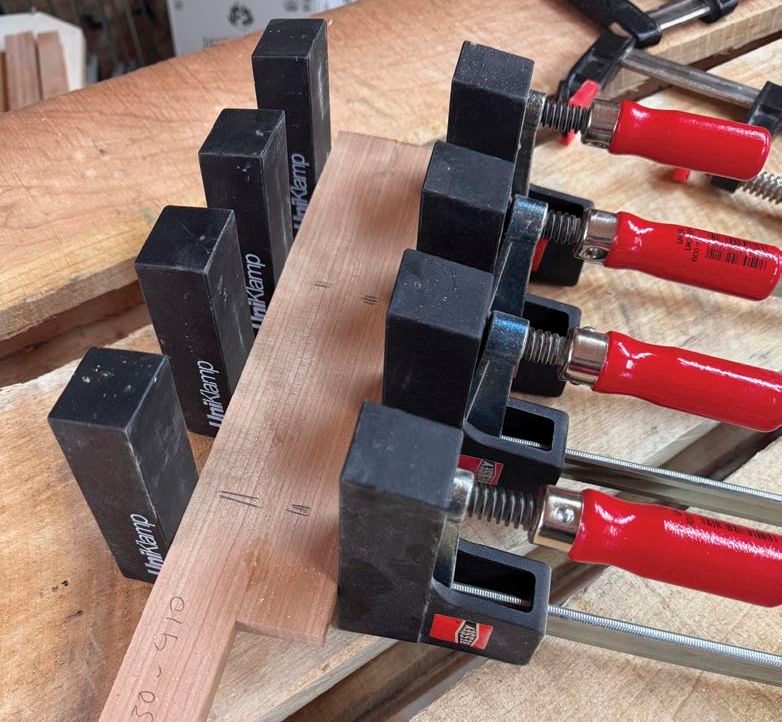
I trimmed a piece of burl oversized, applied an even coat of glue to the upper surface of the box, then used clamps, cauls and a few layers of paper to bring the assembly together. The paper ensured the cauls wouldn’t be glued to the veneer. I used a sharp knife to trim the veneer flush with the edge of the base once it was dry. No need to be too careful here, as the next step will further shape this edge.
Shaping the edge
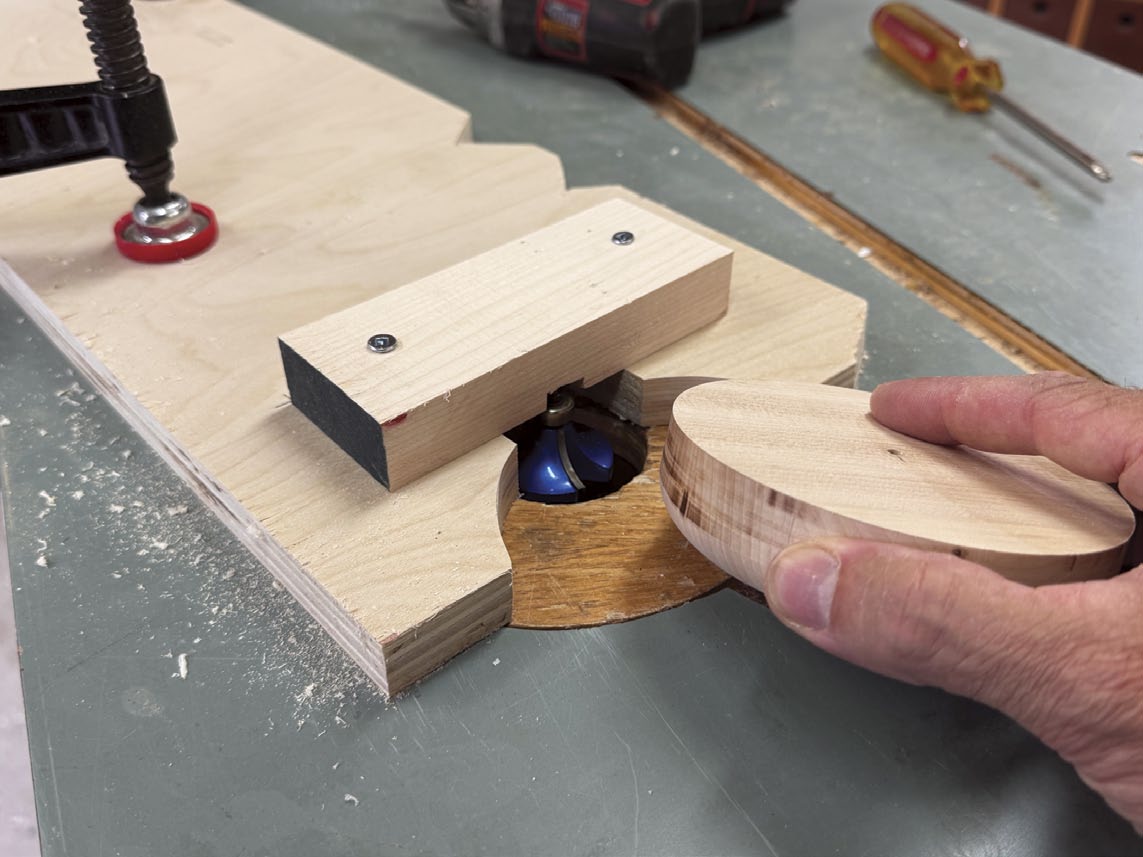
This step is a bit finicky, but adds a nice shape to the overall project. I chose a 3/8″ radius round over bit to shape the upper edge of the round base and installed it in my router table. Since the base is small, machining this freehand would risk injury and damaging the base. I made a very simple jig from 3/4″ thick plywood that would help guide the round base while it was being profiled. I cut a curve in the end of the plywood that was ever so slightly larger than the diameter of the round base, allowing the round base to fit inside the arc, but just barely. It doesn’t have to be perfect, as the bearing on the router bit will do the majority of the guiding. A second piece is added on top of the jig to ensure fingers don’t get close to the rotating bit. This jig provides some assistance for bringing the base to the router bit, while also making the operation safer. It gets clamped to the router tabletop, with the arc of the cutout in line with the forward edge of the bearing.
Start shaping the edge with the router bit lower than you want to finish, and raise it slightly after each pass. Removing less material per pass will leave you with a smoother edge and be safer. It’s also important that the round base be rotated counter-clockwise while being machined; climb cutting in this situation will cause many problems.
Create cavities
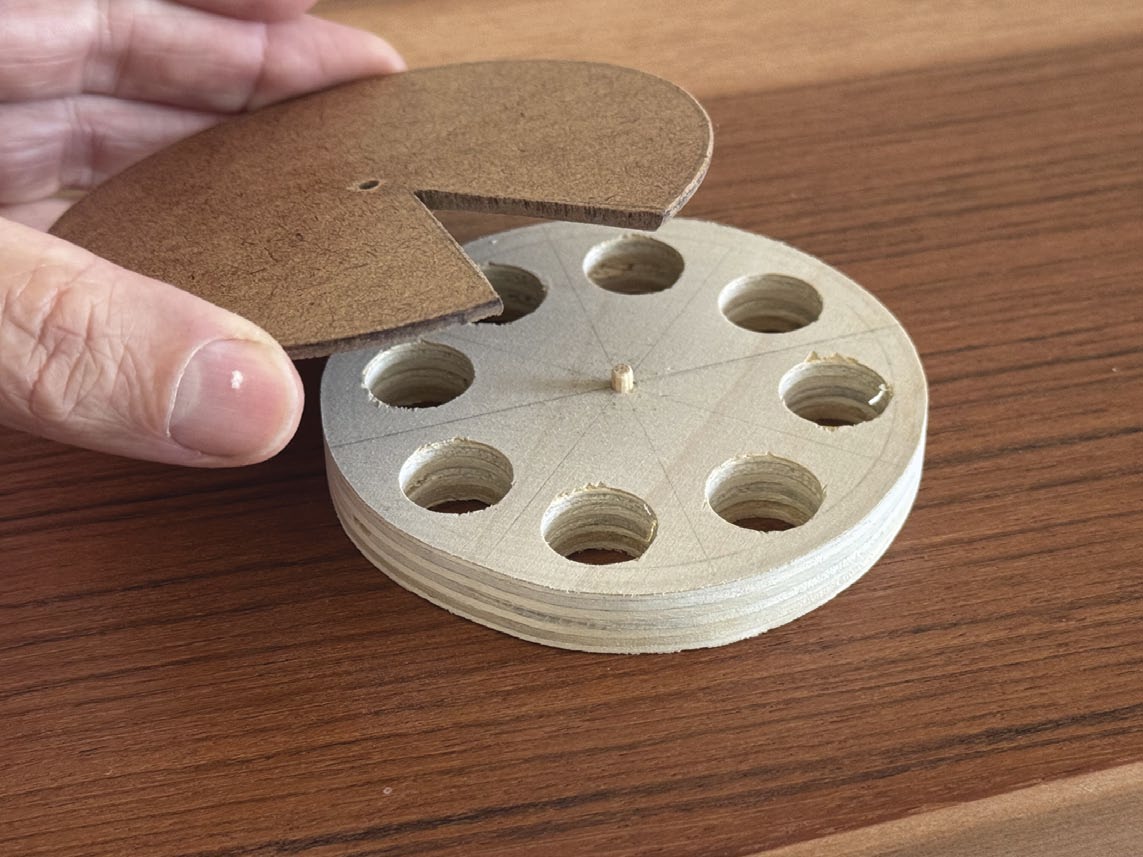
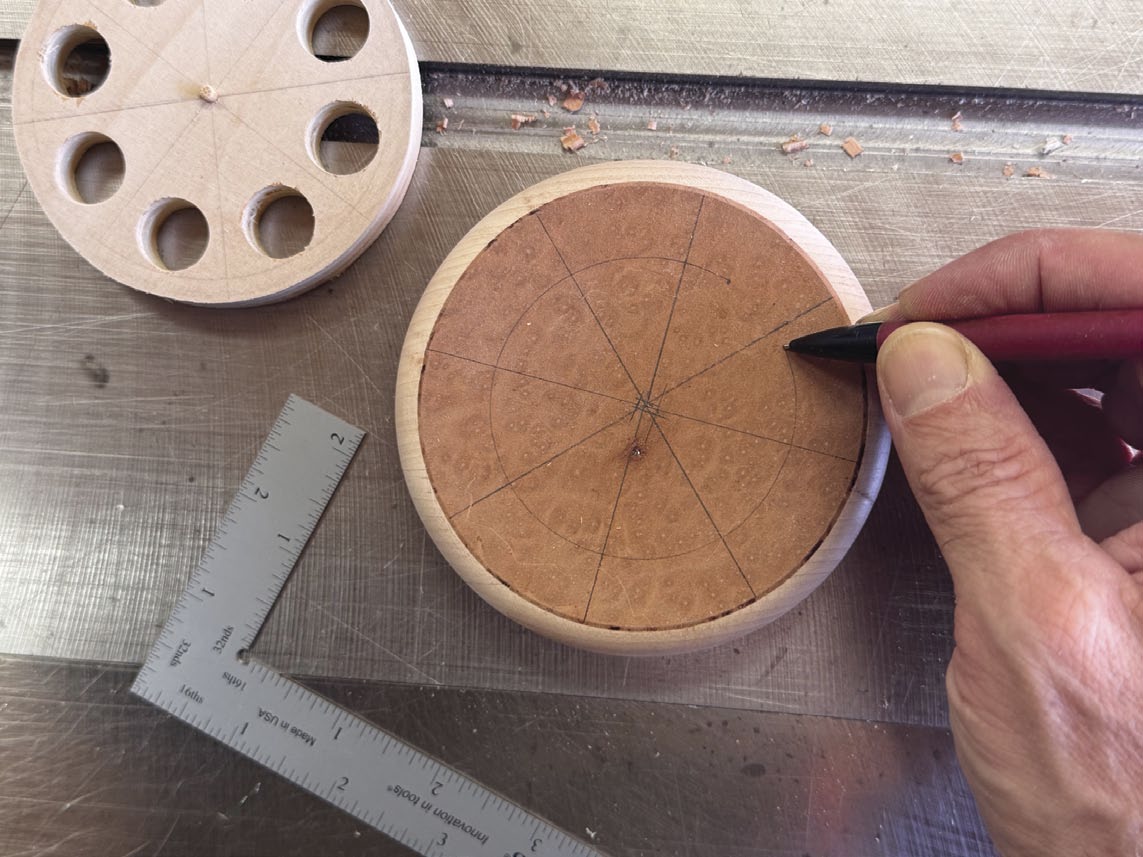
Lay out the eight sections on the top of the round base, then add a circle to locate the centre of each of the seven holes that needs to be bored. I used my finger against the edge of the base to guide the pencil while drawing the line, but a compass also works well. The intersections are the centre points for the seven holes.
It’s possible to bore holes only part way through the round base, but that leaves an uneven hole bottom that I didn’t like. Bore the 5/8″ diameter holes, completely through the round base, on the drill press, ensuring the base is clamped securely while drilling. I found I needed to drill slowly and clean the hole frequently while drilling, so the inner edges of the holes didn’t scorch. Remember to leave one spot without a hole, as there are only seven days in a week. The undrilled section can be seen as the beginning of the week. The user might even prefer to return the opening to this undrilled area after obtaining each pill every day, for a cleaner look.
Add a bottom
Because I drilled the holes completely through the base, a bottom was needed. The bottom also covers up the screw hole made when I attached the circle cutting jig to the blank. I opted for laminating three layers of cherry and maple veneer, alternating their grain directions, to create a thin piece of plywood. I liked the visual it added on the bottom of the edge.
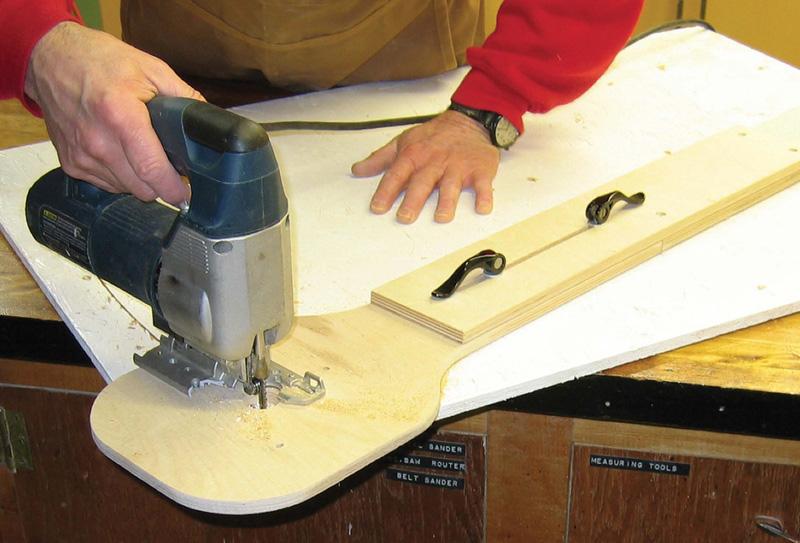
Once it was created, I glued it to the underside of the base. I trimmed it flush with a scroll saw, while the blade was tilted slightly, undercutting the edge of the bottom slightly. The important part is to not cut into the centre portion of the shaped edge, though cutting into the lower portion was fine, as it’s going to be further shaped in the next step.
More edge shaping
I chose a 25° router bit to shape the lower portion of the edge. This added a nice visual, while also made the small box that much easier to pick up and grasp. The last thing I want is for the user to drop the box while picking it up or while turning the box over to obtain the pill, ruining the proper weekly distribution of pills. If you don’t have a 25° router bit, either a 45° chamfer or another round over would work.
Using the same curved jig to guide the round base, I made multiple passes to sneak up to the final shape on the router table.
The lily pad top
At first, I considered a round top with a hole in it, centred over the cavities, to allow the pills to travel through. It would have worked fine, but lacked a more pleasing visual. The shape of a lily pad popped into my mind and I was very happy it did. I enjoy shapes from the natural world and this one was functionally perfect for this situation, too.
Again, flat sawn stock will work just fine, but I prefer the simpler look of quarter cut stock. It also tends to move less, which means the lid will stay flatter over the years. I ripped some 3/8″ thick strips from 6/4 stock, ensured the edges were square, and glued two 10″ long lengths together. Once this was dry, I cut the workpiece in half and glued the two halves together. Doing this in two stages is much simpler than doing it in one stage.
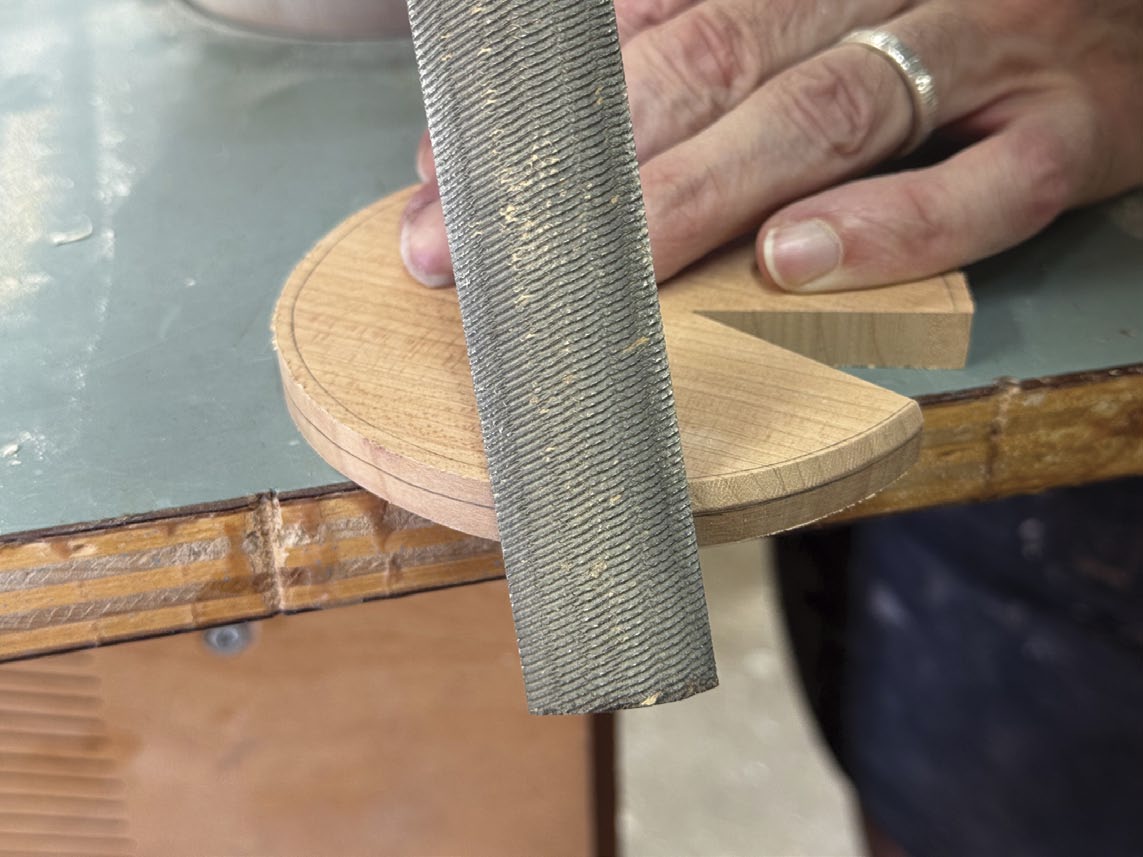
Once the glue was dry, I drew the shape of a lily pad on the blank and cut it out on my scroll saw. I used a file to rough shape the edges, so they were undercut by about 1/8″, then used sandpaper to further fair the edge.
Make it rotate
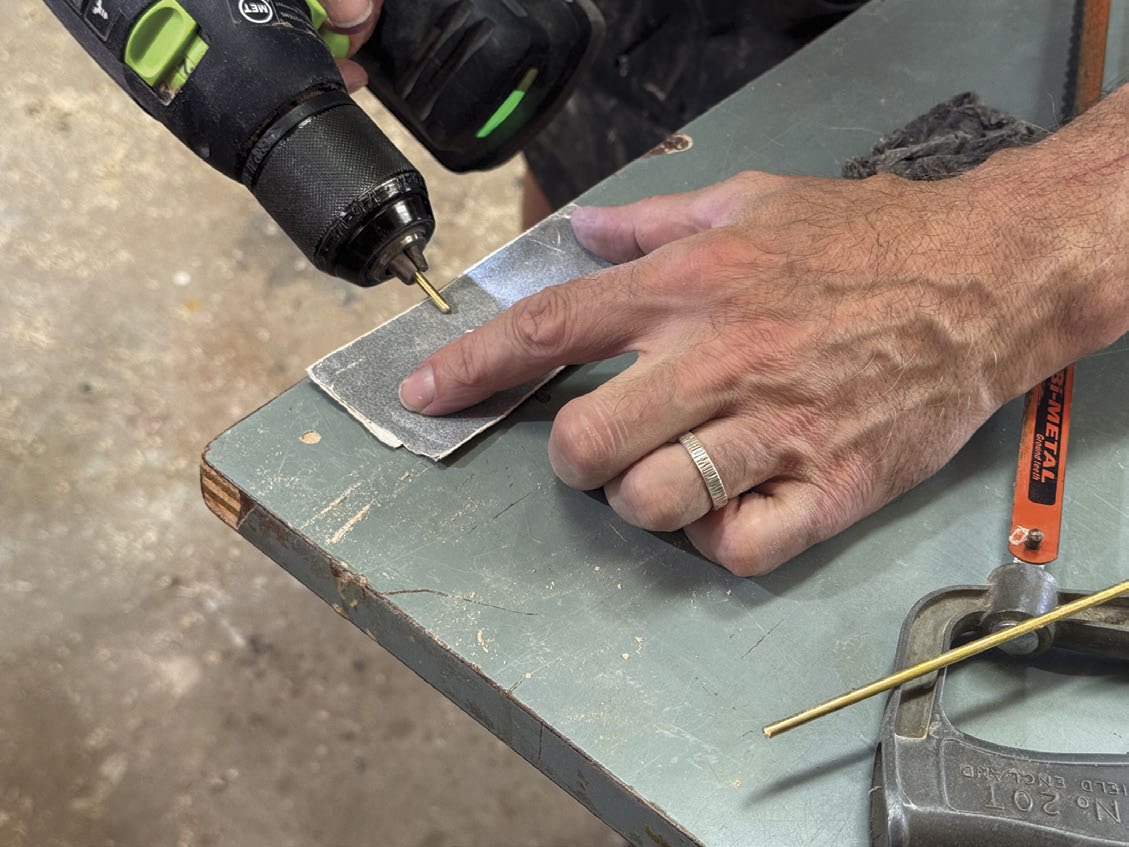
I used a 1/8″ diameter brass pin, secured in the centre of the base, as a pivot point. A hole in the underside of the top will make the opening in the lily pad top rotate around the series of seven holes. I drilled both on the drill press, then cut the brass pin to length. So the lid could easily be re-installed weekly, I rounded the upper tip of the brass pin by chucking it in my drill and using sandpaper, then steel wool, to remove some of the brass. The brass pin gets epoxied in place after a finish has been applied.
It goes without saying that you have to be careful not to drill the hole in the underside of the top too deep, or it will be visible from above.
Textured top
When it comes to adding texture to the upper surface of the top, there are many options. Testing out what approach you like best on a piece of scrap will help adjust your approach, especially if you’re new to texturing.
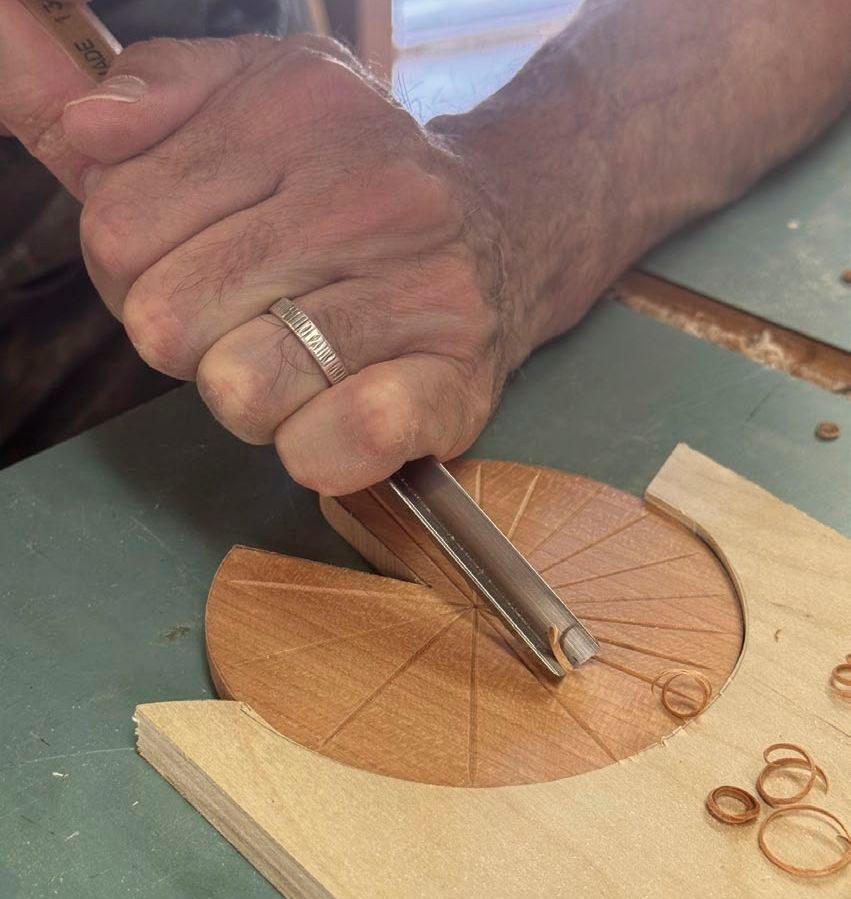
First, I sanded the surfaces of the top. Next, I added a few straight lines to guide me as I added a series of veins on the top. Finally, I used my rotary tool, equipped with a small burr, to add more texture. I created more dense texture towards the outer circumference of the lid, and less dense texture about 1/2″ in from the outer edge. Being patient during this process will help yield pleasing results.
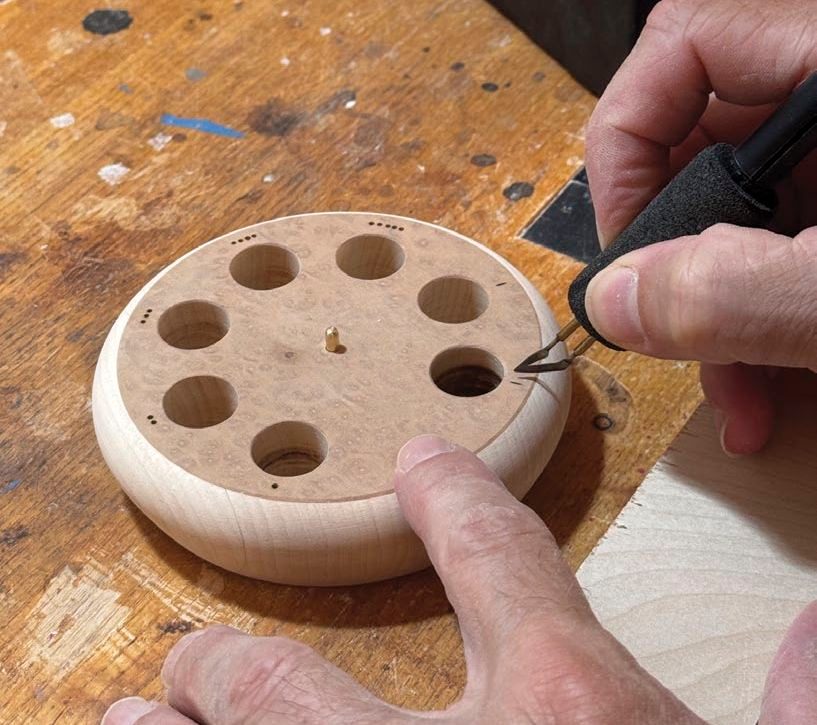
Days of the week
Though not needed, adding the days of the week to the box will help protect against missing a pill, or taking two on one day. The only trouble is there’s not a lot of room to do this. There’s no room to write out the day of the week, so some form of shorthand is necessary. An initial is possible; “M” for Monday, for example.
I didn’t like the look of just initials, so I considered Roman numerals, but my friend doesn’t know them well enough to be sure they’d catch a pill dose mistake, if one happened. I landed on adding a dot representing each day of the week, and a slash for each day of the weekend. This meant a single dot for Monday, five dots for Friday, a single slash for Saturday and two slashes for Sunday. Continuing with six and seven dots for the weekend was an option, though at that quantity they’re hard to quickly recognize.
Time for a finish
With the surfaces all sanded and prepped, it was time to decide on a finish. Usually I know what type of finish I’m going to apply before starting a project, but this time I hadn’t given it much consideration.
I almost went with an aerosol spray polyurethane to coat this box, but at the last minute opted for a hand-applied shellac finish. Spray cans are great for small projects, but I like the depth and feel of a shellac finish, too. I wiped on a few quick coats, let it dry for about 10 minutes, then reapplied a few more quick coats. After another 10 minutes I was able to wipe on a couple more coats to all the surfaces and give it an hour or so to completely dry.
At that point, I gave all the surfaces a light sanding and started the process again. I find the more coats, the longer it takes for each coat to dry. Although shellac dries very quickly, if the previous coat is at all sticky while wiping the next coat on, give it more time to dry.
Once you’re happy with the look of the finish, you can use #0000 steel wool and wax to buff the finish to your liking.
Photos by Rob Brown
Simple Mock-Up
Brown spent about 20 minutes on this basic mock-up, which allowed him to work out some of the design and dimensional details.
First Cut Isn’t the Deepest
With the circle cutting jig screwed to the underside of the base, Brown machines a shallow first pass. Next, he can remove the circle jig and cut away much of the waste.
Remove Some Waste
Notice how Brown left the round workpiece attached to the rest of the blank. This is so the small workpiece can still be secured to a worksurface while machining it. Removing some of the waste now will make it easier to rout the round base to shape.
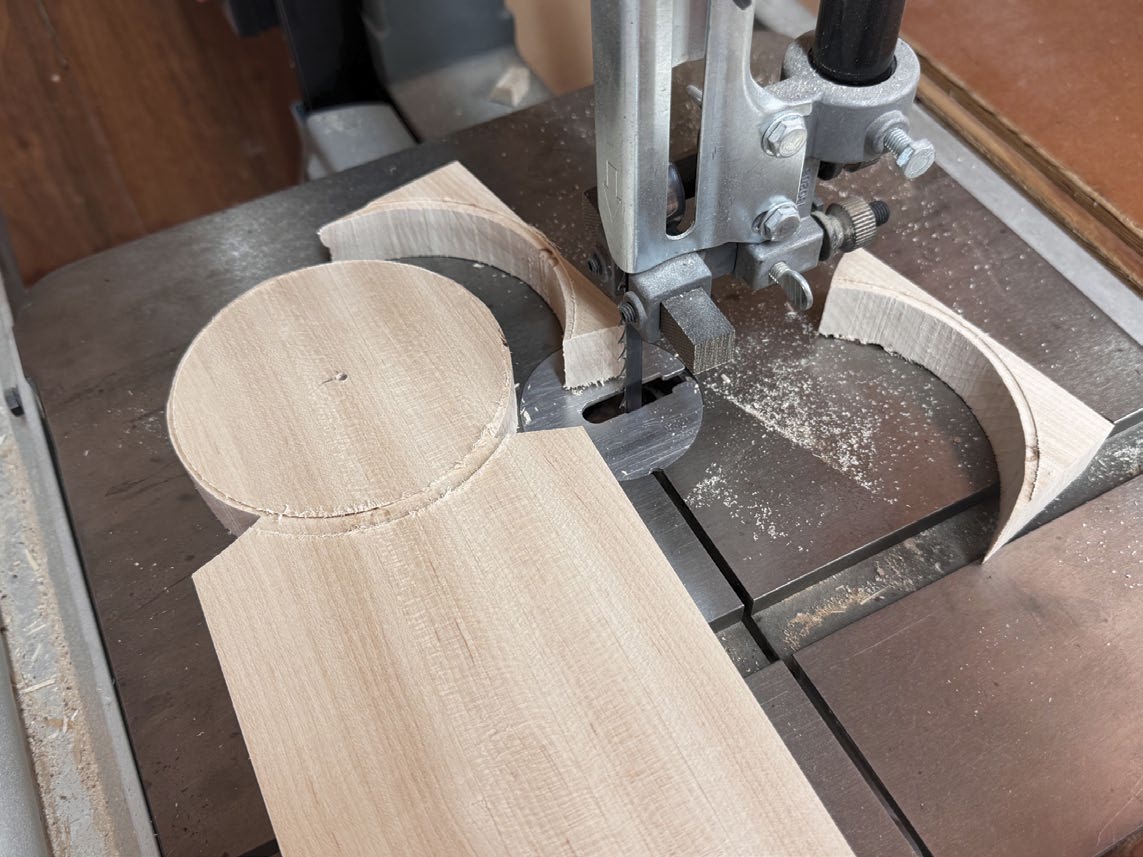
Almost Done
A router can be used to cut through the vast majority of the material, though the last 1/16" or so can be cut on a bandsaw. This makes the routing operation safer.
Round Over the Edge
Brown made a simple jig, with a curve cut into its end, to assist with routing a round over on the edge of the round base. While machining the round over, it’s important to rotate the round base in a counter clockwise direction to avoid climb cutting.
Add Intersections
You can either use a compass to mark the locations of the cavities on your base, or do as Brown did and reference your finger on the outer edge of the base and mark the circle.
Glue Up the Top
Although you can use flat sawn material for the top, Brown opted to glue up thin slices of quarter sawn pieces. First, he glued two longer sections together, then he cut that lamination in half and glued those two halves together.
Ease the Edge
A file will help you ease the lower perimeter of the top, leaving you with a more refined shape.
Rounded Tip
Once the brass pin has been cut to length, chuck it in a drill and round the tip on some coarse sandpaper. Like sanding wood, go through progressively higher grits, then use steel wood to smooth and buff the brass pin.
Vein Lines
Brown adds texture to the top, starting with carved vein lines radiating out from the centre point of the lily pad lid.
Days of the Week
Although there are a lot of approaches for indicating what day of the week each cavity represents, Brown chose to add a series of dots and slashes with his pyrography tool.
Wipe It On
Shellac can easily be applied to a small project like this box, though many other finishes would also work well. Multiple coats of shellac can be hand-applied in one day, then buffed to your liking with #0000 steel wool and wax.
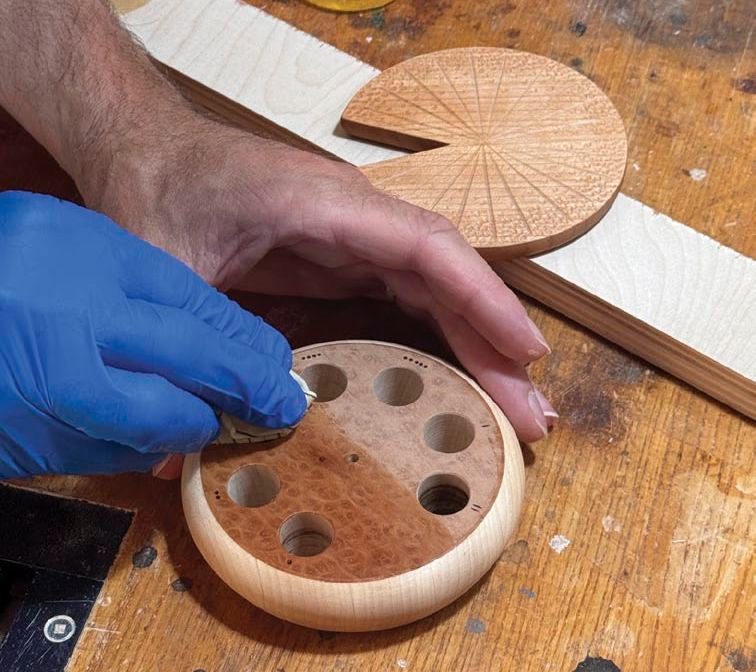
Illustration by Len Churchill
[illustrations_gallery]