PROJECT
Customize a fireplace surround

Scott Bennett

Find more Home Improvement projects
Making a fireplace surround is well within reach for most woodworkers. It can be tailored to your home and built to accommodate any type of gas fireplace insert you’d like.
My wife and I wanted to add a fireplace to our living room for more ambience and character. We discovered wood burning and gas weren’t an option for the wall we had in mind, so we started looking at electric fireplace options at furniture and hardware stores. Unfortunately, we weren’t happy with the look of the flames in the firebox or the design of the mantels we saw. We turned our focus to fireplace stores and were pleasantly surprised with the quality of electric fireplace inserts that were available. We found a fireplace insert we liked, so I designed a mantel that had much more character than what we saw in retail stores.
The design of the fireplace mantel was inspired by the Cape Cod style, where white painted interior woodwork is common, along with clean lines. It’s designed to work with a Dimplex electric fireplace insert. It took about four versions of scaled drawings to come up with this design. I used birch plywood, poplar and stock mouldings. You may not find the same mouldings at your local retailer, but something similar will work. I made the crown moulding on the table saw. I also purchased some quartz door jamb for the fireplace surround (space between the fireplace insert and the mantel).
I’m not including precise measurements in this article, as the dimensions and proportions are going to be different for everyone. Your tastes may also differ.
You may find it’s a lot easier to build this project after making a full-sized drawing on a large piece of paper, a large piece of cardboard or a piece of sheet good. You can take measurements directly off the full-sized drawing as you build, increasing clarity and decreasing mistakes.
Important warning: Make sure you comply with building codes in your area to ensure the mantel is far enough away from the specific fireplace unit you’re using. The fireplace insert we used is an electric fireplace with zero clearance and the mantel is separated from the fireplace with quartz stone.
Customize a fireplace surround
Building the foundation
The fireplace insert plugs into the wall for power, and fortunately there was a plug behind the location we chose for the fireplace mantel. The first step was to build a platform to set the fireplace insert on, at the correct height, using 2x8s and plywood. The second step was to frame the structure to support the fireplace mantel shelf and the quartz surround on the front, using 2×4s and plywood. I also made a black plate for the bottom of the fireplace insert to make the fireplace box appear larger.
I waited to cut and install the quartz surround until I had the fireplace mantel built, to ensure I measured and installed the pieces correctly.
Four sections
The mantel is designed in four separate sections so it could be moved easily, as I would be transporting it to another workshop for spray finishing. It’s also easier to build and handle separate pieces, especially if you’re working alone.
The first section to be built is a header for directly above the fireplace. Next, there are two column sections, one on either side of the fireplace. The fourth section is the mantel shelf, the uppermost section. The header is set behind the side columns, and because of that, the columns have a filler strip in them so the mantel will rest snug up against the quartz surround.
Build the header
The most challenging part of this build for me was the header, because of the curved shape. I decided to install the panels after I built the frame by rabbeting in the panels from the back, which simplified the build. I also decided to use butt joints for the frame, as I would glue in plywood panels to provide the structural support, and this also simplified the build. The inside of the project isn’t visible, so simplified construction techniques like these are possible.
The first step was to cut the curved bottom rail. I attached my router to a trammel – two pieces of plywood screwed together that extends 8′ long. This allowed me to cut an arc with the router by installing a screw at the opposite end. Fortunately, my workshop has a plywood floor which was the perfect work surface to secure the router and the parts to.
I secured a sacrificial board to the floor and then mounted a 3/4″ × 4-1/2″ poplar board to it to cut out the bottom rail. I blocked up the trammel to the right height and secured it to the floor 6′ away from the cutting edge so I could cut the radius for the bottom edge of the bottom rail. I used an upcut spiral router bit to cut the arc in a few passes, but a standard straight router bit will work, too.
I wanted to keep as much material intact on both ends of the lower curved rail as possible, so I opted to stop the curved portion on the top of the lower curved rail immediately after the rail extended behind the vertical member of the side column. This would give me a small amount of extra material to screw through, fixing the header to the columns on both sides. In hindsight, this was likely more work than was needed. It took some careful planning to stop the arc on both ends of the upper edge of the lower curved rail and it really didn’t give me that much extra material. The images in this article show my process, and I’ll take you through the steps I took, but you’d be fine not stopping the curved upper edge on the lower curved rail.
With this arc defined on the bottom rail, I then marked out where to stop the arc on the top edge of the bottom rail. I then extended the length of the trammel to cut a slightly larger radius into the top edge (the pivot point stays in the same location). I carefully started and stopped the cut on the top edge so the straight portion of the rail would remain intact. To make these radius cuts, make multiple passes with the router. Removing the whole thickness in one pass would not only leave a rough edge but also be dangerous.
I then cut the remaining parts of the frame. I started by marking out the location of the stiles (vertical parts between the top and bottom rail) on the top rail. I then cut the stiles longer than needed, as I would need to cut curves on one end. I set out the top rail and the stiles on the floor, ensuring all the stiles were square. I then laid the curved bottom rail on top in the location I needed. This allowed me to trace the curved cut line on the stiles.
I cut the curved ends of the stiles on the bandsaw and dry fit the frame. Once I was happy with the fit, I applied glue to the parts and clamped them up. Yes, this is very weak joinery, but that’s fixed in the next step.
Add dowels for strength?
Although I just used butt joints to temporarily join the header frame, then added the routed rabbets in the next step carefully, there’s also nothing wrong with boring a hole across the width of the joint and inserting a length of dowel rod to further strengthen the joint. When the glue is dry, just flush trim the dowel with a hand saw and sand it flush. As I mentioned previously, most of the surfaces of this project won’t be visible, so you have some flexibility when machining some of the joints. And even if a few of the joints are visible, sanding the joints smooth and adding a few coats of paint will often cover up any signs of joints. That’s one of the nice things about paint-grade projects.
Rout rabbets
Once the glue dried, I cut a 1/4″ rabbet, 1/2″ deep along the inside edge of each of the panel openings. I did this carefully to avoid dislocating any of the butt joints on the frame. If you added dowels across these joints, you don’t need to be as careful while machining the rabbets.
I then traced the shape of the panel openings on 1/2″ plywood. I added 1/4″ to the perimeter and cut out the parts, including rounding the corners so they would fit in the routed rabbets. Once all the panels were fit, I glued and clamped them in place. It may seem odd to glue panels in place, however, these panels won’t move with seasonal changes in humidity, and they provide the structure for this simplified frame and panel design.
Build the columns
The columns on either side of the fireplace mantel form the vertical visual interest. I designed them to have a large panel with a smaller panel on top. These are divided by a piece of shingle trim. The bottoms of the columns have a baseboard detail using a 3/4″ board and baseboard cap trim – typical of what’s found in historic homes.
I built the front of the columns the same way as the header. I cut out the frame parts, glued them together, routed out the rabbets, cut panels to insert into the rabbets, and glued in the panels. With the panels assembled, I then added the sides, which are made of 3/4″ birch plywood. I glued these together using biscuits, allowing the front panel to extend slightly beyond the surface of the plywood. It’s important that this is glued together square. After the glue dried, I used a plane and a card scraper to level out the transition between the front panel and the plywood. Once primed and painted, this seam becomes invisible.
I also attached a filler strip where the front panel of the columns touch the fireplace surround. This is simply a 3/4″ × 3/4″ piece of solid wood, which also provides support for the header panel to rest on. Next, I added the shingle moulding at the top of the filler strip, around the front and outside of the column. I then added the baseboard (6-1/2″ wide piece of plywood) and the base cap trim, wrapping it around the column from the filler strip to the outside of the column.
Assembling the columns and header
With both columns built, it was time to attach the header. I stood up the columns, set the header on the filler strips and clamped it in place. Once I lined up the parts, I simply screwed the header into the column front panel with two 1-1/4″ screws on each side.
Build the mantel shelf
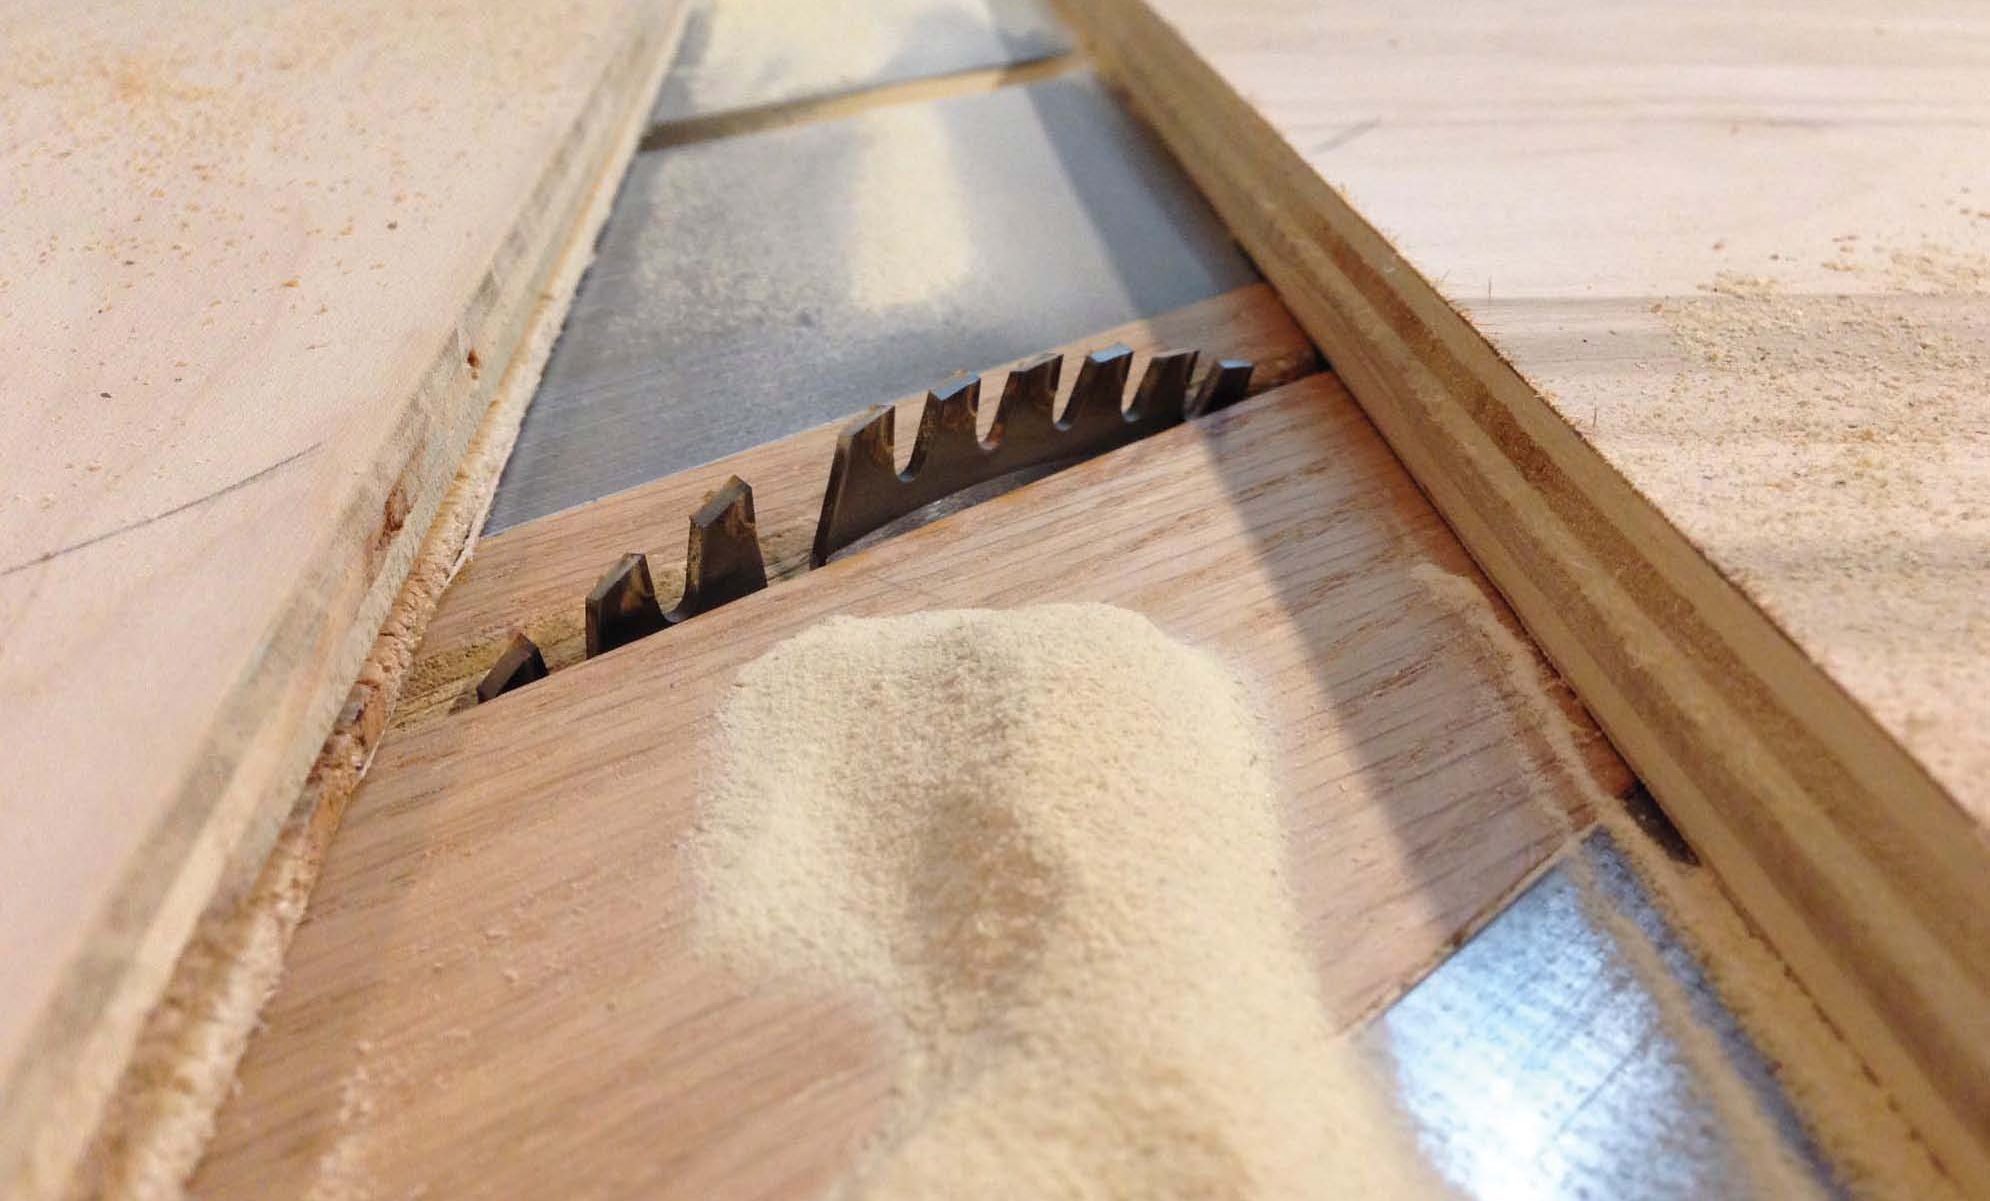
For this project, I decided to make my own 3-1/2″ cove crown moulding on the table saw. I’ve done this before and wanted to get more experience with it. If you haven’t seen this done before, it’s a process where the board is pushed through the saw on an angle to the blade, scooping out a curve. There are safety risks to this and it requires guides clamped in place. I suggest doing research if this is something you’d like to try yourself.
I cut the mantel shelf larger than needed, as it’s easier to get the measurements right later. I set the oversized shelf on the columns and header, then centred it. I measured 2-1/2″ down on the columns and marked a line. I held the crown moulding in place, to the line, and marked the location on the underside of the mantel shelf. I added 1/4″ to the perimeter of the mantel shelf and cut it to size. I prefer to mark the size of parts when held in place, especially after reading Norm Abram’s book “Measure Twice, Cut Once”. He says, “Never measure unless you have no choice. Instead, base your marking and cutting on the actual situation.”
I finished the edge of the plywood with iron-on birch edge banding. I also cut glue blocks for attaching the crown moulding to the mantel shelf (not the columns). As I mentioned before, I needed to transport the fireplace mantel for spray painting, so the mantel shelf is designed to have the crown moulding attached to it. The joint between the crown moulding and the columns isn’t visible, so there can be a slight gap. I laid out the crown moulding and secured it in place with the glue blocks and some brad nails.
Finishing the parts
With the build complete, it’s time for the finishing process. I sanded down all the surfaces with 220 grit sandpaper. I rounded the edges slightly by hand so they felt nice to the touch. This also helps prevent wear, as sharp corners are more susceptible to the finish chipping off.
I took this to a professional refinishing shop, where I was learning how to spray finish. I sprayed two coats of primer, followed by four coats of paint. I inspected and sanded each coat before applying the next. A sprayed finish is superior to a brushed or rolled finish, so it was worth the extra design effort to make sure I could easily transport the sections. The finish has a beautiful satin sheen to it that looks amazing when light is reflected on it.
Installation
For the installation, the back of the columns and the back of the mantel shelf needed to be scribed to the wall. Before I scribed them, I had to add the quartz surround. I started by assembling the base of the fireplace mantel (columns and header), then pushed them to the wall. I marked out the location for the quartz door jambs, then carefully cut the parts on a tile saw. This was a little unsettling, as I’m not used to cutting stone and I didn’t want to ruin a $130 piece.
I attached the stone to the framing with a generous amount of construction adhesive. I was careful to ensure the pieces were plumb, as the fireplace mantel needs to sit against them and this seam would be visible.
To scribe the fireplace mantel, I stood it in place and made sure it was plumb. I measured the shortest distance between the filler strip on the column and the quartz. I then scribed a line that distance on the sides and top with a pencil. I cut close to the scribe line with a jigsaw and then removed the remainder of the material with a belt sander. When sanding to a scribe line, I put a slight back angle on the edge so the leading, visible edge is what touches the wall, without interference from anything behind it.
I attached the bottom of the fireplace mantel to the frame on the inside by toe screwing it. Then I cut a 2×4 to length and mounted it to the wall at the back of the fireplace mantel to support the mantel shelf. This also provides a location to attach the fireplace mantel at the top with a screw from the outside as it is hidden by the crown moulding. The last step was to apply a few dabs of construction adhesive to the top of the fireplace mantel and 2×4, and set the mantel shelf in place.
The final step was to plug in the fireplace insert and slide it into the opening. The flanges on the sides and top overlap the quartz surround. I added the additional black panel below the fireplace insert. This fireplace really adds the character and charm we wanted in our living room and we’re pleased with how it turned out. It was a fun project to build and the end result was very rewarding.
Photos by Scott Bennett
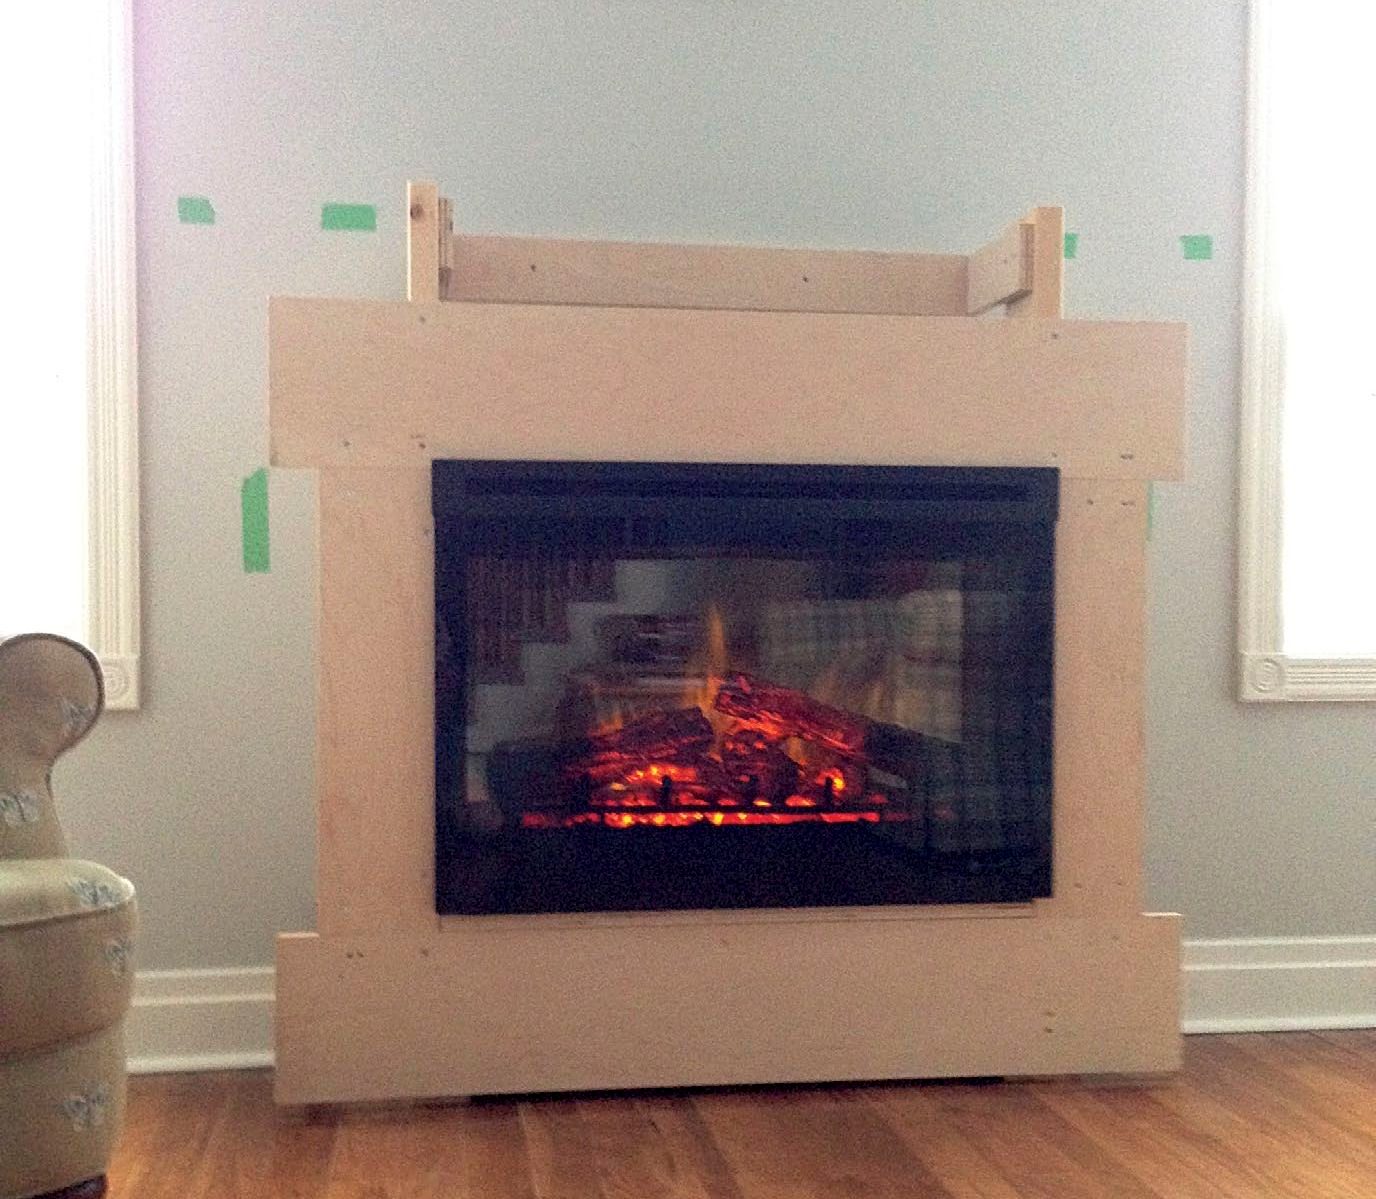
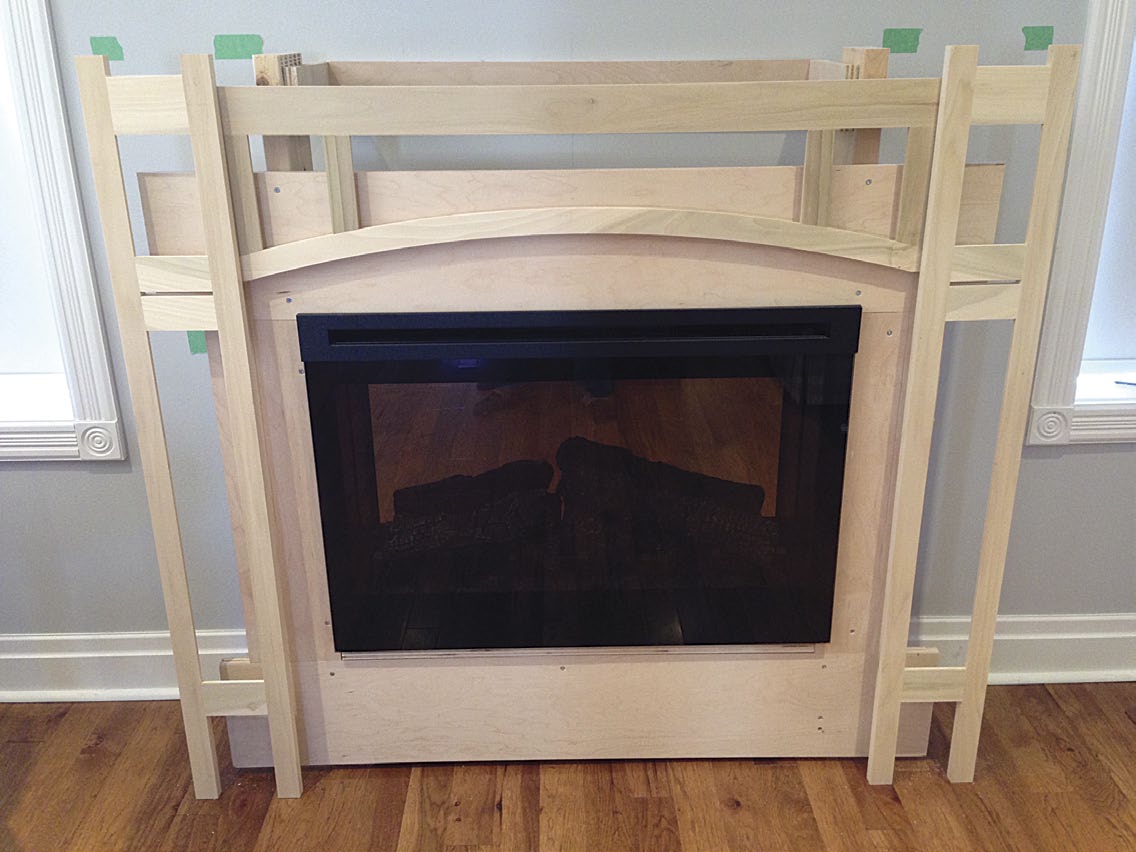
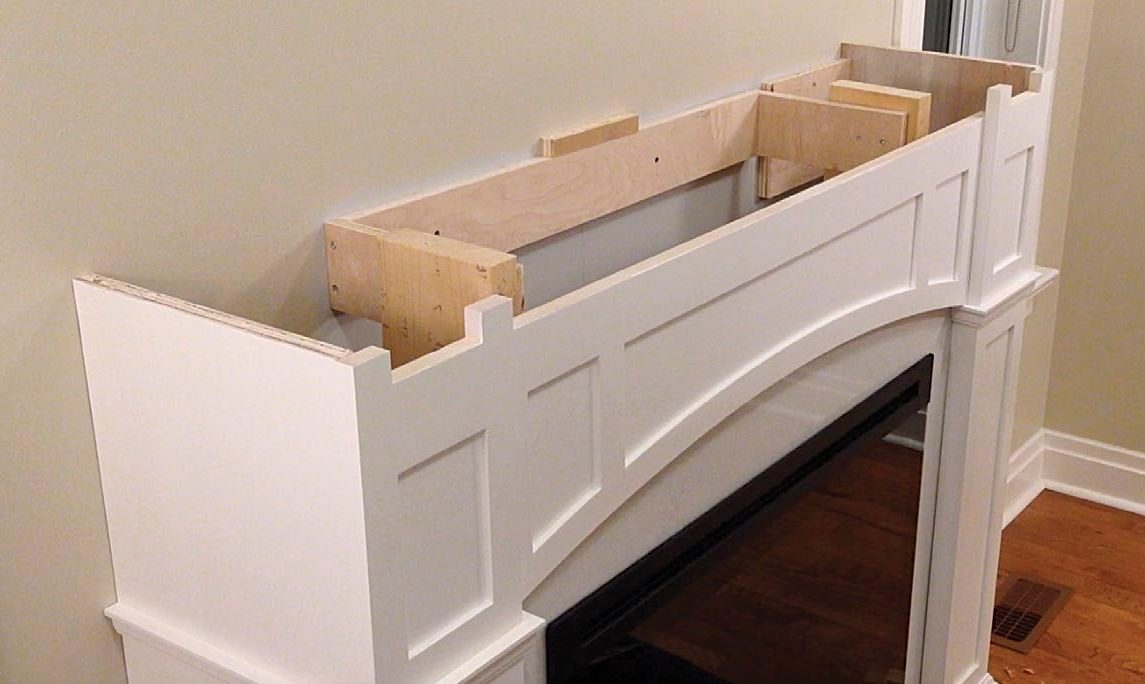
Frame It Out
Before the fireplace surround was made, Bennett framed the area so he could install the fireplace to the wall down the road and install the quartz to the area immediately between the front of the insert and the inner edges of the surround he will build.
Router Trammel
In order to guide the router in an accurate arc, Bennett used a long piece of plywood. He didn’t have a piece that was long enough, so he attached two pieces together.
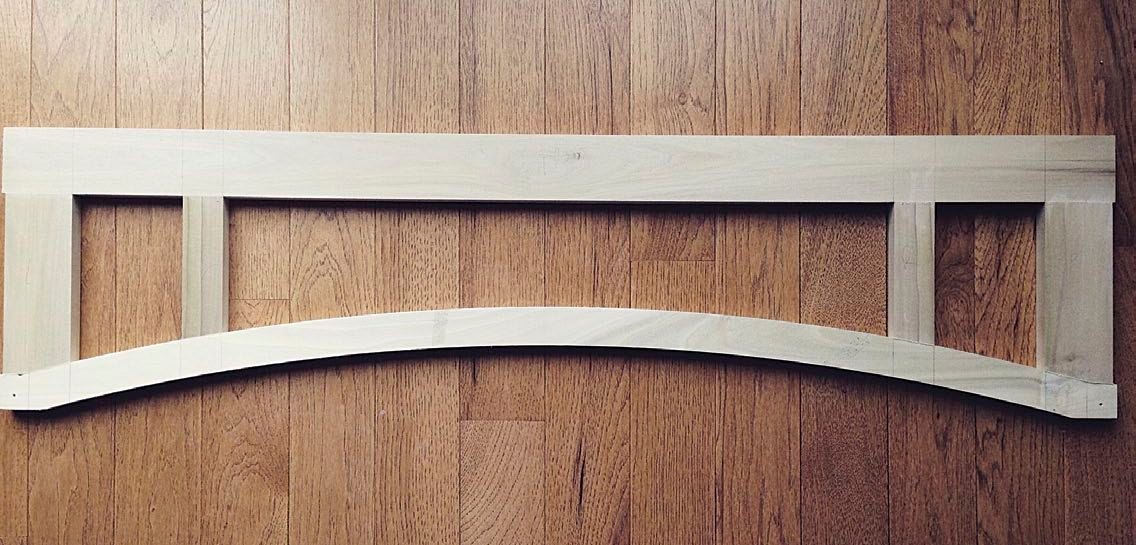
Header Frame
Here, the header frame is complete. Next, a router needs to be used to add a rabbet in the rear face, surrounding all the panel openings, so panels can be cut to fit those openings.
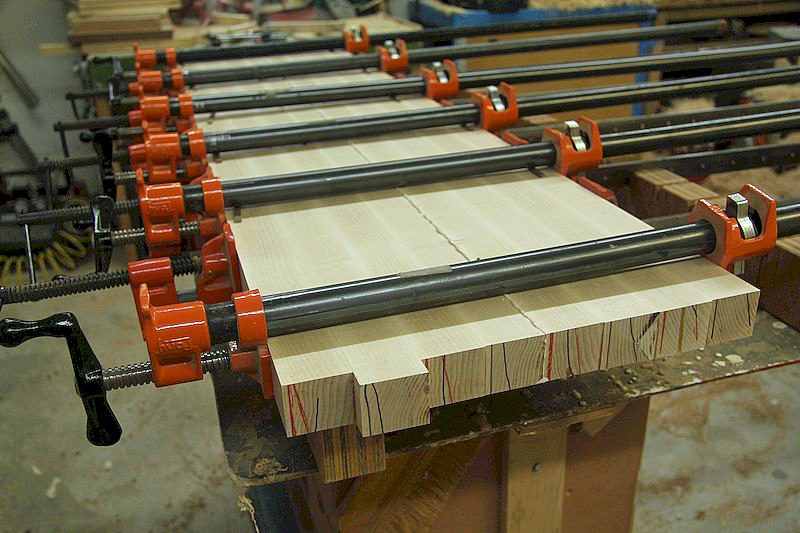
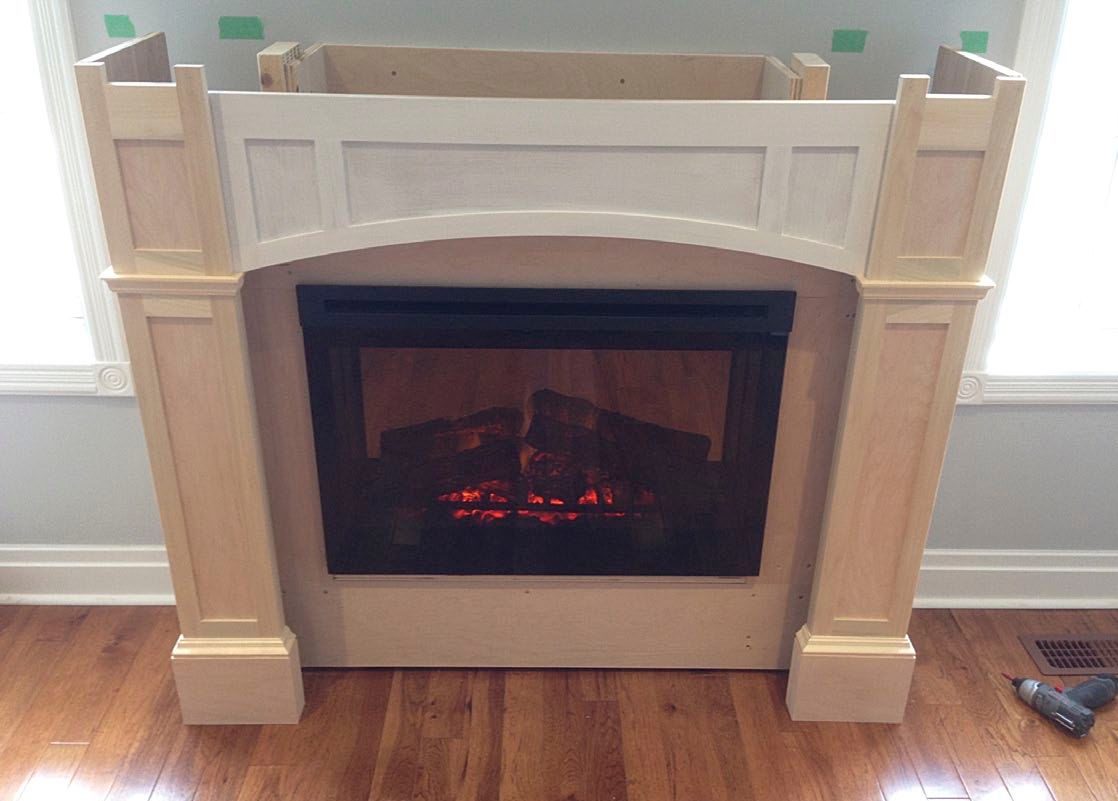
Lots of Frames
With the frame sections complete, the panels can be cut to size and installed. At this stage it’s a good idea to bring the assembly into place to make sure everything is fitting nicely.
Panels Complete
With the panels installed, this project is starting to come together nicely.
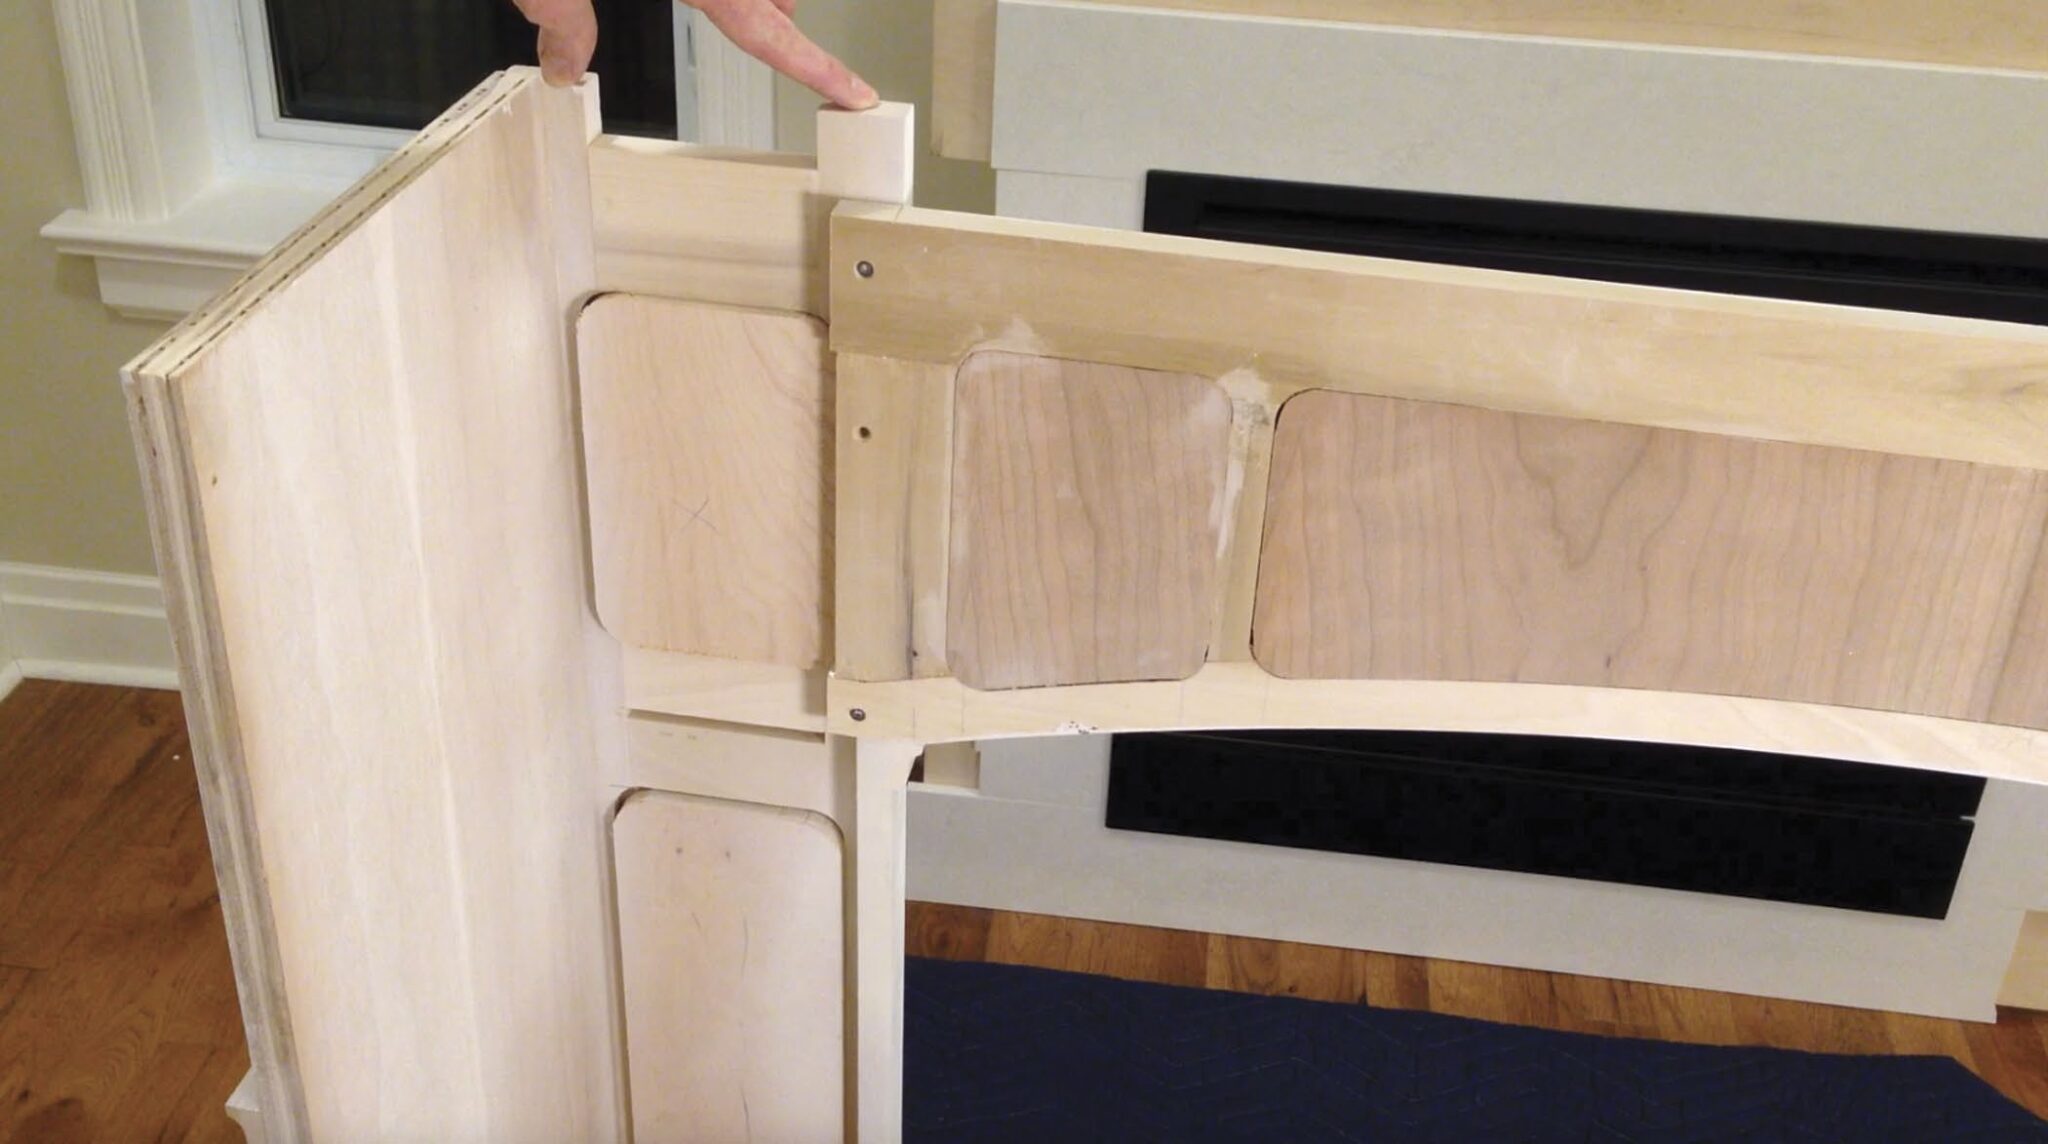
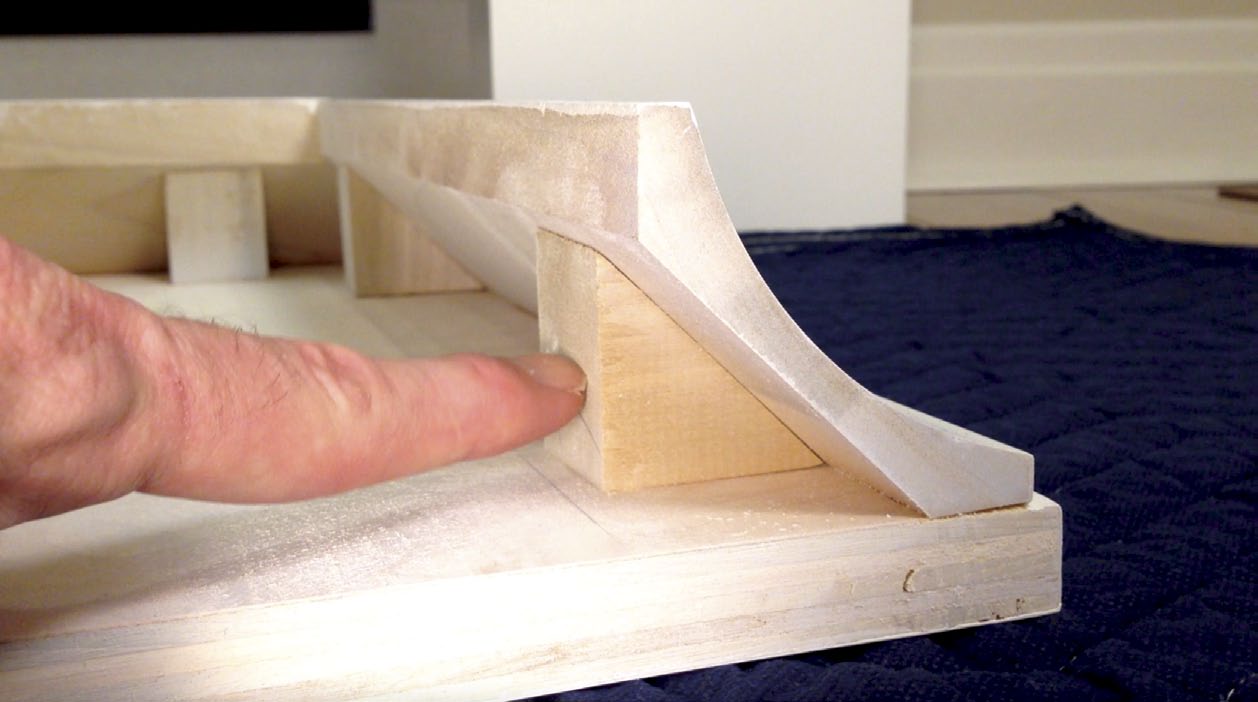
Inner Details
Here, you can see the curved lower front rail, and how it mates with the vertical stile. He shaped the curved rail to have a straight section on both ends, but that’s not necessary. You can also see the 3/4" × 3/4" filler strip that’s attached to the vertical edge of the inner face of the column.
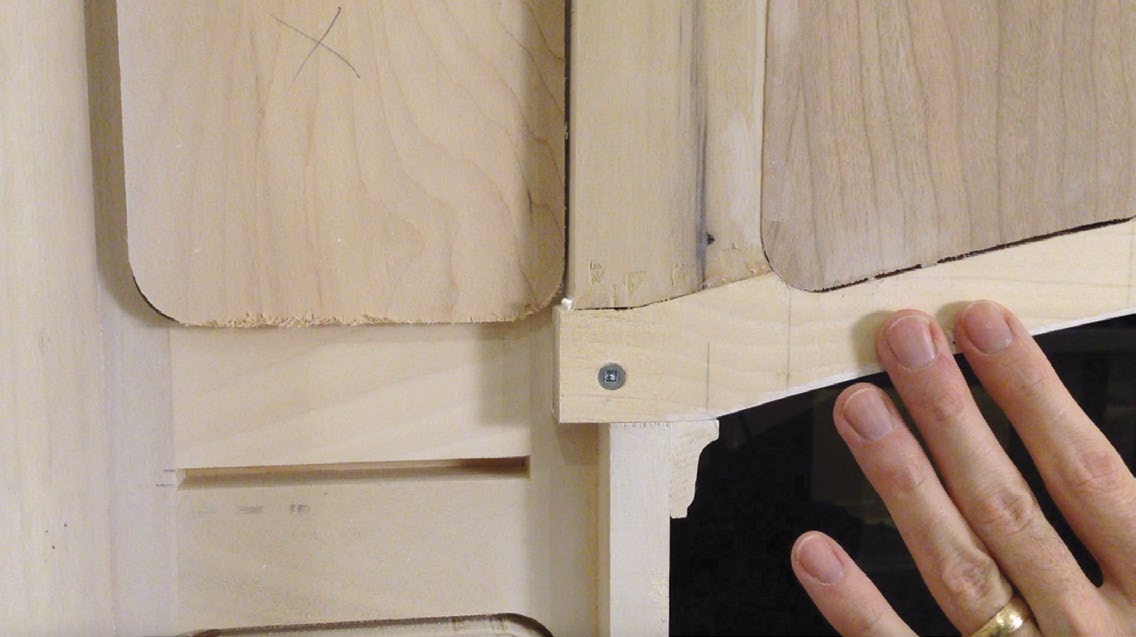
Imperfections Are Fine
You can see how the header mates with one of the columns, and just gets screwed together. The gaps across the top will be covered by the large cove moulding. The small gaps between the panels and the frame openings will also never be seen.
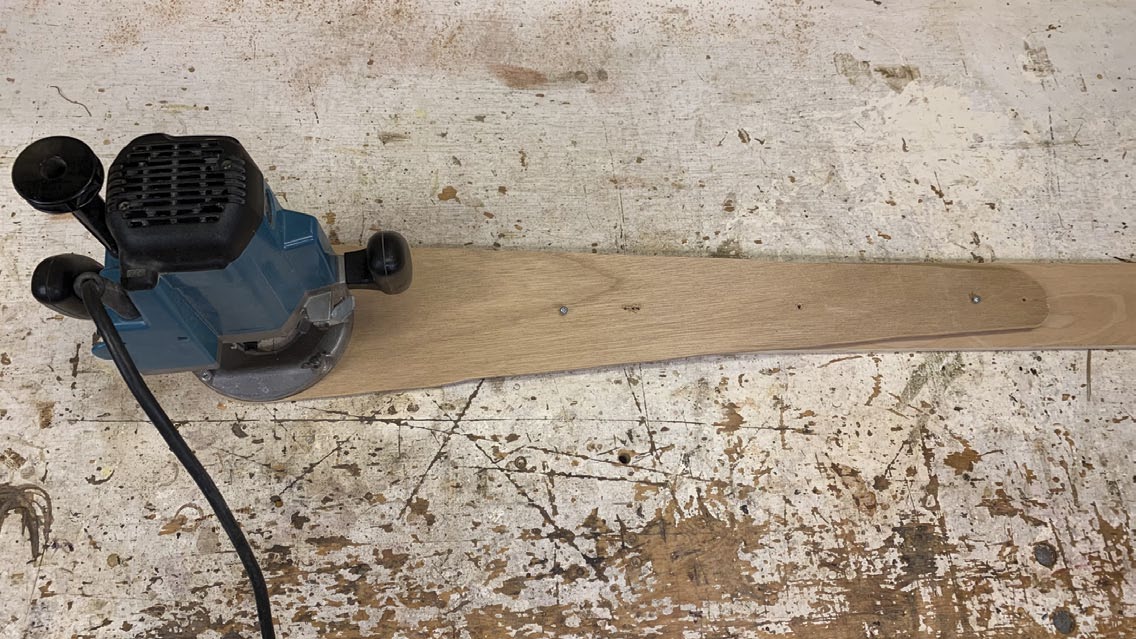
The Last Pass
Bennett made his own cove moulding by clamping two boards to his table saw surface, the same distance apart as the workpiece he’s going to add the cove to. He sneaks up on the final cove depth with multiple small passes. The blade is shown at the height of the final pass.
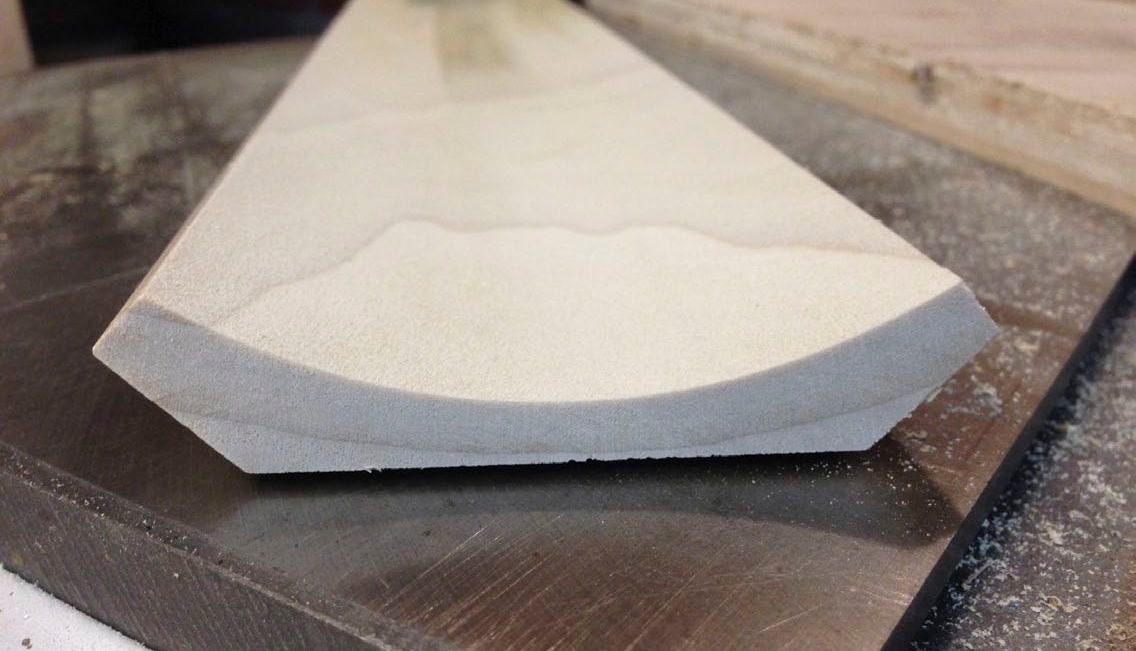
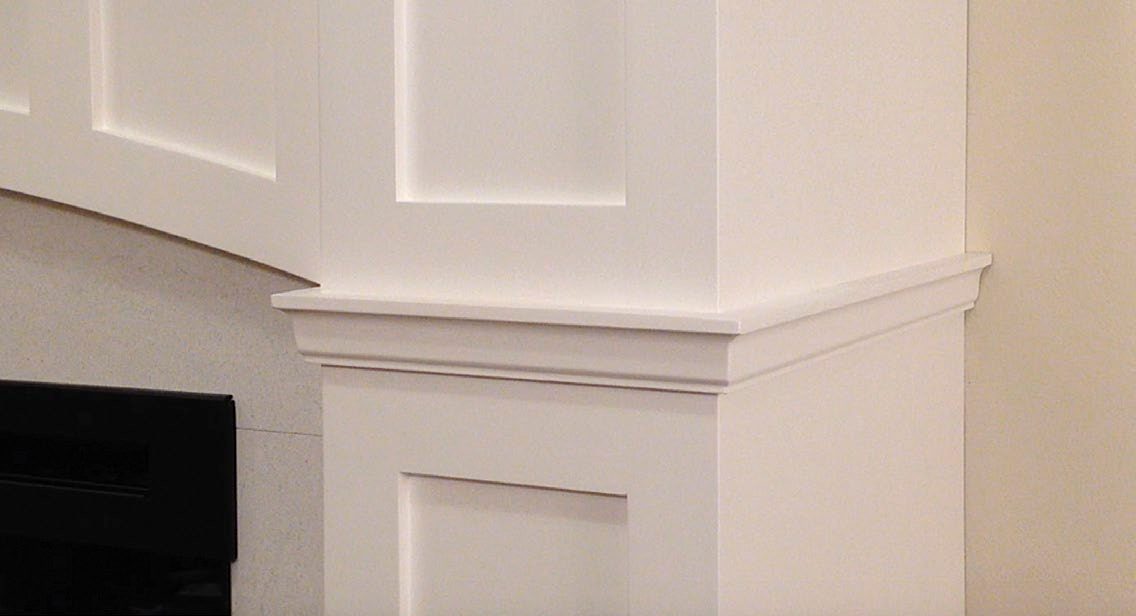
The Finished Cove
An even pass, at consistent speed and pressure, will provide a fairly smooth finish. It will still have to be sanded smooth, though, before being finished. It’s often easiest to machine the cove first, then trim the edges to final width and angle.
Shingle Mould
The shingle mould gets fixed to the assemblies so its upper edge is at the same height as the lower end of the curved rail. They’re just mitred and glued in place.
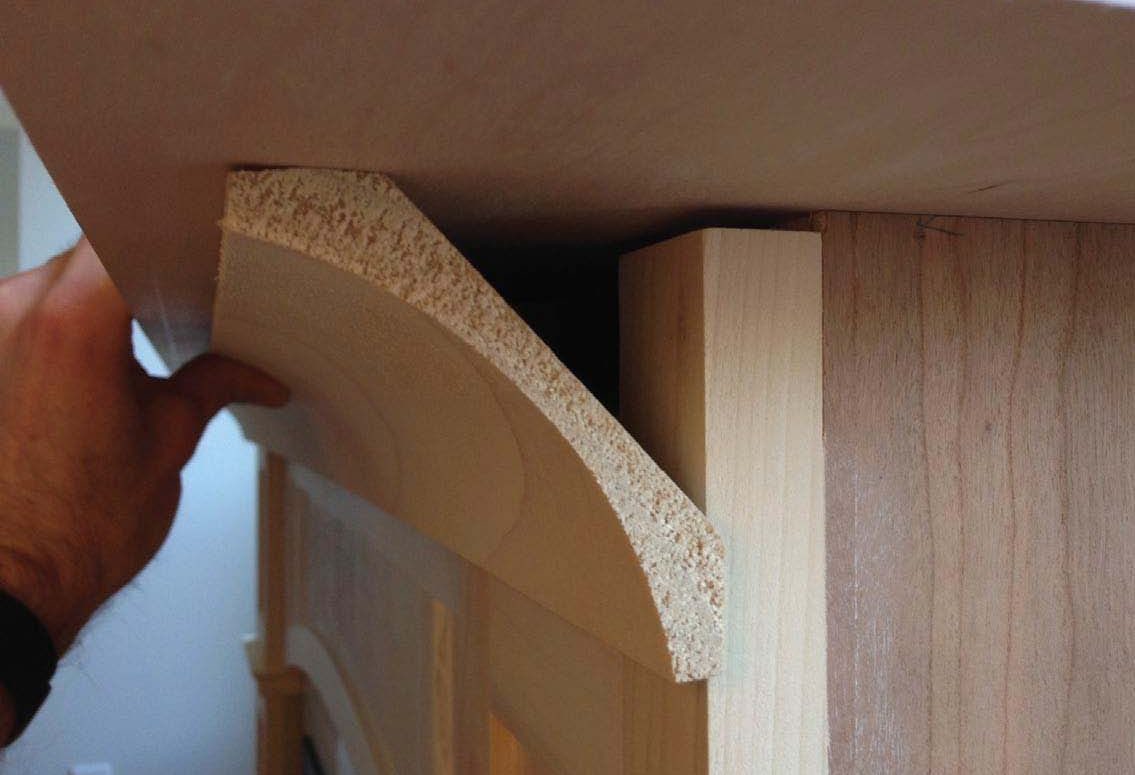
Put It in Place
Bennett positioned the cove moulding in place and marked where the edge of the moulding would end up. This allowed him to locate the moulding on the underside of the top panel.
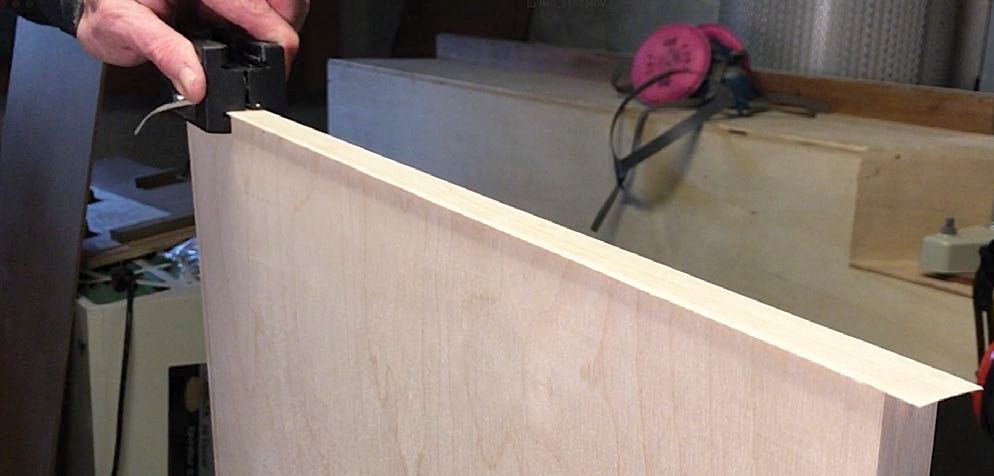
Easy Edging
Ironing on edge tape, then trimming it flush, is an easy way to prepare the edges of any exposed sheet goods for a finish.
Crown Blocking
Blocks, cut with a 45° angle, get glued into place to keep the cove moulding secure for good.
One Final Check
With all the parts made, it’s best to check how they all fit into place with one another. It’s easier to make adjustments now, as opposed to after a finish has been applied.
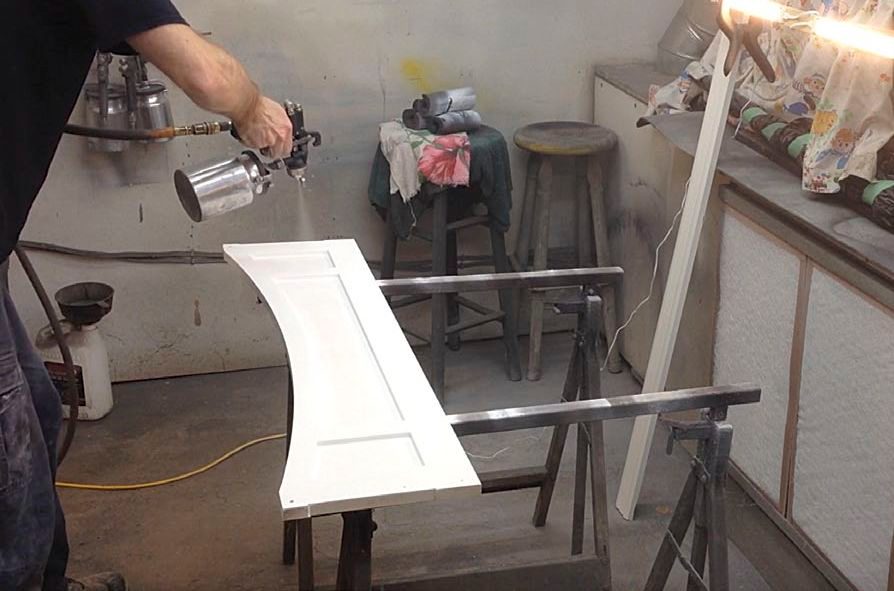
A Nice Finish
Spraying on a finish will leave you with a nice, even surface to enjoy for years to come. If you don’t have access to spray equipment, it’s also possible to brush on a few coats of protection.
Scribe to the Wall
The rear edge of the columns should meet the wall with minimal gap. The section of the column that will be hidden by the baseboard doesn’t have to meet the wall snugly, though the baseboard will have to be cut away. You can alternatively scribe the lower edge of the column to the baseboard.
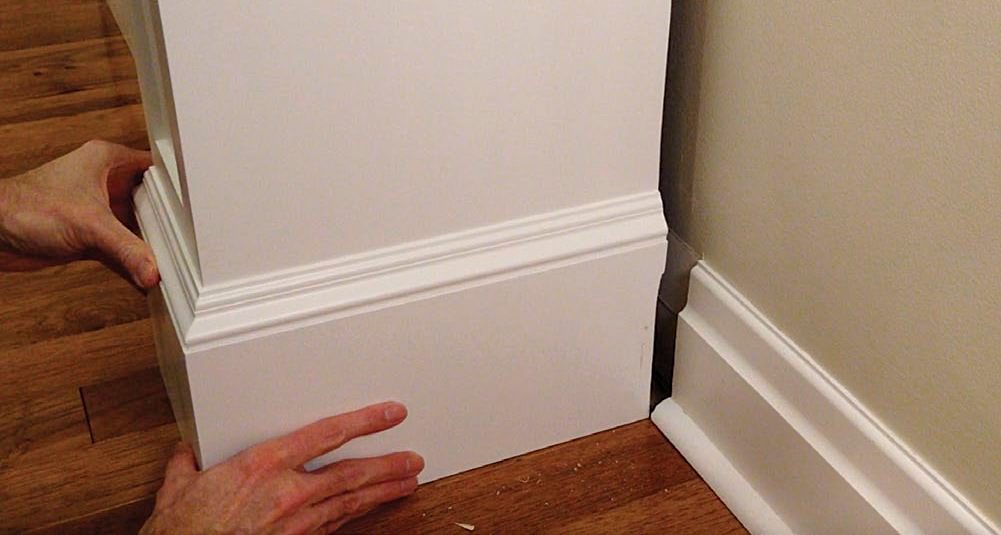
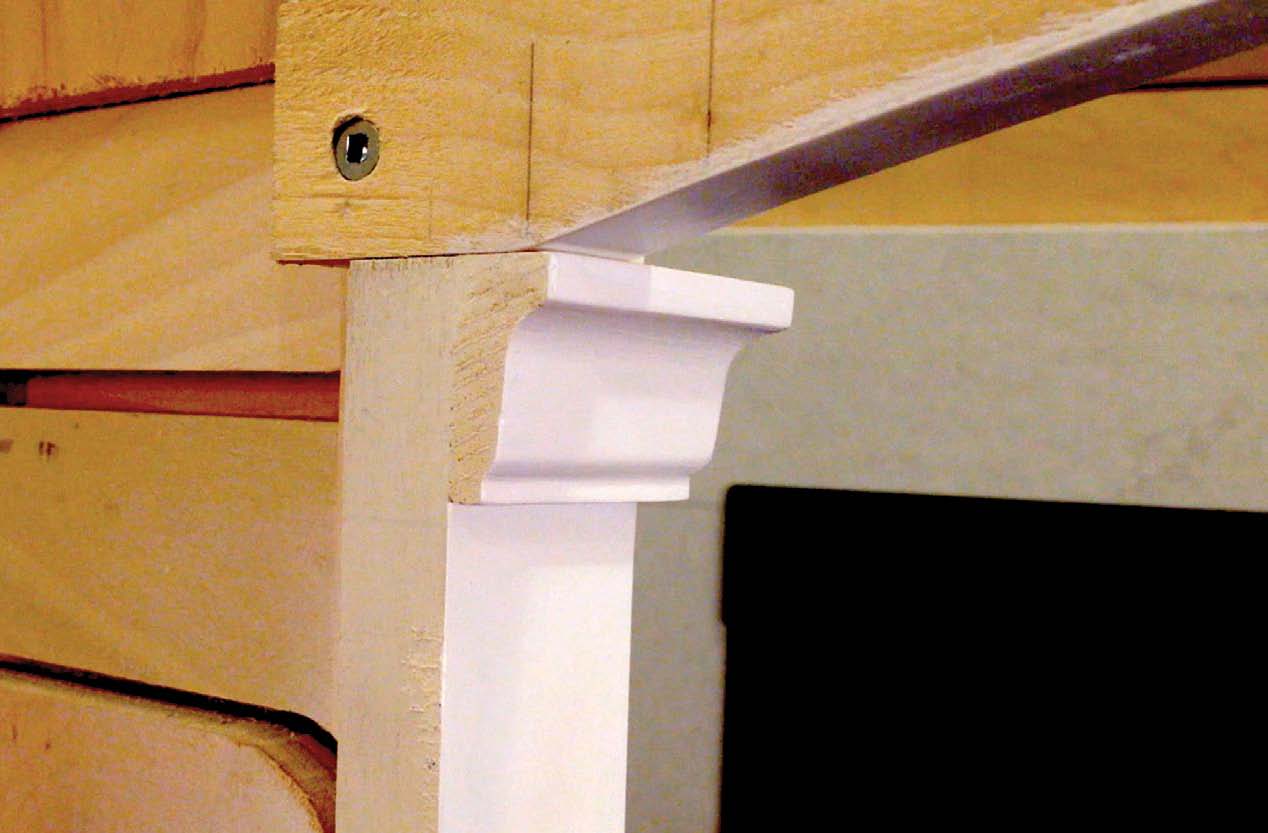
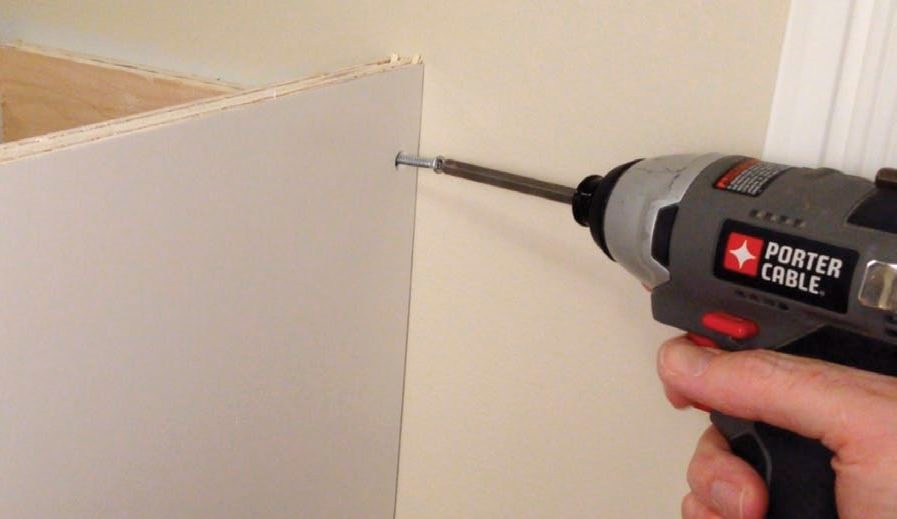
Screw It Down
Screws, through clearance holes, will do a great job at fixing the assemblies in place. If you can drive screws where they will eventually be covered, you don’t have to worry about covering them up later. This screw will be hidden behind the cove moulding.
Top It Off
The assembly is now ready for the top to be installed. Framing along the wall will help support it.
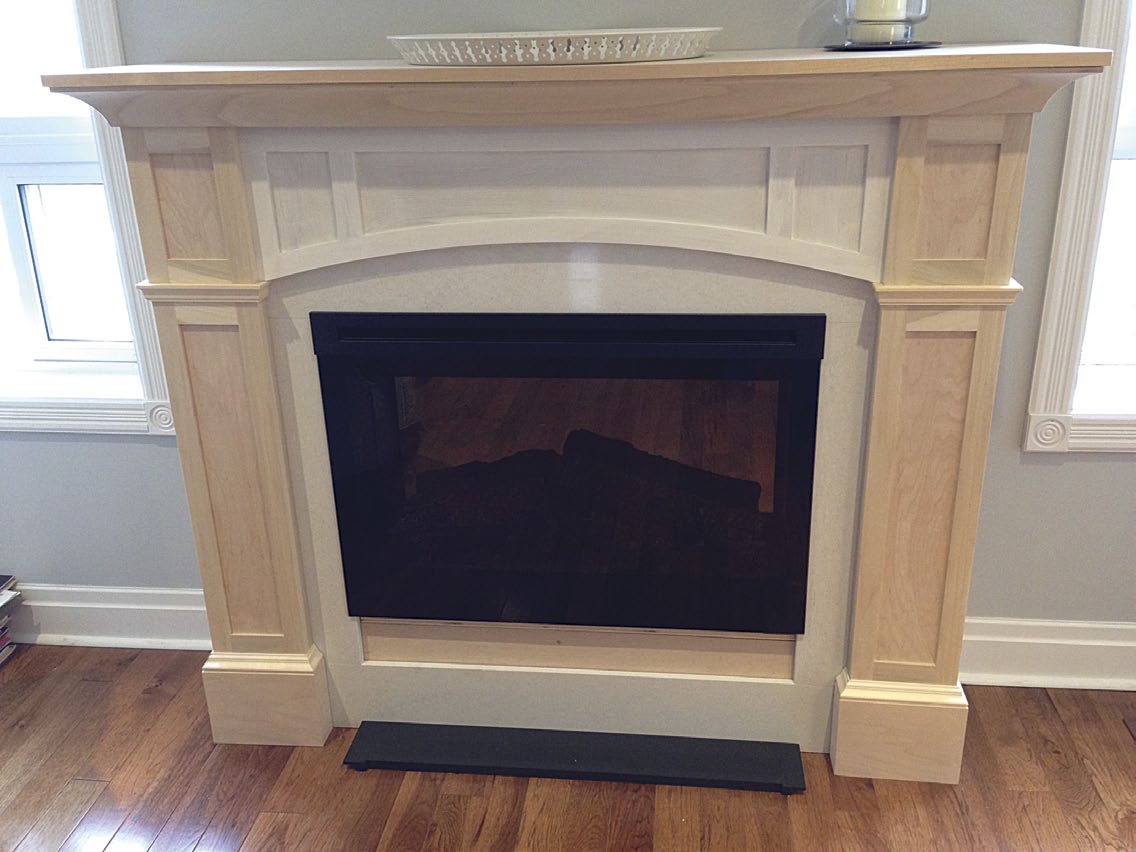
Looking Good
Tight joints, simple mouldings, a nice finish and a clean installation are the keys to making a stylish fireplace surround.
[illustrations_gallery]