FROM ROB'S BENCH
Cutting tiny half laps

Rob Brown

Blog for November 27, 2025
Last week I left you with a plan in mind, but no idea of how that plan was going to work. I find myself in that situation very regularly.
There’s no need to carefully consider a simple operation like jointing a face of a board, ripping a sheet of plywood in half or how to cut a basic mortise and tenon, but when you’ve got to accomplish a somewhat complex process things can be much different.
The first step is going through the process in my mind and trying to imagine how it will turn out. Considering the tooling I own, the (sometimes limited!) skills I have and how the material will react is a good first step. There’s often more head scratching after the first try, as things didn’t go quite as planned.
So, what's the plan?
Hand tools are great for trimming away small amounts of material, especially when you’re dealing with a lot of random angles. While hand tools will certainly play a large role in cutting the half lap joints that will join the Baltic birch plywood fish to the kumiko of the screens, they won’t easily provide me with a standard depth when cutting these joints. That’s why I planning on using the router, equipped with a straight bit, to remove most of the material and leave me with a consistent depth.
But starting with a router would surely leave me with a lot of tearout, so I thought I’d begin with a handsaw kerf very close to either side of each half lap joint. With a starting point decided upon, it was time to make some sawdust.
The general locations of each fish were already determined, so it was just a matter of marking their exact locations on the front faces of the kumiko. I placed the first fish and used a sharp marking knife to mark the edges of the fish, where they intersected with the kumiko. I also used a combination square to guide me in marking the depth of the half laps, so I wouldn’t cut too deep with the handsaw. Next, I made the handsaw kerfs on either end of the joint, about 1/16″ inside of the line. Rather than hog out the rest of the material with the router bit and risk excessive tearout, I made multiple kerfs in the center of the joint and used my chisel to gently remove them. At this stage, at least 90% of the waste has been removed, but the trickiest part was still remaining.
As an aside, this first joint was in the central part of the face of the screen, away from the main wooden shoji frame. This was because the faces of the main frame was proud of the faces of the kumiko by about 1/8″. The plan was to create the joints in the central 90% of the area, then turn my attention to the joints that were close enough to the edge that the depth of the router bit had to be adjusted.
Start routing
I opted for a 1/4″ diameter bit, as some of the joints were only barely wider than 1/4″. I also opted for a spiral bit, as it would do a better job at smoothly and evenly removing the waste to create each shoulder. Also, this particular spiral bit was brand new, so was nice and sharp.
Because the small base of my trim router wouldn’t properly and evenly balance on one, or even two, kumiko without tilting and giving me an uneven joint. I cut a piece of 1/2″ thick plywood to use a router base and attached it to my router. Once the depth was set, it was time to flip the power switch.
I very carefully and slowly trimmed the first shoulder, with surprising success. I repeated the process on the other shoulder, made sure the entire depth of the joint was routed to a consistent level, turned the router off and reached for the fish. It fit almost perfectly, which was a great relief. A small amount of chisel work and I was ready to move on.
I proceeded to the other end of the fish, completed all the steps and tested out the entire fish. It wasn’t perfect, but with a bit more fiddling and it fit very nicely. Cue the smile and sigh of relief. Now, to repeat that process another eight times.
Now, the perimeter
Up until now, I’d been focusing on the central majority of the face, but now it was time to deal with the joints at, or at least very close to, the shoji frame members. Not only did the depth of the router bit had to be adjusted (which was quite simple) but since many of these joints where not ‘through’ half laps it made things tricky. By ‘through’ I mean they were not half lap joints that were open on both sides, but rather they butted up against eh frame. Up until now, I was able to run the router clear through the width of each kumiko, but that would have to change with these last few joints, as I didn’t want to rout into the shoji frame.
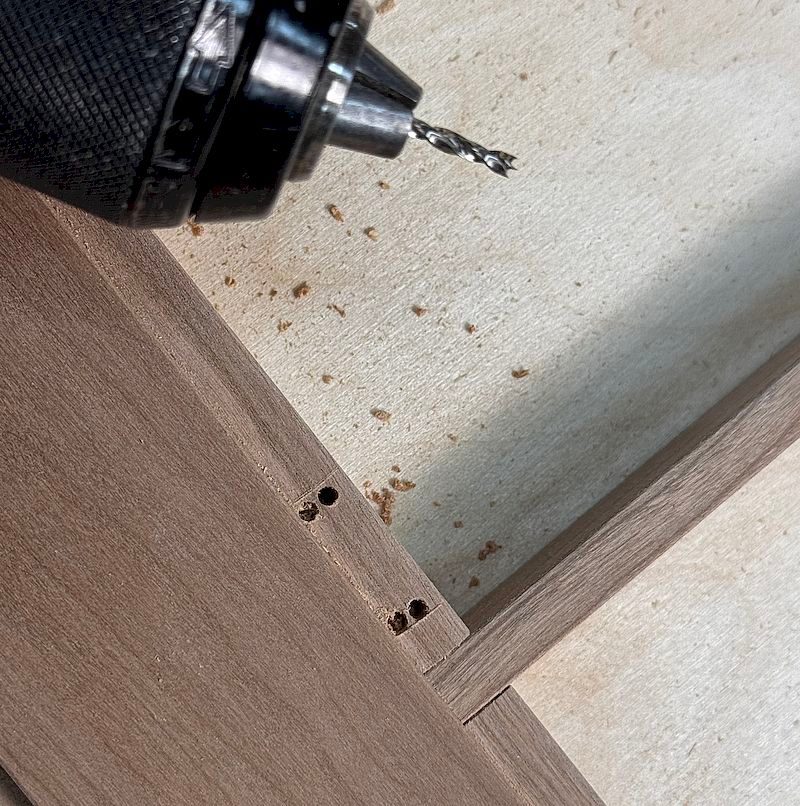
This changed just about everything, as I couldn’t use a handsaw to create the initial kerfs, nor could I remove most of the material with additional midway kerfs. Also, the diameter of the bit meant that I couldn’t get very far into the corners of these half lap joints. My solution was to use a small diameter drill bit to hog out some of the waste that was deep in the corners. This meant that it would be easier to chisel out the waste into the corner. I was able to use the handsaw to create a partial kerf, thankfully, which helped reduce any chipping during the routing process.
After the corner holes were drilled, the saw kerfs were made and the depth of the router bit was adjusted, I dove in. Again, very slowly and carefully, I routed away as much of the material as I could, then used a sharp chisel to remove the rest of the waste. Once again, success.
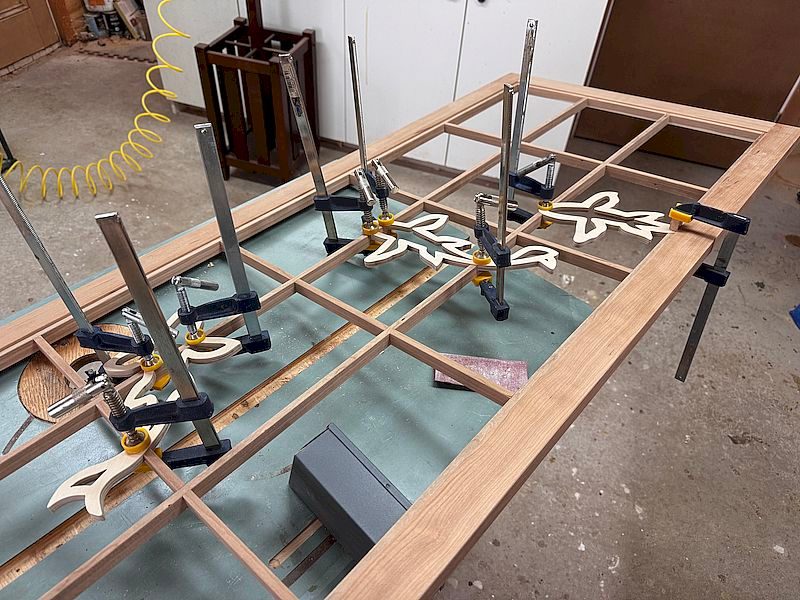
Reach for the glue
After cutting the rest of the joints and fitting and sanding all the fish, I was ready to glue them all in. A small amount of glue was all that was needed, followed by some lightweight clamps. At this stage I cut away the portions of kumiko that extended ‘underneath’ or ‘through’ each fish, giving the fish a more prominent look. Once I was done, the fish looked like they were indeed swimming in front of the kumiko.
Some final sanding, and I was ready to apply the finish. I was really pleased with how these screens turned out. Sadly, I had to wait a few weeks to install them, as that date got pushed back yesterday. Not to worry, as that only gives me an extra couple of weeks to do the play-by-play of the installation process, so I can get things right on the jobsite. Come to think of it, sometimes having too much time to think, think, think can be a bad thing.
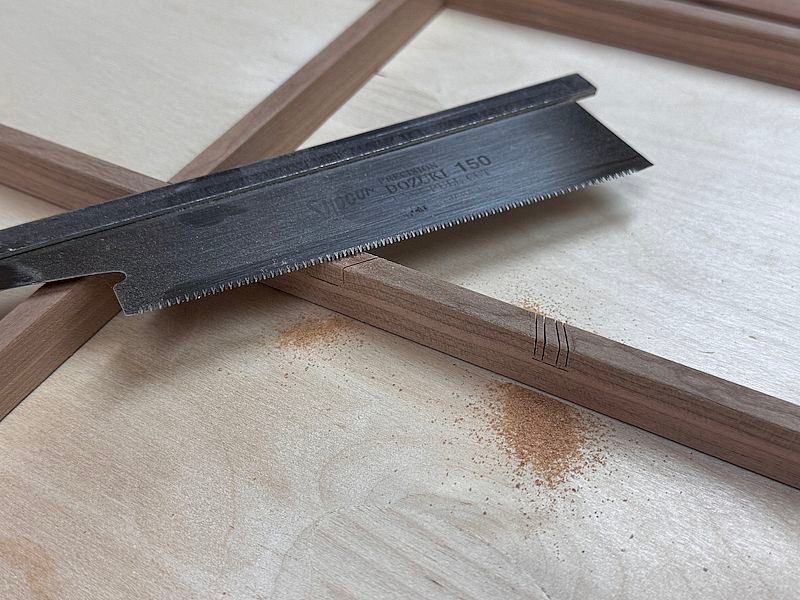
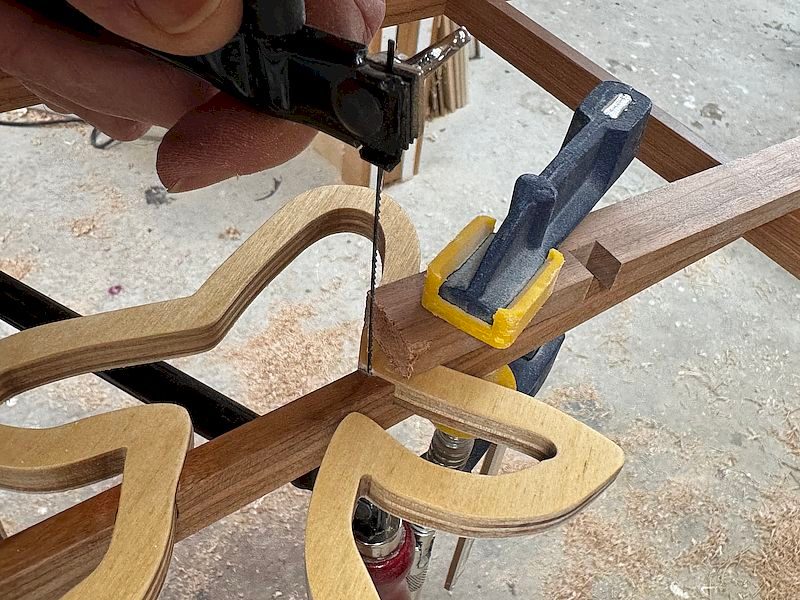
Scribe a Line
With the fish cut to final shape, I placed it on the faces of the kumiko exactly where I wanted it, then used a marking knife to scribe the location of the shoulder.
Some Kerfs
First, I added the handsaw kerfs just inside the shoulders of each joint, then I added a series of kerfs across the joint. This allowed me to use a chisel to tap each short grain section from the joint.
Partially Routed
Here, I've routed one shoulder, with the other shoulder next. You can see the base I used to span multiple kumiko and keep the router stable during this operation.
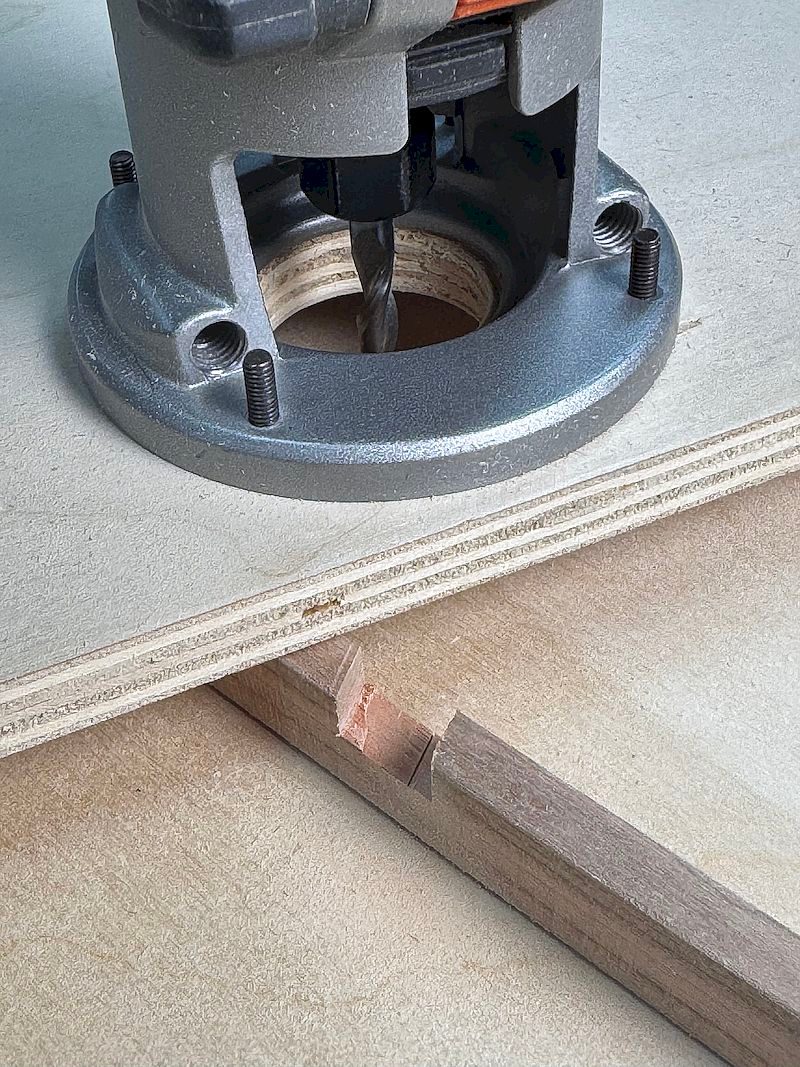
Tiny Holes
To help with the removal of waste, I drilled a few holes in the furthest corners of the perimeter half lap joints.
Glue Them In
Some small clamps are more than enough for this light task.
Remove Some Material
I removed the short lengths of kumiko that extended behind each fish, so it gave the fish a more prominent look.
Machining and Cutting
Here's a look at a few of the steps along the way.


So much to learn from you!!
Just awesome!