FROM ROB'S BENCH
Gone to the dogs

Rob Brown

Blog for January 8, 2026
What do you get for someone who has everything? This question comes up every holiday season in our house.
Some of the family members we buy for are younger and have gift lists longer than my to-do list. I don’t enjoy buying gifts for these people. The other people on our gift-buying list frustrate me. These are the people who have everything they need. What am I supposed to buy for these people?
The answer, of course, is don’t buy anything. Make them something. Over the holidays I had to buy gifts for a couple of people who really frustrate me. Honestly, my wife is the worst of the worst. She either has everything she needs, or is right in the middle of researching the exact brand and item she’s going to buy. And, I have to be honest here, she’s picky. Frustratingly so. If she needs something, there’s no way she’s going to leave what product she wants up to me to buy, as I might mess it up. Instead, I made her a nice gift this year. One that I’ve been telling you I was going to make for almost a year now: a new top for the side table featured in our Fall 2025 print issue. I’m not going to share it with you right now, but just know I did a great job! I’ll cover that in an upcoming post.
Now, about those dogs
A few other folks I had to make gifts for were my brother and his partner, and my in-laws. They all have one thing in common – a love for their dogs. Making a scroll-sawn portrait of Ollie and Jimmy was something I knew would go over very well.
These aren’t overly hard or technical projects to complete, but they have to be crafted with care, so the finished project would resemble each pooch as closely as possible. I didn’t want to end up with was a pair of dog portraits that looked nothing like the real thing.
Choose the photo carefully
I went through a bunch of images they’ve both sent me over the years. There were lots of great images, but I wanted something that would let each dog’s personality clearly shine through, yet was overall a fairly simple portrait. I eventually found what I was after and got to work transferring that pose to a piece of paper.
In both cases, I brought the image up on my laptop and zoomed in until I had the dog at the actual size I wanted the portrait to be. I taped a piece of blank paper to my screen and lightly sketched the dog onto the paper. At the shop, I used carbon paper to transfer that design to thin plywood, then got to work on making what amounts to essentially a lot of weirdly shaped puzzle pieces.
I used the scroll saw to cut the parts out. The trick was keeping all the parts in some sort of vague order, so it wouldn’t be a nightmare putting them all back together again. I marked all their undersides. When complete, I quickly sanded the sharp edges and grouped them into paint colours. Some of these parts were large enough to stay put while I sprayed them with an aerosol paint can, but most were too small. I taped them to a board so I could make a few passes with each paint can and colour all the parts accordingly.
Putting things back together
When they were dry, I started the process of gluing the puzzle pieces to a backer board. I started with the outer piece, then fit some of the smaller pieces in the centre and let them dry. It took a few stages of gluing to get all the parts fixed to the backer board. When everything was dry, I cut the panel to size and added some solid wood edges around the piece before I added a few coats of wiping oil to the frame.
I added a hanging wire on the backs of the panels and was ready to wrap them.
For next time
The aerosol spray cans worked out fine, but I think that step can be improved upon. Taping the parts down can be a bit of a pain, and the finish surface I’m getting from them is also fine, but not great. Each colour isn’t cheap either, coming in at just under $20 each. The upside of using the spray cans is they are available in wide variety of colours, which is great. Any ideas?
I hope you were able to make some great Christmas presents in your shop over the past few months.
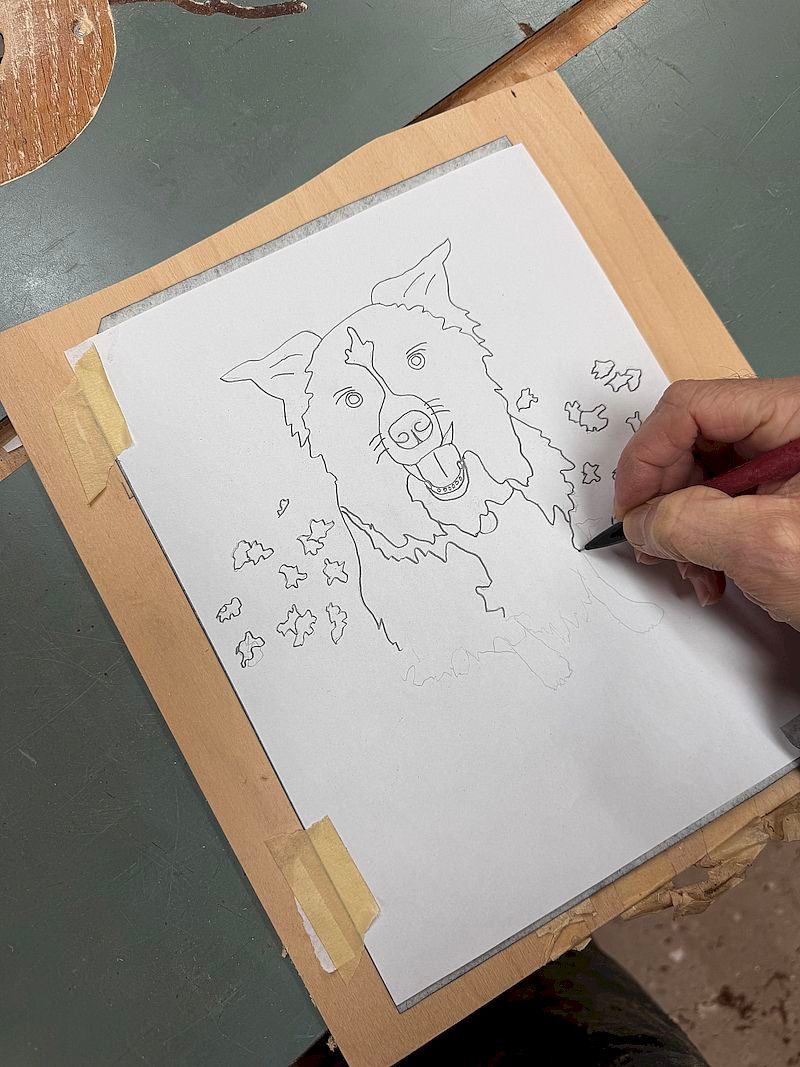
Carbon Copy
Here, I'm transferring the original sketch to the plywood, with carbon paper. I eventually decided to do away with the leaves, scattered around the background. Not only would they take a lot of time to do, but they might not come across as well as I hope in this project.
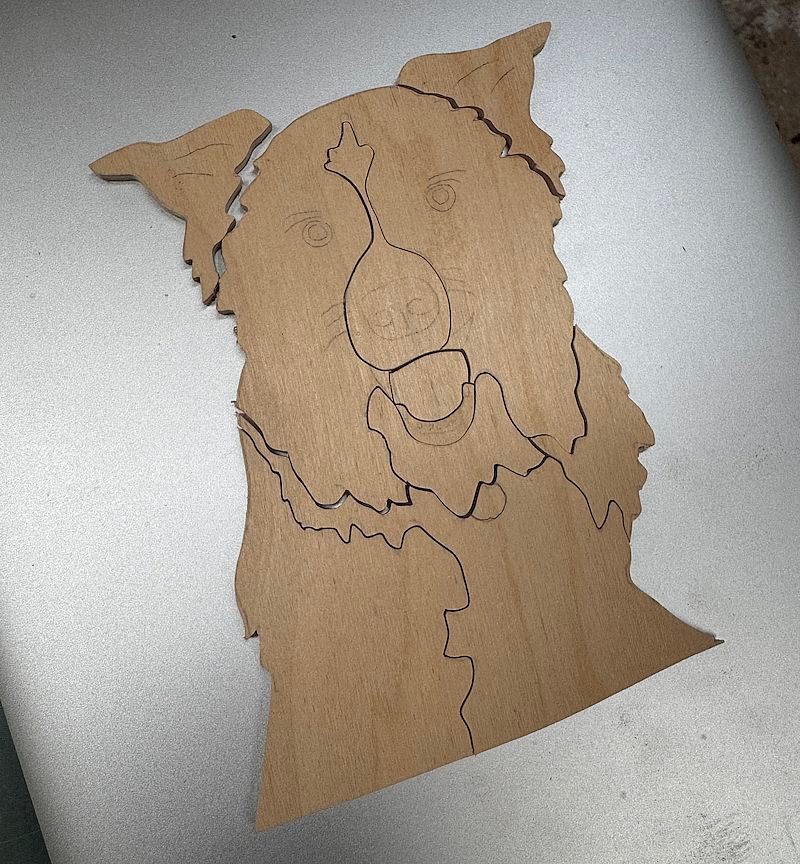
Puzzle Pieces
I guess I could have just ended this project here and called it a jigsaw puzzle. I eventually decided to cut out the nose too, then I added some grooves for the eyes, whiskers and some other details with a sharp carving tool.
Apply a Finish
I taped most of the parts to a scrap board so I could spray paint them.

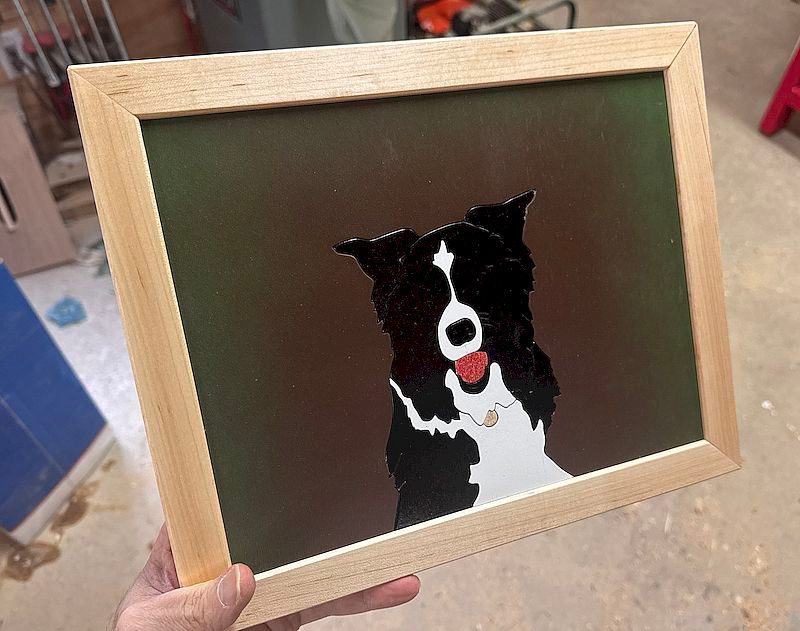
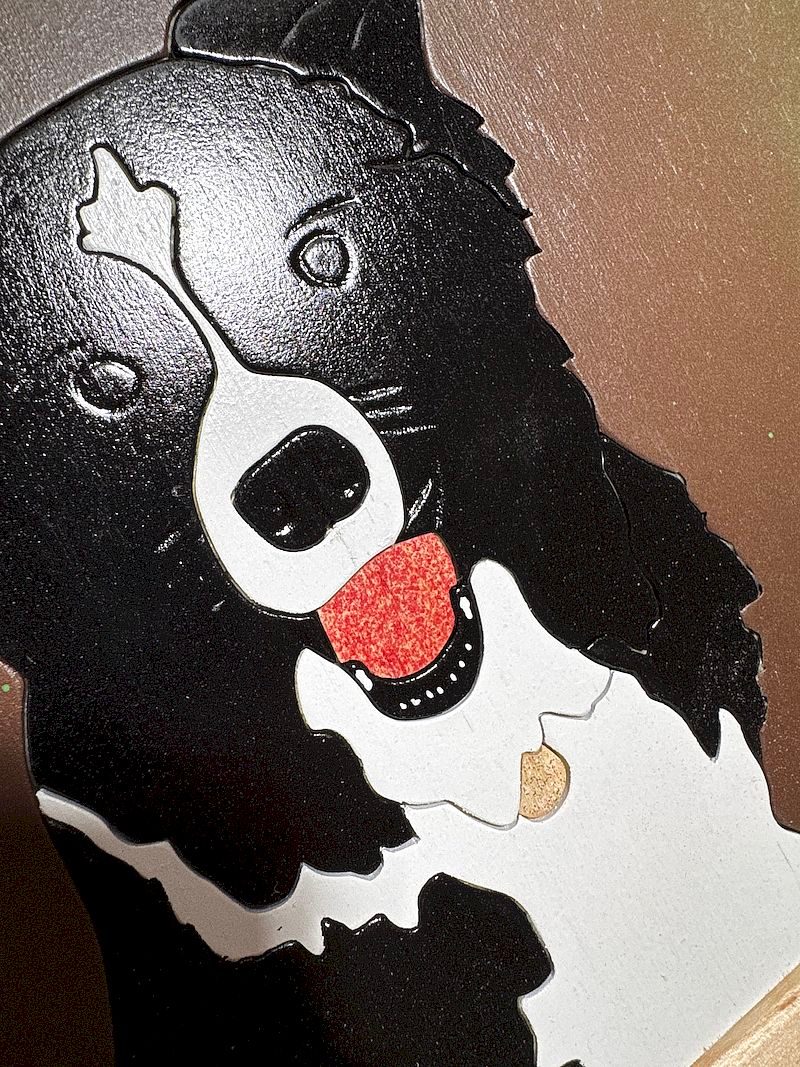
"Jimmy"
Here's the first portrait, ready to be gift wrapped.
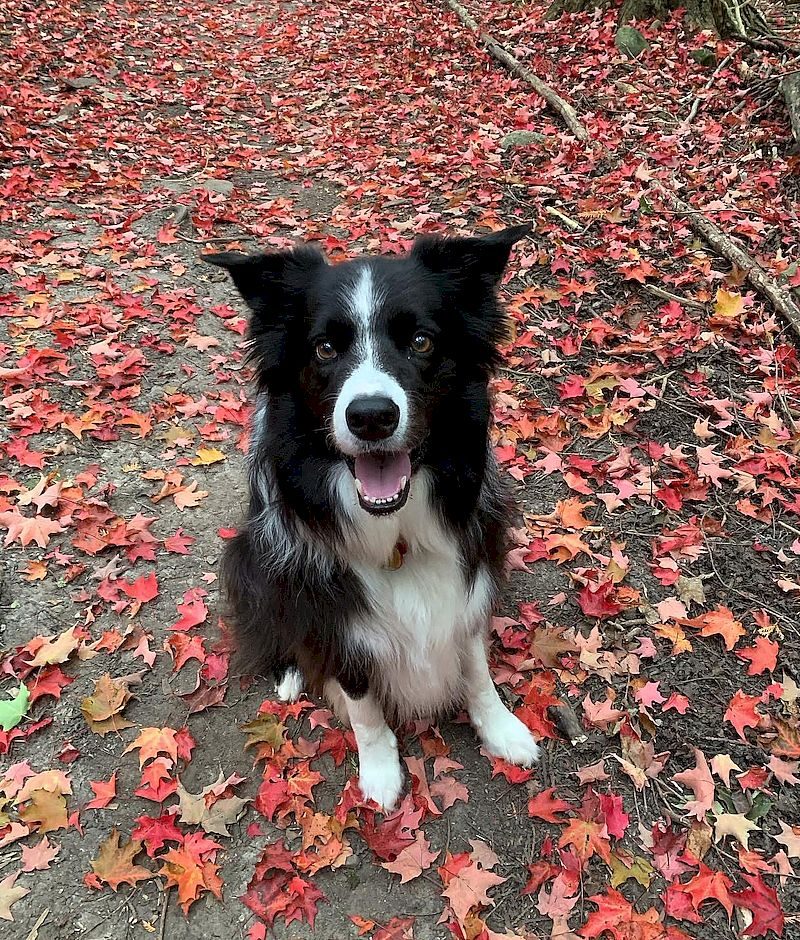
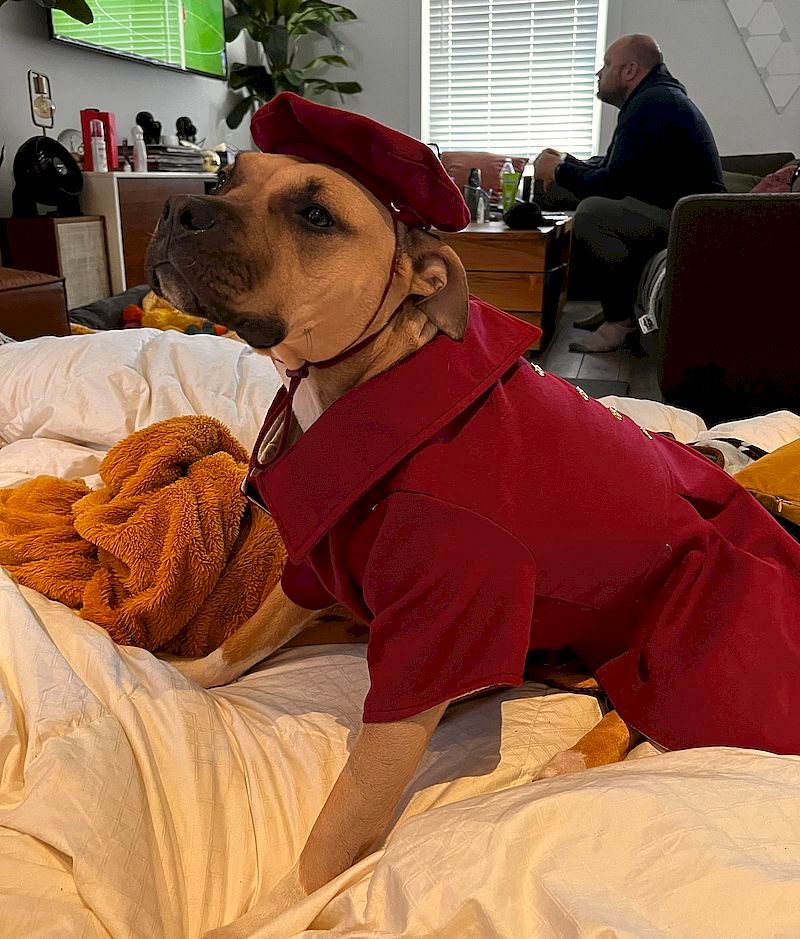
The Original
This is the photograph I worked from.
The Details
You can easily see the carved details with some raking light.
"Ollie"
This is the dog portrait I made for my brother and his partner.
Sunday Best
Here's the photograph I worked from.


Wonderful gift idea. I’m sure the recipients were thrilled.