PROJECT
Bow Box – Part 3: wrap it up

Rick Campbell

Find more Gifts / Crafts projects
This is the last of three articles in which Rick Campbell shows you how he made his bow box.
This week Rick shares how you can fix the ribbons and bow to the box to complete this great gift project.
In the first article Rick takes you through the process of building the box.
In the second article Rick covers how to make the ribbons and bow.
Bow Box – Part 3: wrap it up
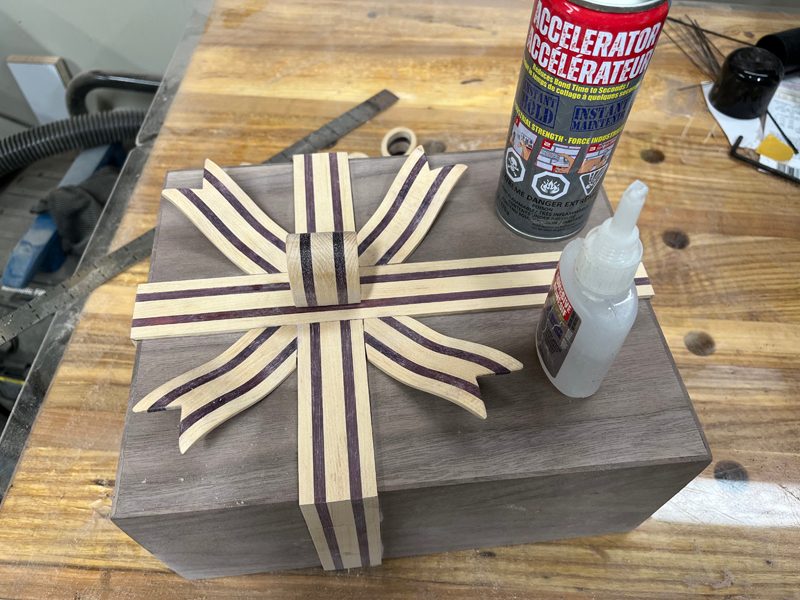
With all the simulated ribbons and bow parts ready to go, we can now “wrap” the box. I used cyanoacrylate (CA) glue to adhere the decorative parts to the box. When paired with an activator spray, the CA glue bonds instantly, eliminating the need for awkward clamps to hold the parts in place while the glue cures. If you either don’t have CA glue, or you’re not confident in your knowledge or skills using it, feel free to use standard wood glue, though the process will take longer as the different assemblies will have to dry before moving on to the next.
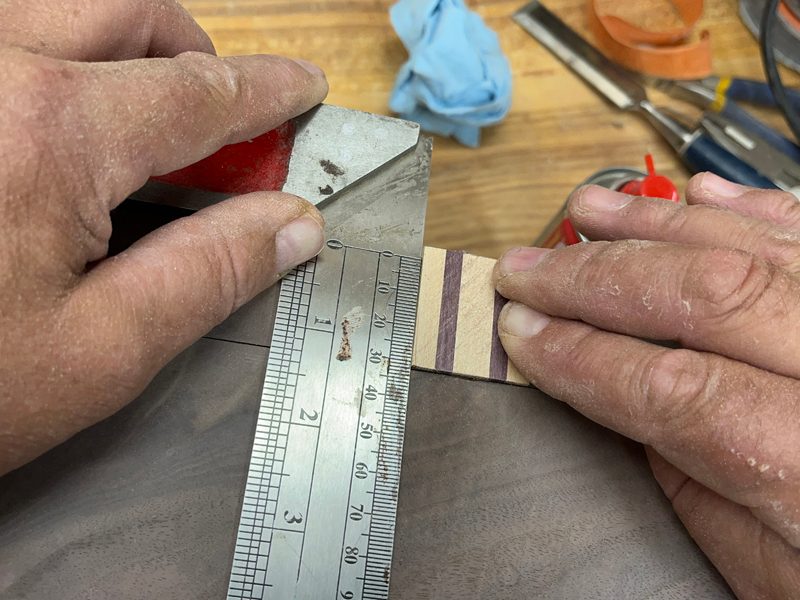
I started with the flat section of ribbon that runs end-to-end down the centre of the lid. The strip is mitred on both ends to connect with shorter sections that will continue down the sides. Using the table saw and a backer board attached to the mitre gauge to prevent tear-out, I cut the piece to length with a 45° bevel on each end.
I measured to the centre part on the lid and marked the edges with strips of painter’s tape. You could use pencil lines instead, but then you would need to sand off the markings afterwards. Once the location is marked, apply a few beads of CA glue to the underside of the ribbon strip. Lightly spray activator on the marked areas of the lid, then carefully press the part into place, using the tape as your guide. Since the bond is instant, you only get one shot, so make it count. Once the strip is secure, go ahead and remove the painter’s tape from the top.
Next, cut the sections of ribbon that continue down the sides. Bevel one end of the short section that will be attached to the lid to complete the connection with the long strip installed on top. This time I used a machinist’s square to guide the placement of the parts during installation. Apply CA glue to the back and bevelled end of the lid piece, spray the target areas with activator spray, then press the parts into position. After completing this process on both ends, you’re ready to move onto the sections that run from side-to-side.
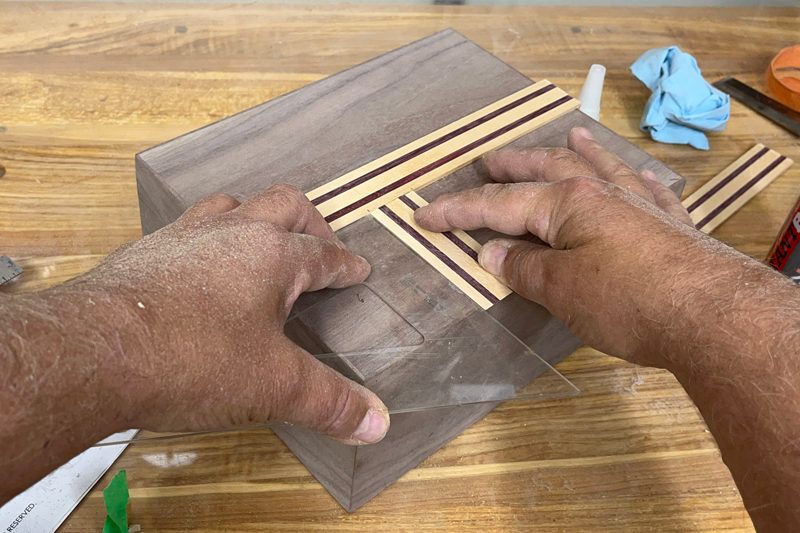
The procedure for these areas is exactly the same, except the top section is made up of two shorter pieces that branch off at 90° from the centre strip. I positioned this run of ribbon slightly off-centre to help visually align the lid with the base when placing the top back on the box. To maintain a perfect 90° angle during installation, I used a flat plastic triangle square as a positioning guide. Cut the parts for the top and sides to length, then glue them in place using the same process as before.
With all the flat ribbon trim in place, finish sand the surfaces to prepare for the installation of the ribbon tails and the creation of the bow. The ribbon tails are easy to install – just apply glue to the underside of the mitred ends, then spray on the accelerator before tucking them into the corners where the flat ribbon sections meet. These parts help transition the flat ribbon into a more three-dimensional look to help enhance the wrapped gift effect.
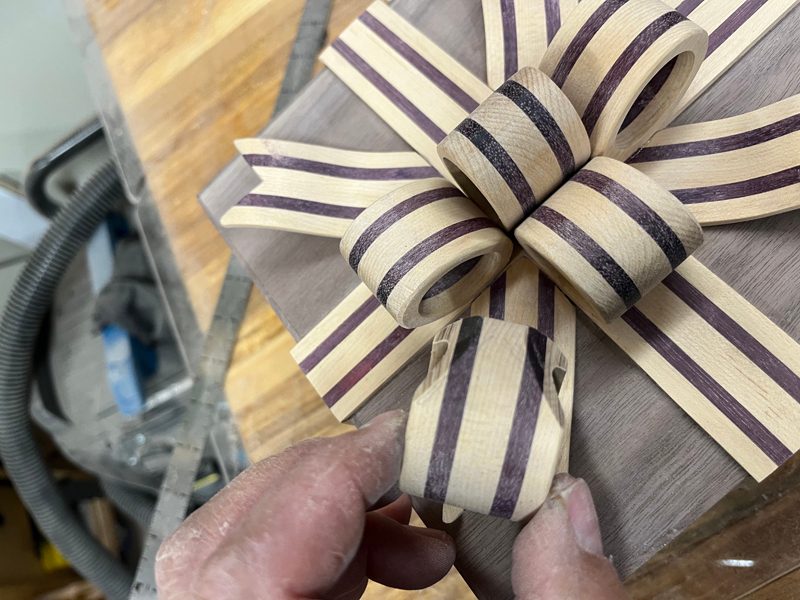
When it comes to installing the bow loops, you can put the ruler away. This step is done entirely by eye. The bow consists of one centre loop that’s positioned vertically on end, surrounded by several more loops arranged in a circle on their sides, much like the petals of a flower. The orientation and number of these outer loops is completely up to you. On this box, I used five radiating from the centre, but I’ve made other versions with more or fewer.
Before gluing anything down, dry-fit the loops in place and play around with the layout until you find a configuration that looks balanced and visually appealing to the eye.
To install the centre loop, use a stationary sander to sand a flat area on the bottom of the loop where it will contact the lid. This will help create a stronger bond by increasing the surface area for glue. Apply CA glue to the flat section, spritz activator at the intersection of the strips on top, then press the loop firmly into place.
The surrounding loops are installed in a similar fashion, but this time sand a flat spot on the side of the loop, near the end that will attach to the box. Depending on how tightly you’re arranging your loops, you may find that they interfere with one another where they meet in the corners. If that happens, sand a slight bevel on the inner corners of the loops to help them nest more tightly around the centre loop.
Now that you’re armed with all this technical know-how, it’s time to put it into action, and get to work installing those loops to bring your beautiful bow to life.
Finishing
Applying finish to a project like this can be a challenge. Drips and runs are a real concern, particularly around the nooks and crannies created by the bow loops and ribbon tails. While it might be a bit unorthodox, I finished this box with cutting board oil. It’s simple, forgiving and gives the wood a rich, natural sheen. There’s not a lot of protection, but then again, this box doesn’t need a lot of protection.
Just brush on a generous coat and let it soak in. Be sure to work the oil into all the tight spots, such as under the ribbon tails and inside the bow loops. After about 15 minutes, wipe off the excess with a clean rag. Expect a little more oil to seep out from the crevices over time, so check back periodically to clean up any further finish.
If you’re anything like me, once you’ve built one of these intriguing boxes, you’ll want to make more, and experiment with different shapes, wood combinations and ribbon styles. Fortunately, you’ll have no shortage of friends and loved ones eager to receive one. These handcrafted treasures are gifts in every sense of the word.
With your bow box now complete, this project has one big advantage over other gifts – there’s no need for wrapping.
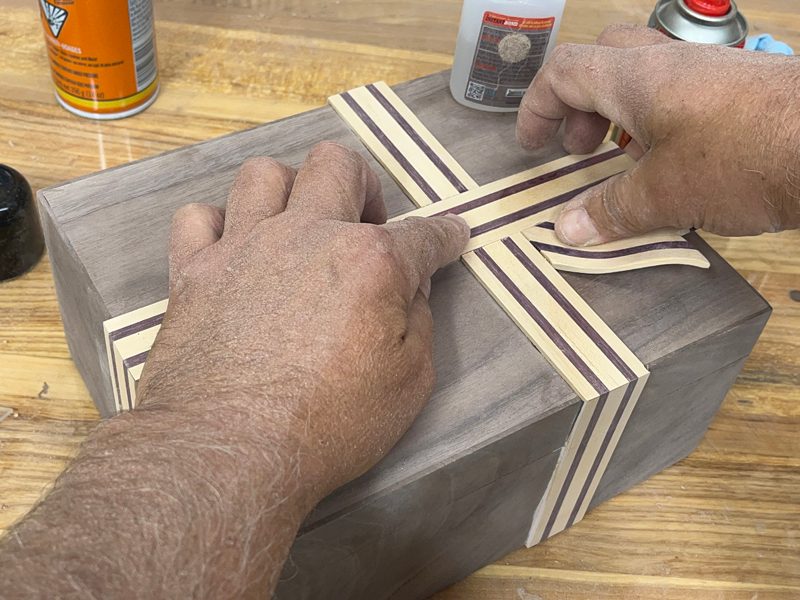
Glue the Ribbon On
Campbell uses CA adhesive to attach the wooden ribbons to the lid. Although it will dry slower, you could also use regular wood glue. Masking tape will help you position the strips and keep any adhesive off the visible portion of the lid.

Maintain Accuracy
A machinist’s square will help you position the ribbon parts on the sides of the lid and box.
More Ribbon
Use some sort of right angle square or other object to install the other parts of the ribbon perpendicular to the first ribbon.
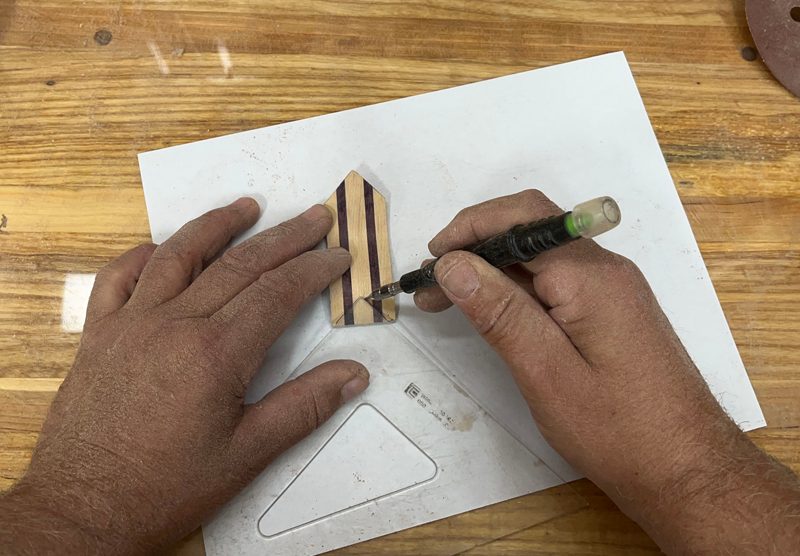
Curved Ribbon Tails
Campbell used spray adhesive to fix the paper template to a portion of the lamination before he cut out the ribbon tails.
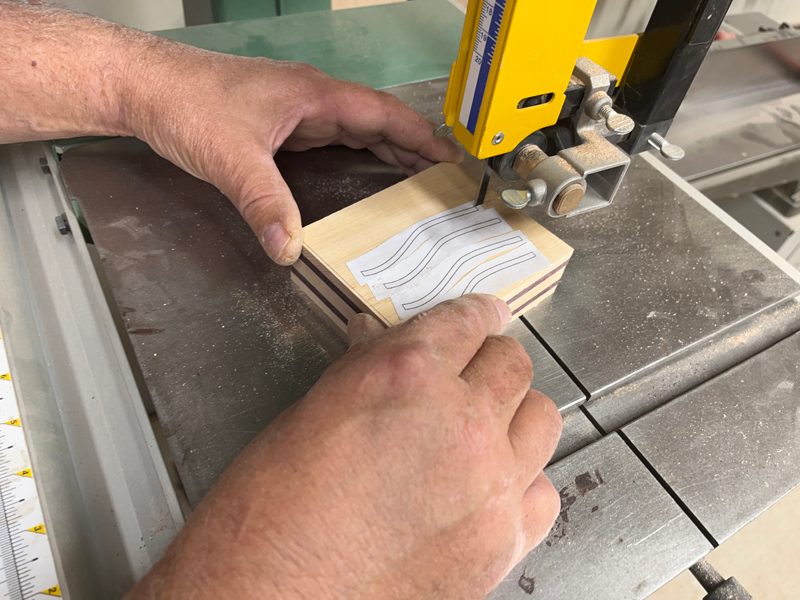
Notch the Ends
In order to fit between the main flat sections of wooden ribbon, the ribbon tails have to be notched. Campbell did this on his bandsaw, then sanded the cut smooth.
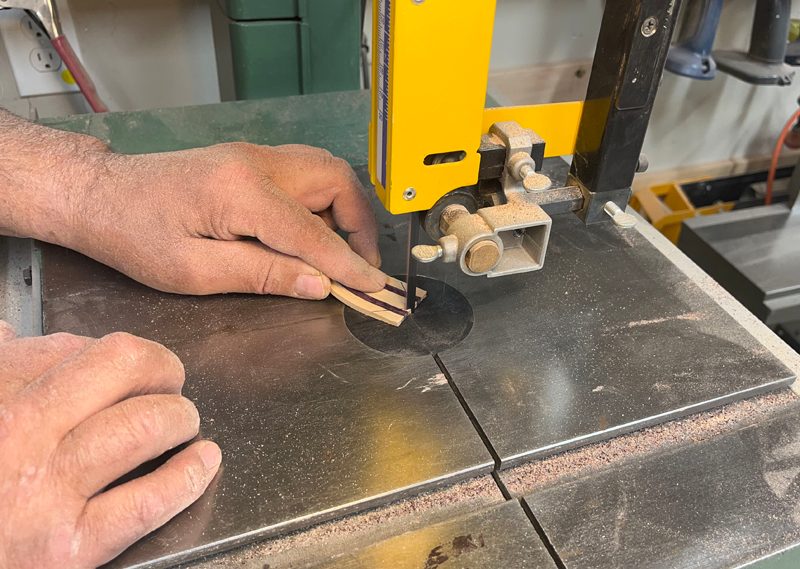
Ribbon Ends
Mark the ends of the tails, then cut them on the bandsaw.
Fit and Glue
Check the ribbon tails for fit and make any slight adjustments on them so they fit the main ribbons with no gaps. Adhere them in place with adhesive.
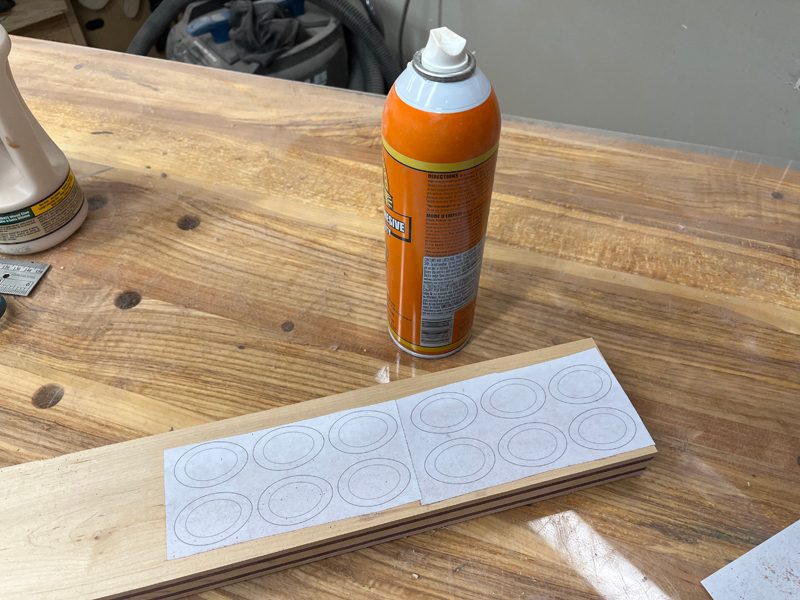
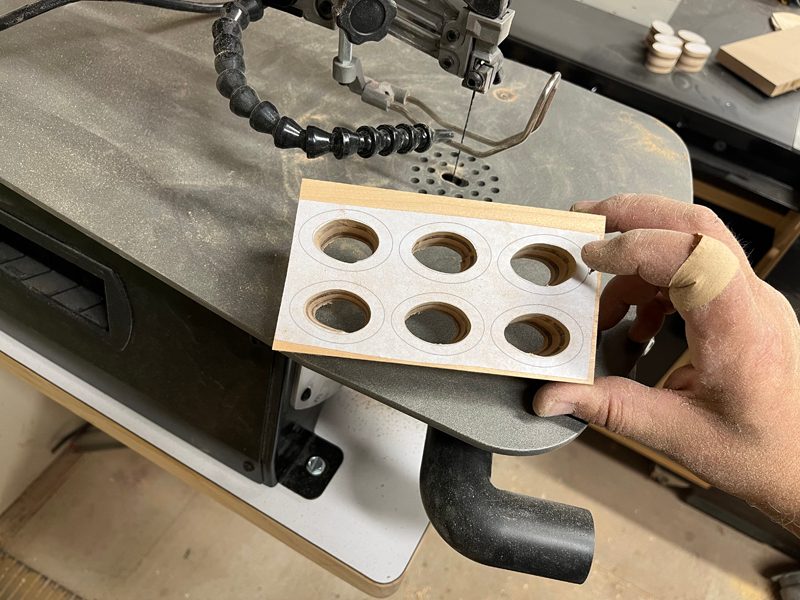
Loop Pattern
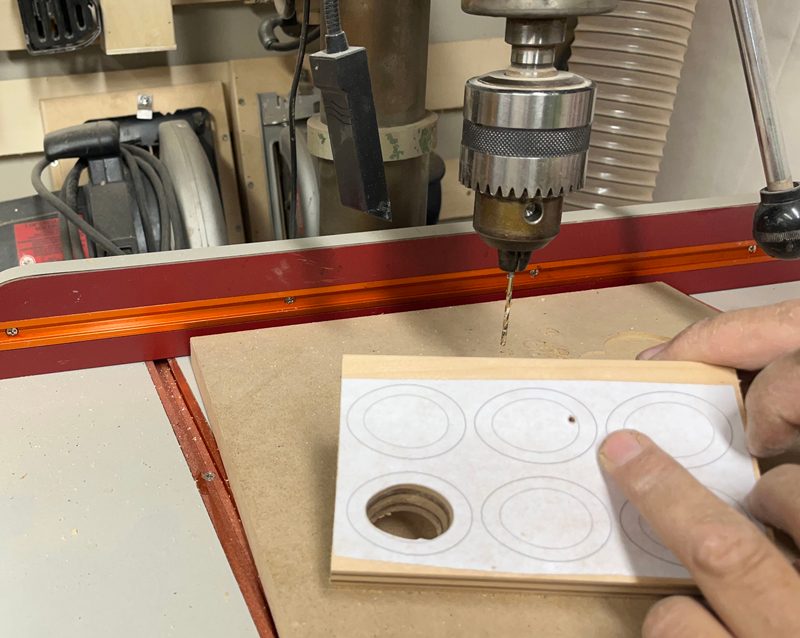
Campbell printed off the loop patterns and used spray adhesive to affix them to the laminated blank. Although you don’t need all the loops to be virtually identical, there’s nothing wrong with this approach.
Drill starter holes in the centre of the loops so you can fit your scroll saw blade through the hole and remove the material from the centre of each loop.
Hollow Them Out
A scroll saw is the perfect machine for this task, as it cuts tight, accurate curves and the blade can be easily removed and positioned on the inside of a circle.
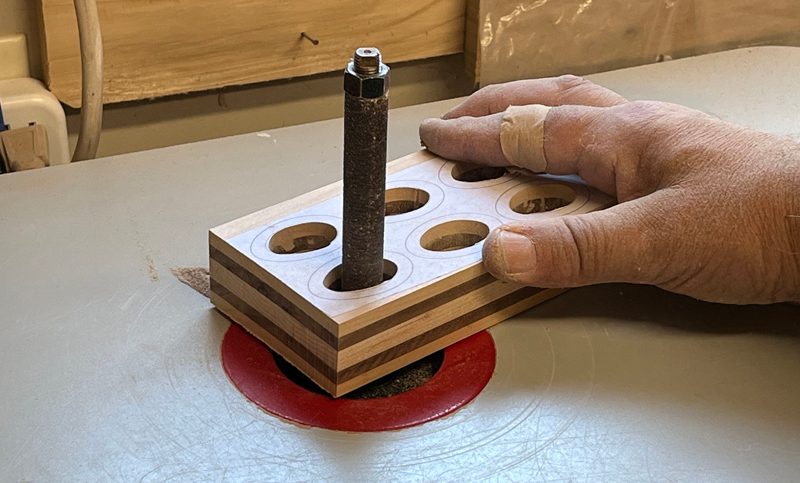
Smooth the Holes
Campbell smoothed the inside of the holes before cutting the individual loops from the blank. The sanding process is much easier with a larger blank.
The Outsides
Although Campbell used a bandsaw to trim the waste from the outside of each loop, a scroll saw would also work well. Leave the line on so you can send to it.

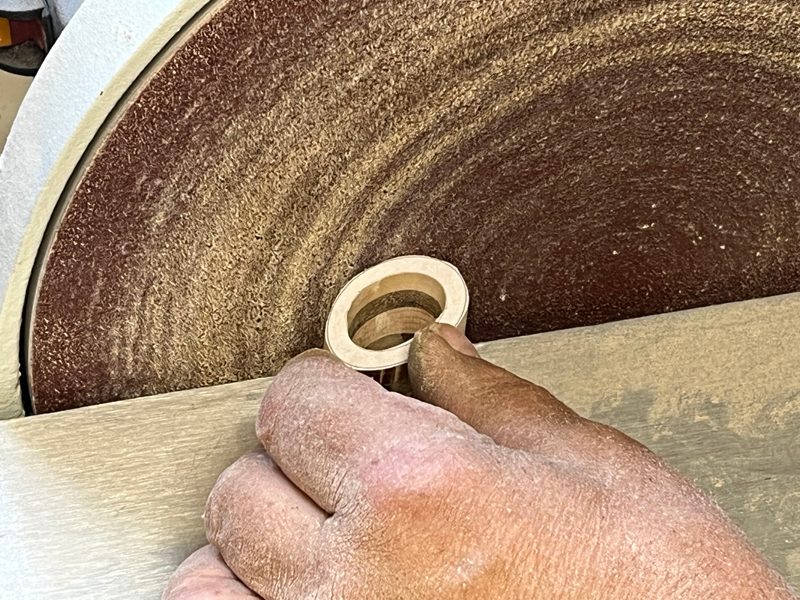
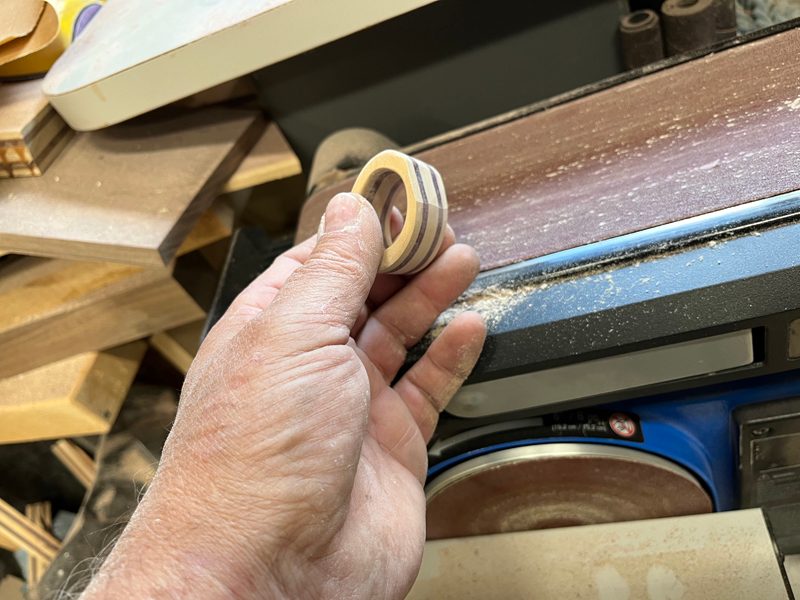
A Smooth Loop
A disk sander makes quick work of evening out the outer edges of each loop. Just be sure to keep a positive grasp on the loops while also keeping your fingers away from the disk.
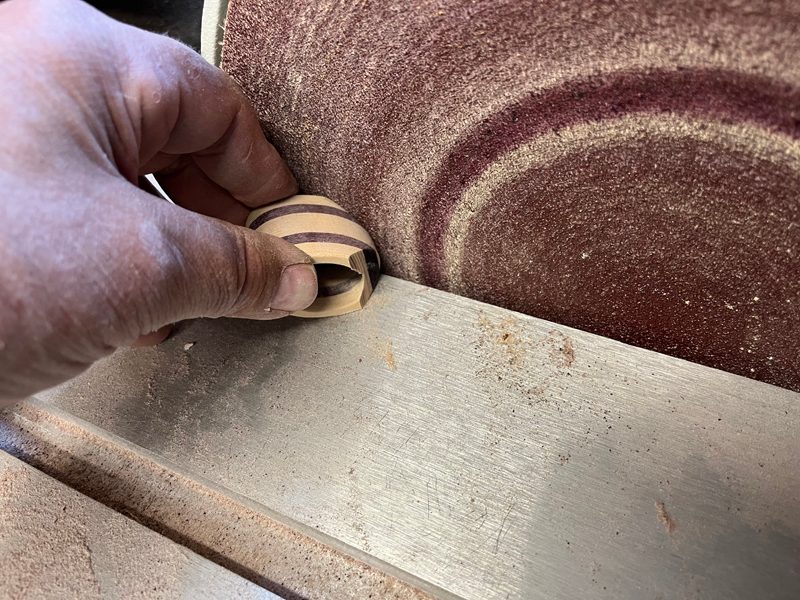
Start in the Middle
After sanding a small, flat surface on the end of one of the loops, it can get fixed to the centre of the bow.
More Flats
Sand a flat area into the rest of the loops, to give them enough surface area to be adhered to the lid.
Loop Bevels
So the loops fit well with each other, a bevel will need to be added to the loops.
Custom Shapes
Some loops may need to be bevelled more than others for a good fit. Each one should be customized for where it will be attached.
[illustrations_gallery]


Hi Rick, Love the gift box. Do you happen to have a printable version of your templates for the curved ribbons and loops available.