This new premium fence has a lot going for it.
Manufacturer: SawStop
Model: T-Glide Advance Rip Fence AGTP-FA
MSRP: $490
Part of the reason I chose the SawStop Professional table saw was because of the high-quality components and the great fit and finish. The instructions and assembly were also what every manufacturer should achieve. The bonus was the safety features inherent in all SawStops. The fence that came with it was fine, but after using the new T-Glide Advance Rip Fence I realized what I was missing.
I used to have a Delta table saw with its Uni-Fence. One of my favourite features was that you could loosen a pair of knobs and pull the fence forward of the blade for safe repeatable crosscuts. (You should never crosscut with the piece touching the fence throughout the cut. You need to leave a gap so that a pinch point isn’t created.) You could do this without clamping any standoffs, which was one of the downsides of that fence. It was hard to clamp accessories to it due to the curved opposite face.
SawStop’s new premium T-Glide Advance Rip Fence has some very useful and unique features. The first is the aluminum face that can be positioned in multiple configurations, one of which is the aforementioned offset for crosscuts. The fence can also be used in the high position, low profile as well as a L-Fence. L-Fences have some good uses, one of which is allowing you to cut straight lines onto not-so-straight edges, in essence, turning your table saw into a jointer. The instructions that come with the fence explain how to make your own. More on that later.
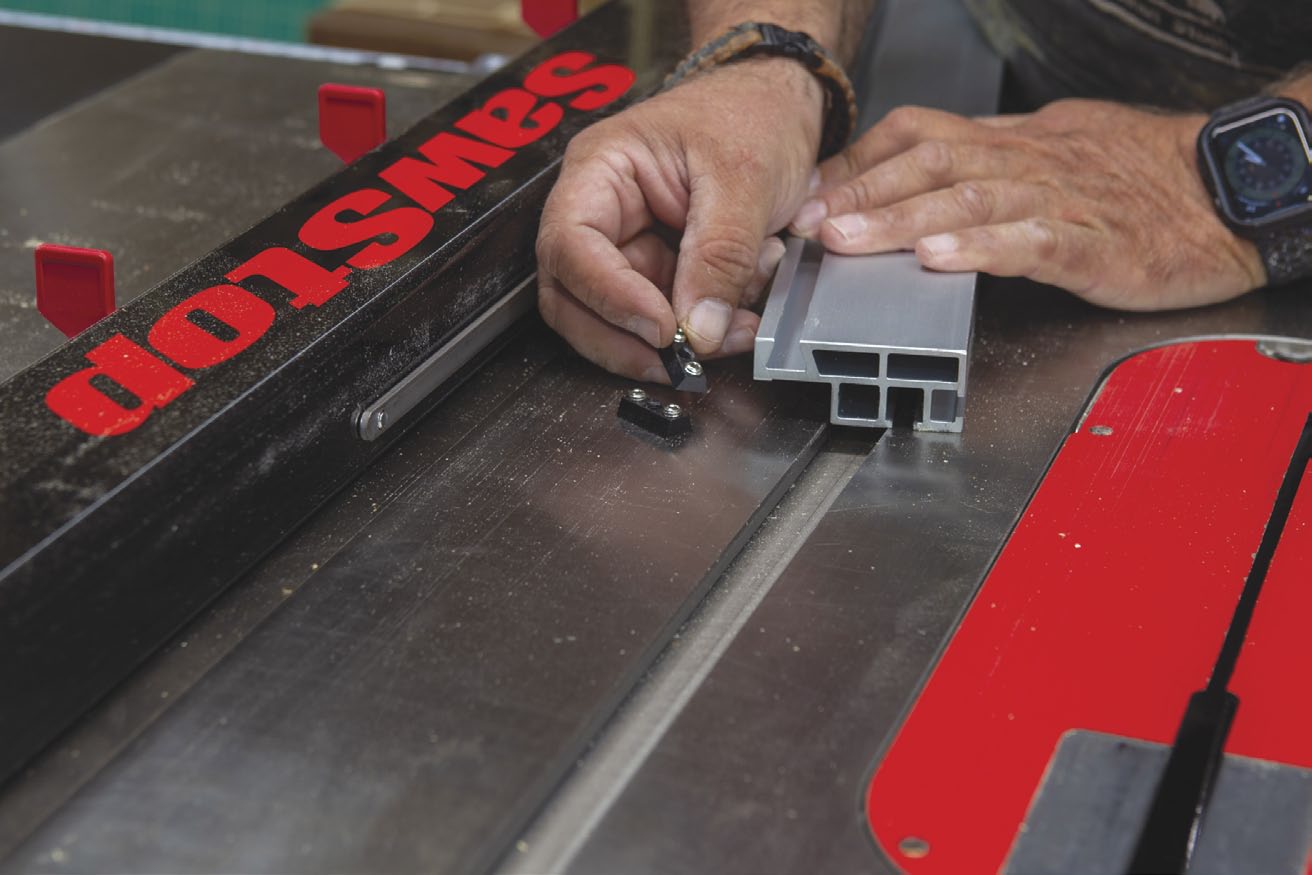
The fence also includes a pair of dovetail blocks, allowing you to use and make accessories that fit into a dovetailed slot on the fence’s face. Using the blocks to hold a sacrificial fence will make it less cumbersome to use without bulky clamps getting in the way. I was able to mount my generic featherboard to the fence using these blocks. You’ll need an appropriate length M6 socket head cap screw to attach accessories via this method. The blocks can be stored on the fence when not needed.
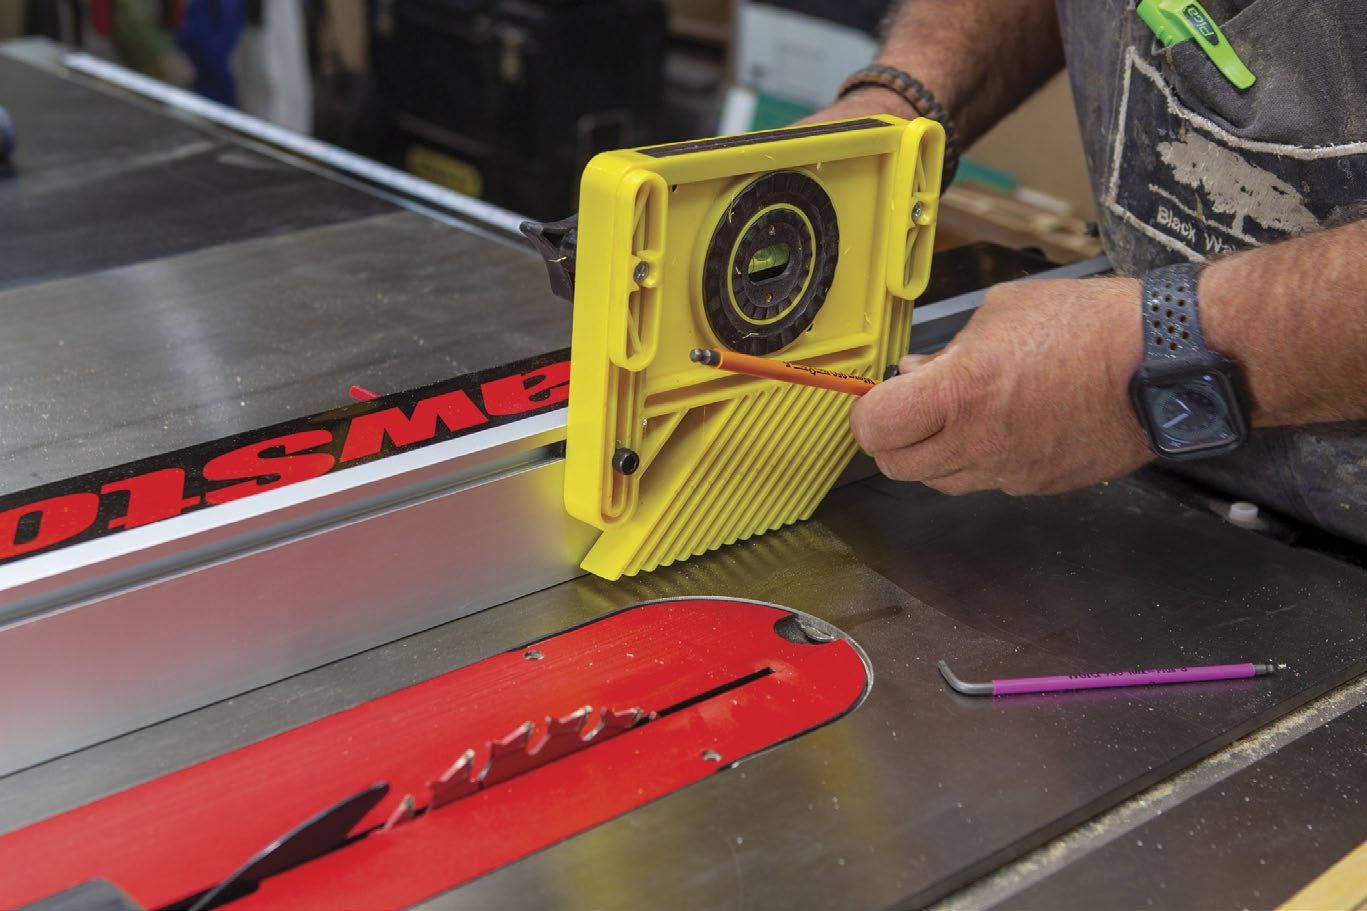
Similar to the saw, the instructions are well written and cover proper setup ensuring the fence is perfectly parallel to the blade and 90° to the tabletop. The fence securely locks to the table with a downward push of the red handle. Accuracy is easy enough to achieve with a pair of adjustable magnified indicator lenses. One is for the fence in the high position while the second is for the low-profile stance; both are well marked. The fence comes set up for use on the right side of the blade, but it’s possible to switch components for left side cuts.
One of the immediate differences I felt in the new fence was how well it slid across the table. At first, I chalked this up to reaching a higher level of machine setup. However, my bubble was burst when I turned over the fence and saw a pair of rollers instead of the previous fence’s UMHW strip.
Accessories for any tool need to be easy to use, otherwise frustration creeps in and you’ll eventually stop using it. Changing fence profiles from high to low to L-Fence is easy and quick. There are three locking levers holding the aluminum portion of the fence to the main block. They only need a one-third counter-clockwise turn to release, yet securely hold the aluminum face when locked down. The levers loosen and tighten a bar that a slot in the aluminum fence rides on. The manual also covers their adjustments, should you need a tighter grip. The Delta Uni-Fence knobs required lots of turns to release and were in an uncomfortable position. Quite the opposite here.
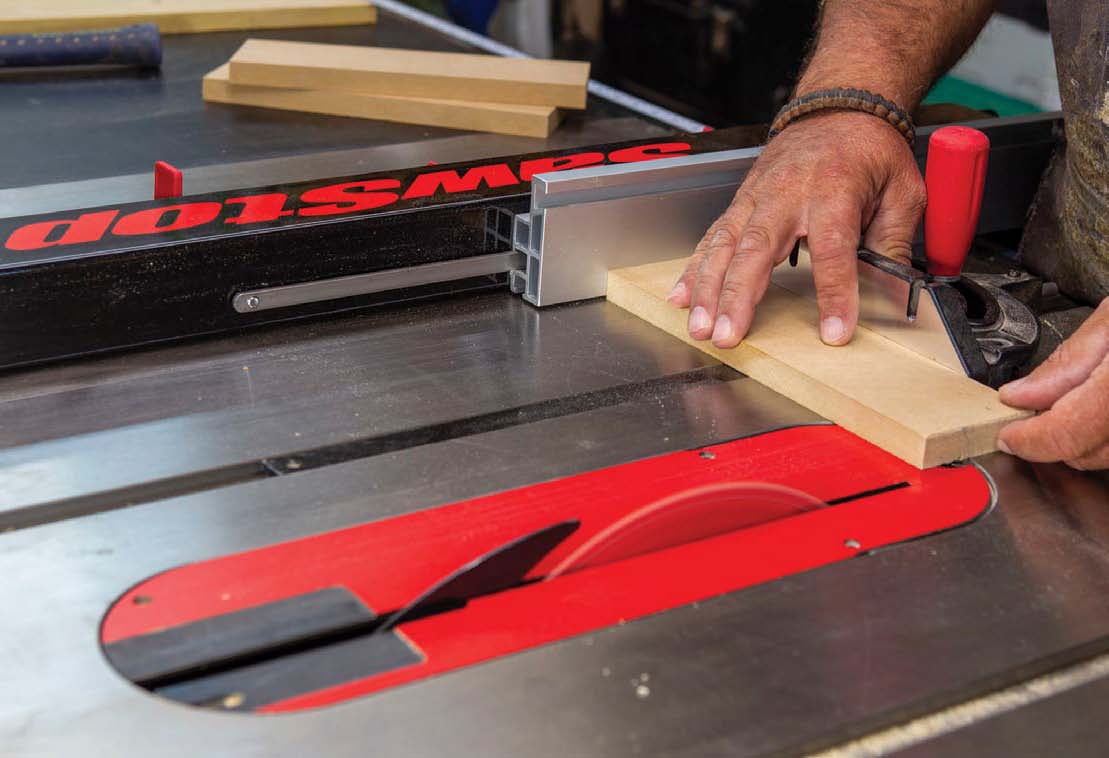
As I mentioned, the instructions cover making an adjustable L-Fence and creating one took very little time. A bit of research will let you know if one might be useful in your shop. I adjusted the dimensions to be more suited to my style of woodworking. I also chose to use 1/4″-20 × 2-3/4″ carriage bolts and wing nuts instead of the recommended 6mm. However, you’ll need to buy appropriate length M6 socket head cap screws to mount the fence to the included dovetailed blocks.
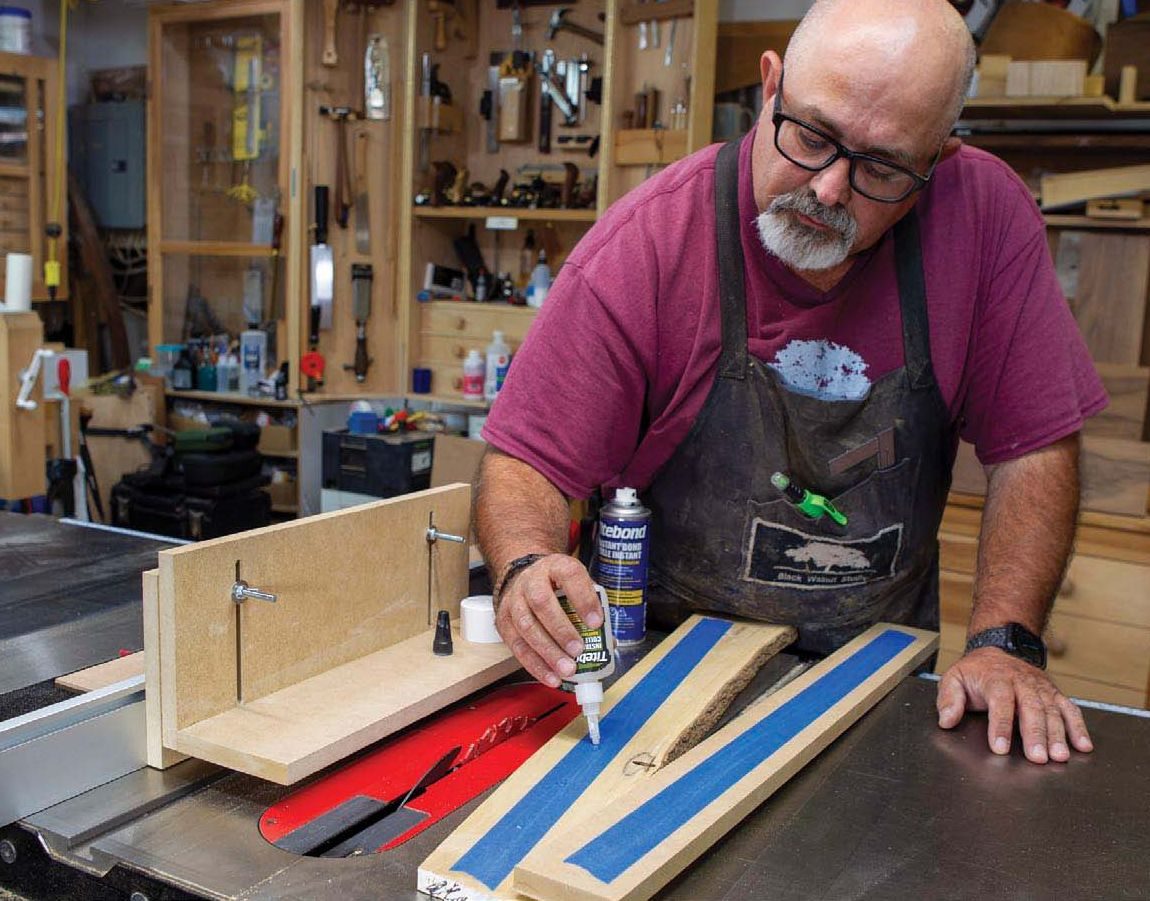
The main use of the L-Fence in my shop is for straightening edges on the table saw. There are other ways of doing this, but this method works well for me in many situations. The process is to first use a spacer on the plank to set the fence height. A 1/8″ or 1/4″ piece of hardboard works very well for this. Next, attach a straight edge to the top of the plank via double-sided tape or the CA and masking tape trick. Adjust the position of the fence to remove enough material and use the straight edge to ride along the horizontal portion of the L-Fence. I find this method to be efficient and safe as the fence acts as a guard during the cut.
This new premium fence is smartly designed with many easily changed configurations. It’s also a step up with some good features that makes using the table saw efficient and safer with the different possible profiles.